Easy BBQ Chicken – Oven or Grill, Ready in 55 Minutes

bubbles into something closer to candy than condiment. That’s the moment you know the chicken is close, and honestly it’s the whole reason I keep coming back to this recipe on weeknights when nobody has the energy for anything fussy.
This version of BBQ chicken skips the marinating overnight and the constant basting on a hot grill. You season the chicken, bake it low until it’s tender, then finish it hot and saucy so the outside gets sticky without drying out the meat. From start to finish it takes about 55 minutes, and most of that is hands off time while the oven does the work.
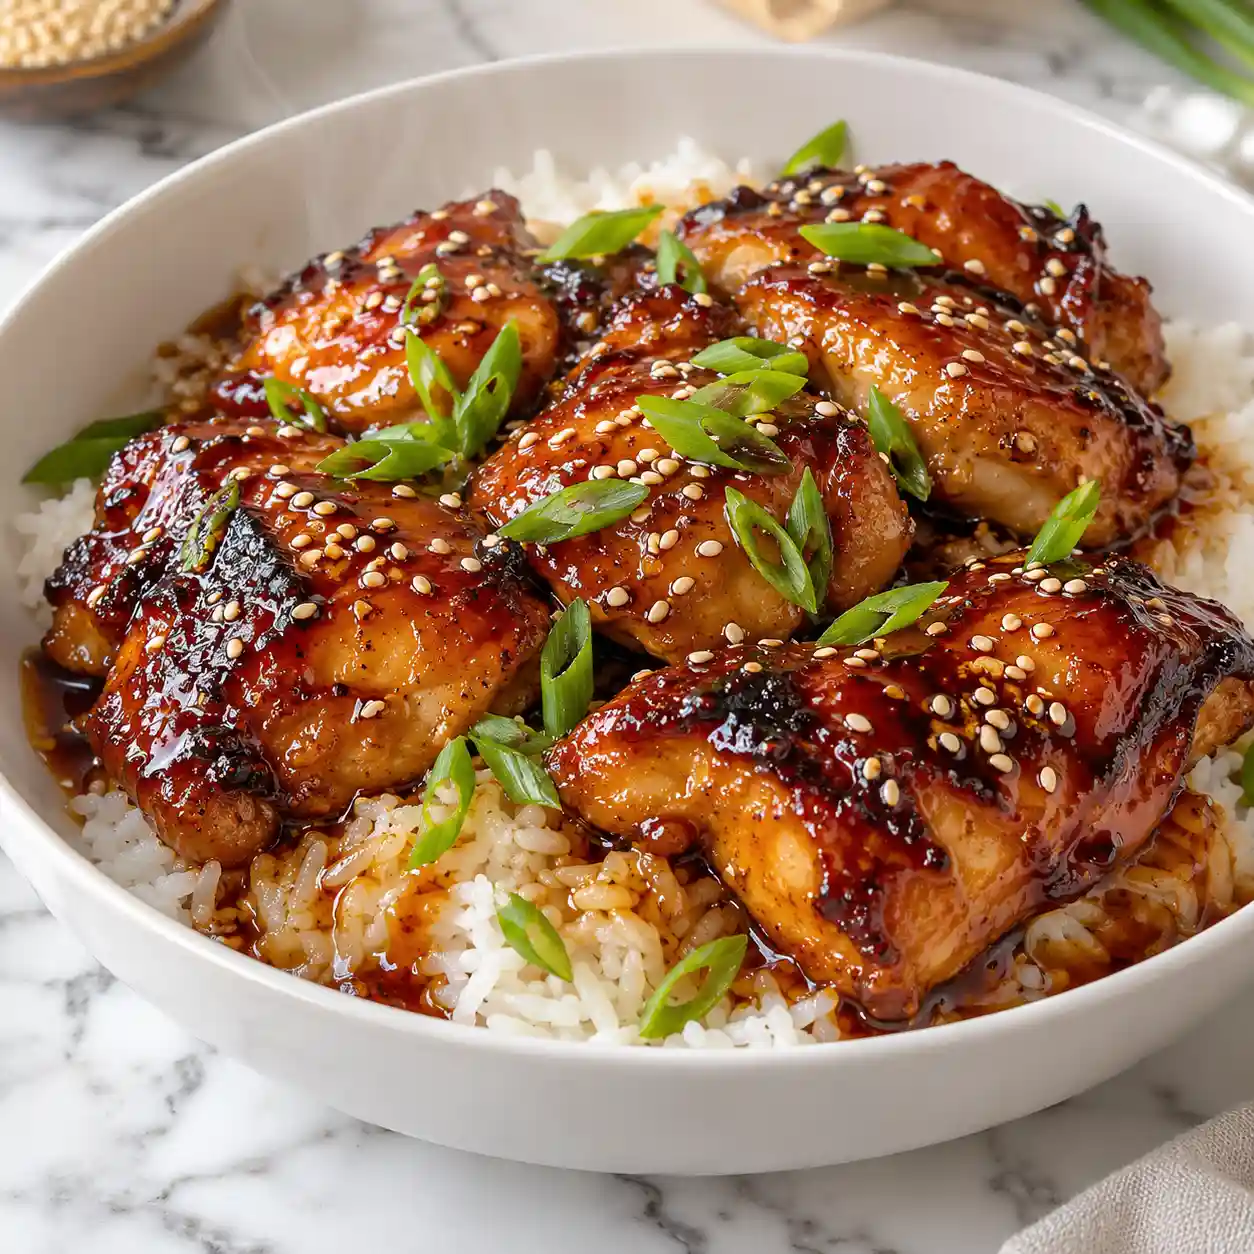
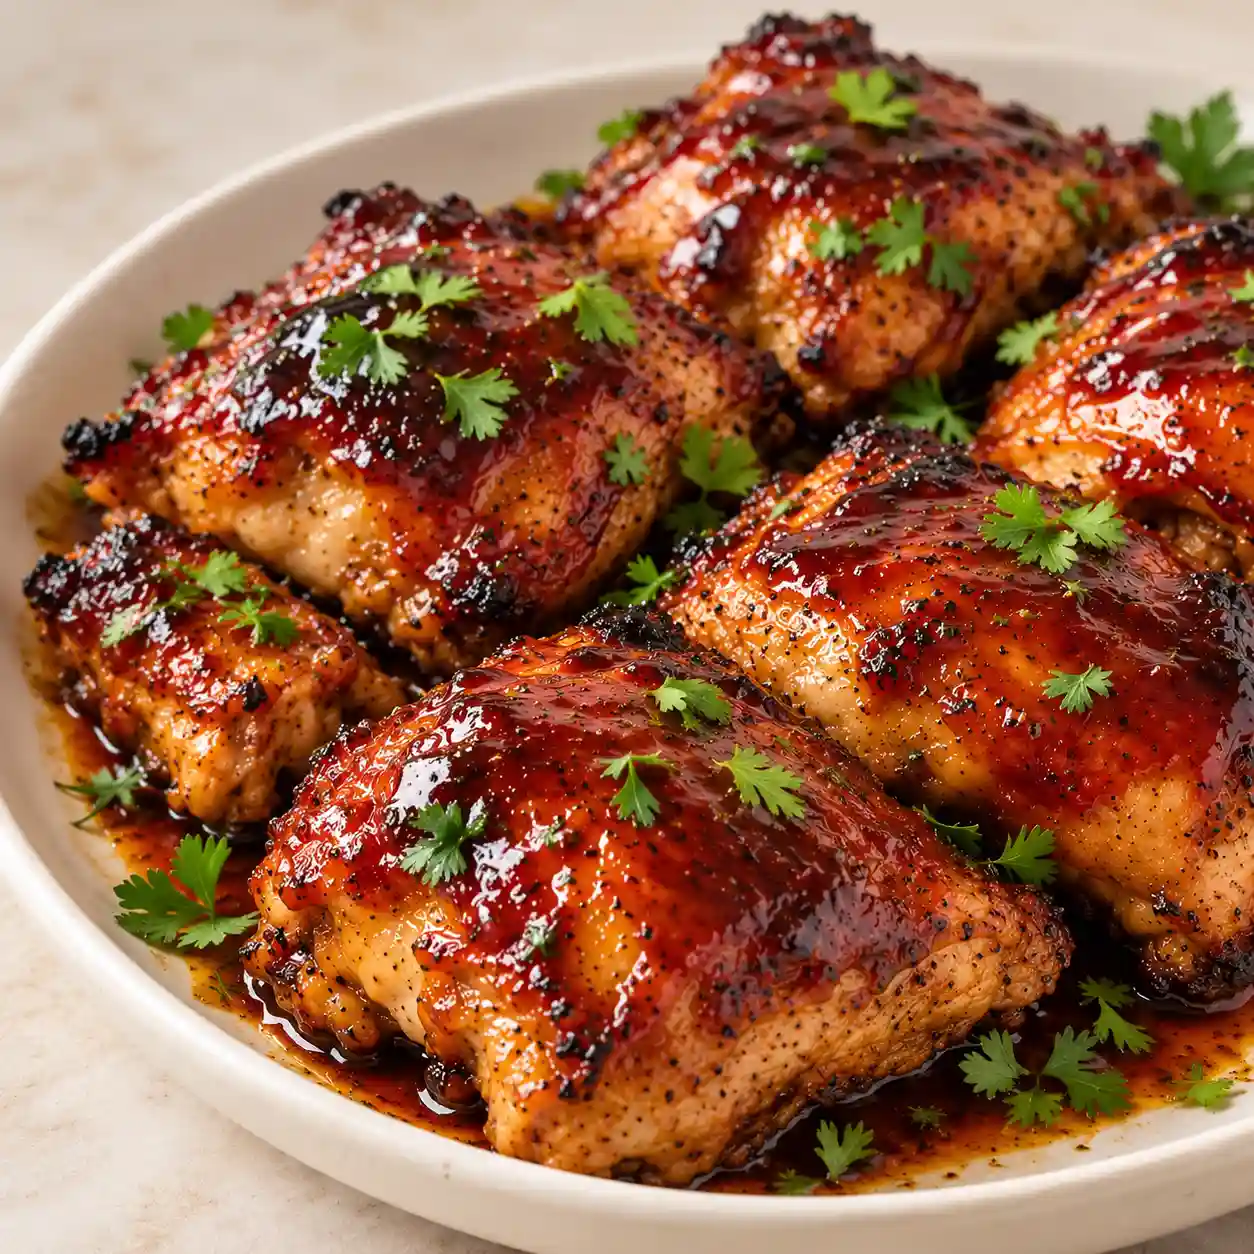
![Placeholder for hero image] [AI IMAGE PROMPT: Golden brown BBQ chicken thighs glazed in glossy dark red barbecue sauce, sticky caramelized edges, on a white ceramic platter, steam rising, scattered fresh parsley, warm kitchen light, 45 degree angle, white marble surface, juicy texture visible.] [IMAGE PLACEHOLDER — alt-text: “Glazed BBQ chicken thighs on a white ceramic platter with sticky caramelized edges” | filename: “bbq-chicken-final-plated-shot.jpg” | orientation: horizontal]
Why You’ll Love This Recipe
- No grill required. The oven method gets you the same sticky, caramelized finish as a backyard grill, so you can make this in the middle of winter or a small apartment kitchen.
- One pan cleanup. Everything cooks in a single sheet pan or oven safe skillet, which means less scrubbing afterward.
- Forgiving timing. Bone in chicken thighs stay juicy even if you leave them in the oven a few extra minutes, unlike chicken breast which dries out fast.
- Kid friendly flavor. The sauce is sweet and mild enough for picky eaters but still has real depth from the vinegar and spices.
- Meal prep ready. It reheats well and holds up in the fridge for days, so a double batch covers several dinners.
Ingredient Selection Tips
Look for bone in, skin on chicken thighs if you can find them. The bone keeps the meat from drying out during the longer bake, and the skin renders down and crisps up under the sauce. If your store only has boneless thighs, that works too, just shave a few minutes off the cook time. For the sauce, a bottled BBQ sauce with a thicker, tomato forward base holds up better under high heat than a thin, vinegar based one, since it caramelizes instead of just running off the chicken.
Recipe Snapshot
| Servings | Difficulty | Course | Cuisine | Prep Time | Cook Time | Rest Time | Total Time | Calories |
| 4 | Easy | Main Course | American | 15 minutes | 35 minutes | 5 minutes | 55 minutes | 385 kcal |
Ingredients
For the chicken:
- 8 bone in, skin on chicken thighs (about 3 pounds) — the bone and skin keep the meat moist through the full bake
- 1 tablespoon olive oil
- 1 teaspoon smoked paprika — brings a background smokiness without needing an actual grill
- 1 teaspoon garlic powder
- 1 teaspoon onion powder
- 1/2 teaspoon black pepper
- 3/4 teaspoon salt
For the sauce:
- 1 cup BBQ sauce, store bought or homemade
- 2 tablespoons apple cider vinegar — cuts through the sweetness and keeps the glaze from tasting flat
- 1 tablespoon honey
- 1 teaspoon Worcestershire sauce (check the label, some brands contain fish; substitute soy sauce if avoiding fish products)
Recipe Timing
Fifteen minutes covers seasoning the chicken and mixing the sauce while the oven heats. The chicken then bakes uncovered for about 25 minutes before you brush on the sauce and return it for another 10, which is where most of that sticky glaze forms. Let it sit for 5 minutes once it comes out so the juices settle back into the meat instead of pooling on the plate.
![Placeholder for ingredient flatlay] [AI IMAGE PROMPT: Raw chicken thighs, bottle of BBQ sauce, honey, vinegar, and spice jars arranged on a white marble countertop, soft natural daylight, overhead flat lay, fresh and clean ingredient textures, small white ceramic bowls holding spices.] [IMAGE PLACEHOLDER — alt-text: “Raw chicken thighs and BBQ sauce ingredients arranged on white marble” | filename: “bbq-chicken-ingredients-flatlay.jpg” | orientation: horizontal]
Allergen & Dietary Disclosure
This recipe can contain gluten and soy depending on the brand of BBQ sauce and Worcestershire sauce used, since some contain wheat based thickeners or soy derivatives. For a gluten free version, check the sauce label or make your own with a gluten free base. This recipe has not been tested for any specific allergy and should not be treated as guaranteed safe for anyone with a severe allergy; always check your own ingredient labels.
Equipment Needed
- Rimmed sheet pan or oven safe skillet. Catches the rendered fat and sauce drips so they don’t burn onto your oven floor.
- Instant read thermometer. The only reliable way to know the chicken is fully cooked without cutting into it and losing juices.
- Pastry brush. Makes it easy to build up thin, even layers of sauce instead of one thick coat that slides off.
- Wire rack (optional). Set inside the sheet pan, it lets air circulate under the chicken so the skin crisps on all sides.
Preparation
Pull the chicken thighs out of the fridge about 15 minutes before cooking so they aren’t ice cold going into the oven, which helps them cook more evenly. Pat each piece dry with paper towels since a dry surface is what actually lets the skin crisp instead of steam. Preheat the oven to 400°F and set a wire rack inside a rimmed sheet pan, or lightly oil the pan directly if you don’t have a rack.
Step-by-Step Instructions
Step 1: Season the chicken Mix the smoked paprika, garlic powder, onion powder, black pepper, and salt in a small bowl. Rub the olive oil over the chicken thighs, then coat them evenly with the spice mix on both sides, working it slightly under the skin where you can.
Chef’s Note: Getting a little seasoning under the skin, not just on top, is what makes the meat taste well seasoned all the way through instead of just on the surface.
Step 2: Arrange and start baking Place the thighs skin side up on the prepared rack or pan, leaving space between each piece so they don’t steam each other. Bake uncovered for 25 minutes.
Step 3: Mix the sauce While the chicken bakes, whisk together the BBQ sauce, apple cider vinegar, honey, and Worcestershire sauce in a small saucepan. Warm it over low heat for about 3 minutes, just enough to loosen it and let the flavors combine, then take it off the heat.
Step 4: First layer of sauce After 25 minutes, pull the chicken out and brush a thin layer of the warm sauce over each piece. Return the pan to the oven for 5 minutes so the sauce sets slightly instead of sliding off.
Chef’s Note: Building the glaze in two thin coats instead of one heavy one is what gives you that lacquered, sticky finish rather than a wet, sauce dumped look.
Step 5: Second layer and finish Brush on a second coat of sauce, then bake for a final 5 minutes, or until the internal temperature at the thickest part of the thigh reads 175°F on an instant read thermometer. The edges should look deep red brown and slightly charred at the tips.
Handle the chicken carefully once it comes out since juices and hot fat will have collected in the pan.
Step 6: Rest before serving Let the chicken rest on the pan for 5 minutes. Brush on any remaining sauce from the saucepan for extra shine right before serving.
Chef’s Note: Skipping the rest means the juices run straight out onto the cutting board the moment you cut into it, leaving the meat drier than it needs to be.
![Placeholder for cooking process image] [AI IMAGE PROMPT: Chicken thighs being brushed with dark glossy BBQ sauce using a pastry brush, mid action, close up on the glaze coating the skin, warm kitchen light, side lit for texture, white marble counter visible in the background, top down angle.] [IMAGE PLACEHOLDER — alt-text: “Brushing BBQ sauce onto baked chicken thighs with a pastry brush” | filename: “bbq-chicken-saucing-step.jpg” | orientation: horizontal]
Expert Tips & Tricks
- Dry the skin properly. I used to skip patting the chicken dry and wondered why the skin never crisped, it turns out that extra surface moisture was steaming the skin instead of letting it render.
- Make the sauce a day ahead. Mixing and warming the sauce the night before saves time and lets the flavors meld a bit more before it touches the chicken.
- Don’t sauce too early. Adding sauce at the very start of baking almost guarantees it burns before the chicken is cooked through, since most BBQ sauces have sugar that scorches fast at high heat.
- Use a thermometer, not a timer alone. Thigh size varies enough between pieces that relying only on the clock can leave some pieces underdone.
- Save extra sauce on the side. Reserve a few tablespoons of unheated sauce separately for serving, since sauce that’s touched raw chicken shouldn’t be reused as a table condiment.
Common Mistakes & Troubleshooting
| Problem | Why It Happens | How to Fix or Prevent It |
| Skin turns out soggy instead of crisp | Chicken wasn’t dried before seasoning, or pieces were packed too close together | Pat the skin fully dry and leave space between pieces so steam can escape |
| Sauce burns before chicken finishes | Sauce added too early, when there’s still a lot of bake time left | Wait until the last 10 minutes to apply sauce, in two thin layers |
| Chicken is dry despite following the recipe | Overbaked past 175°F internal temperature, or skipped the rest period | Pull the chicken as soon as it hits temperature and always rest it before cutting |
| Sauce slides off instead of sticking | Sauce applied too thick in one coat, or chicken skin was still very wet | Apply thin layers and let each one set in the oven for a few minutes before the next |
Storage, Reheating, Freezing, Make-Ahead
Refrigerator: Store leftover chicken in an airtight container for up to 4 days. I like to keep any extra sauce in a separate small container so the chicken doesn’t turn mushy sitting in liquid.
Freezer: Cooked chicken freezes well for up to 3 months in a freezer safe bag with as much air pressed out as possible. Label the bag with the date so it doesn’t get lost at the back of the freezer.
Reheating: Warm gently in a 325°F oven for about 15 minutes, covered loosely with foil, which keeps the meat from drying out. A microwave works in a pinch but tends to make the skin rubbery.
Make-Ahead: You can season the chicken and mix the sauce up to a day in advance, then store both separately in the fridge until you’re ready to bake.
![Placeholder for storage image] [AI IMAGE PROMPT: Cooked BBQ chicken portioned into a clear glass container with a lid, sitting on a white marble counter, small labeled container of extra sauce beside it, soft natural daylight, top down angle, clean and organized meal prep look.] [IMAGE PLACEHOLDER — alt-text: “BBQ chicken stored in a glass container next to a small container of sauce” | filename: “bbq-chicken-meal-prep-storage.jpg” | orientation: horizontal]
Variations & Substitutions
- Spicy version: Stir a teaspoon of cayenne or a tablespoon of hot sauce into the BBQ sauce mix for real heat.
- Kid friendly version: Leave out the vinegar and add an extra tablespoon of honey for a sweeter, milder glaze.
- Boneless option: Swap in boneless, skinless thighs and reduce the initial bake time to about 15 minutes before saucing.
- Grilled version: Cook the seasoned thighs over medium heat on a grill for about 8 minutes per side, brushing with sauce during the last few minutes instead of baking.
- Drumstick version: Use an equal weight of chicken drumsticks in place of thighs, keeping the same bake time and temperature.
Serving Suggestions
- Serve alongside a simple coleslaw to balance the sweetness of the sauce with something crisp and tangy.
- Cornbread or a soft dinner roll works well for soaking up any extra sauce on the plate.
- A cold pasta or potato salad rounds this out into a full backyard style meal, even when it’s made indoors.
- Pair with corn on the cob brushed with butter for a classic combination.
- Try it over a bed of rice for a heartier plate the next day using leftovers.
- [INTERNAL LINK: description of a related coleslaw recipe]
Nutrition Information
| Nutrient | Amount |
| Calories | 385 kcal |
| Protein | 28 g |
| Carbohydrates | 18 g |
| Fiber | 0.5 g |
| Sugar | 14 g |
| Fat | 22 g |
| Saturated Fat | 6 g |
| Cholesterol | 145 mg |
| Sodium | 620 mg |
Serving size is 2 chicken thighs, based on 4 servings from this recipe. Along with protein, this dish provides a fair amount of iron and vitamin B12 from the chicken itself. These numbers are estimates only, and actual values will shift depending on the specific brands of sauce you use and how you measure each ingredient.
Why This Recipe Works
Baking the chicken low and slow before saucing gives the fat under the skin time to render out fully, which is what lets the skin crisp instead of staying soft and rubbery. If sauce goes on too early, that rendering process gets interrupted and the sugar in the sauce burns before the fat has a chance to cook out.
The two thin layers of sauce matter more than they might seem to. A single thick coat tends to slide off warm, rendered skin, while thin layers build up gradually and cling to the surface as the sugars start to caramelize. That’s the same basic idea behind glazing a ham or lacquering duck, just applied to a much faster weeknight cut of meat.
Resting the chicken after baking gives the muscle fibers, which tighten up under high heat, a few minutes to relax again. That relaxation is what lets the juices redistribute through the meat instead of running out the moment you cut into it.
Frequently Asked Questions
FAQ Source Note: The questions below reflect typical search patterns and common reader questions around this type of recipe, based on general cooking search behavior rather than a specific live query pull.
Can I make BBQ chicken ahead of time?
Yes, you can season the chicken and mix the sauce up to a day ahead and store them separately in the fridge. Bake as directed once you’re ready, since baking straight from cold just means the chicken may need a few extra minutes in the oven.
Why did my BBQ chicken turn out dry?
This usually happens from overbaking past the point of doneness or skipping the rest time after cooking. Pull the chicken as soon as it reaches 175°F internally and let it sit for 5 minutes before cutting, which keeps the juices inside the meat instead of on the cutting board.
Can I use chicken breast instead of thighs for BBQ chicken?
You can, but breast meat cooks faster and dries out more easily than thigh meat, so reduce the initial bake time to about 15 minutes before saucing and check the temperature closely, pulling it at 165°F.
How do I know when BBQ chicken is fully cooked?
The most reliable way is an instant read thermometer inserted into the thickest part of the meat without touching the bone, reading 175°F for thighs or 165°F for breast meat. Visually, the juices should run clear and the meat should no longer look pink near the bone.
Is this BBQ chicken recipe gluten free?
It can be, depending on the BBQ sauce and Worcestershire sauce you use, since some brands include wheat based thickeners. Check your specific labels or substitute a gluten free BBQ sauce and soy sauce in place of Worcestershire sauce.
Can I freeze leftover BBQ chicken?
Yes, cooked BBQ chicken freezes well for up to 3 months in a sealed freezer bag with the air pressed out. Thaw it in the fridge overnight before reheating gently in the oven.
What’s the best way to reheat BBQ chicken without drying it out?
Reheat it covered in a 325°F oven for about 15 minutes, which warms it through gently without pushing the internal temperature too far past done. Avoid high heat reheating, which tends to tighten the meat and push out moisture fast.
![Placeholder for final plated image] [AI IMAGE PROMPT: Close up of a single glazed BBQ chicken thigh on a white ceramic plate, glossy sticky sauce dripping slightly, fresh chopped parsley on top, side lit warm kitchen light, 45 degree angle, white marble table, steam faintly visible.] [IMAGE PLACEHOLDER — alt-text: “Close up of a glazed BBQ chicken thigh on a white plate with parsley garnish” | filename: “bbq-chicken-close-up-final.jpg” | orientation: vertical, 2:3 ratio]
Conclusion
What makes this BBQ chicken worth repeating isn’t a secret ingredient, it’s the order you do things in: season well, bake low first, then build the glaze in layers at the end. Once you’ve made it this way a couple of times, you’ll notice how much more control you have over the finish compared to just brushing sauce on from the start.
I keep a batch of this in the fridge most weeks specifically because it holds up so well reheated, which is rare for anything with a glaze on it. If you’re looking for a version of BBQ chicken that doesn’t need a grill or a whole afternoon, this is the one I’d hand you.
If you loved this recipe, save it to your BBQ Recipes Pinterest board so you can find it easily later!
Easy BBQ Chicken
Ingredients
Method
- Instructions:
- Pat chicken dry, mix the dry rub, and coat each piece with oil then the spice blend, working some under the skin.
- Preheat oven to 400°F or heat grill to medium with an indirect zone.
- Place chicken skin side up and cook undisturbed for 20 minutes.
- Warm the glaze ingredients together in a small saucepan over low heat for 3 minutes.
- Brush the first layer of glaze onto the chicken once it reads about 145°F internally, then cook 8 to 10 minutes more.
- Flip, brush the second side with glaze, and cook another 8 to 10 minutes until it reads 165°F.
- Add a final light glaze layer and cook 2 to 3 more minutes to set it.
- Rest 5 minutes before serving, checking multiple pieces with a thermometer.
Notes
- Glaze and dry rub can both be made up to 5 days ahead.
- Store leftovers in the fridge up to 4 days, or freeze tightly wrapped for up to 3 months.
- Reheat covered at 325°F for about 15 minutes to protect the glaze.
- Boneless thighs or breasts work but need a shorter cook time.