Easy 24 Cake Pops Recipe, No-Fail Method
The first batch I made cracked right down the middle the moment the candy coating touched them. Cold cake balls plus warm chocolate is a bad combination, and nobody warns you about it until you’re standing over a sink full of broken pops.This version fixes that. The cake balls chill just enough to hold their shape without shattering, and the candy coating gets thinned so it coats in one dip instead of three clumsy ones. Start to finish, including chill time, you’re looking at under two hours, and most of that is hands-off. These cake pops work for birthdays, bake sales, or just because someone in the house wanted dessert on a stick.
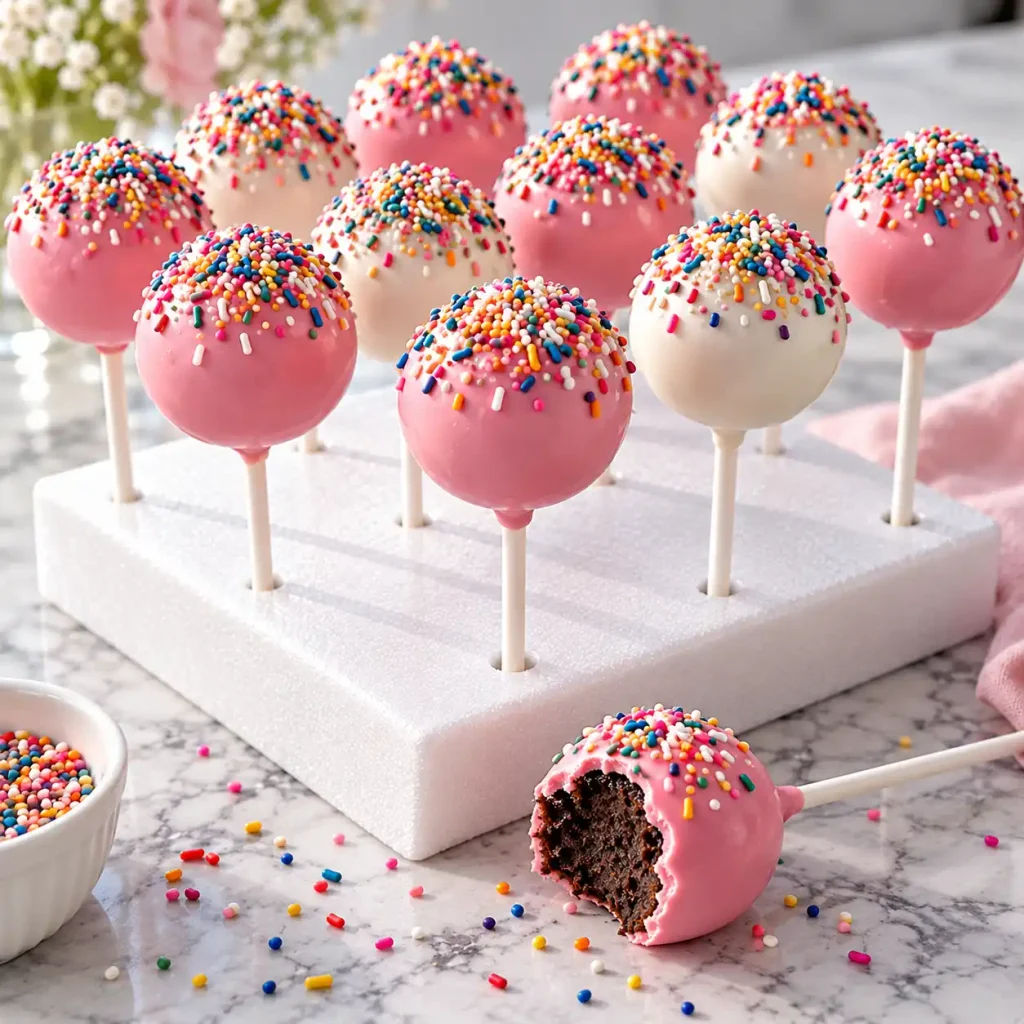
Why You’ll Love This Recipe
- No special mold required. Rolling the cake balls by hand works better than a mold anyway, since the shape adjusts naturally instead of forcing air pockets.
- The coating doesn’t clump. A small amount of shortening or coconut oil thins the candy melts so they flow off the pop instead of piling up in a lump at the bottom.
- Kid-friendly assembly line. Once the balls are rolled, decorating turns into a group activity, sprinkles and all.
- Freezer-friendly base. The cake balls freeze well before dipping, so you can prep days ahead and finish them the morning of.
- Uses a box cake mix. No need to bake a cake from scratch just to crumble it apart. Doctored box mix holds together fine.
Ingredient Selection Tips
Grab a cake mix that bakes moist rather than airy, chocolate fudge and butter yellow both work well since they crumble into a tighter, more workable texture. For the frosting, a can of the store brand is fine, but check the ingredient list for one with real fat content (not a whipped, low calorie version), since that fat is what binds the cake crumbs into a ball that holds its shape overnight in the fridge.
Recipe Snapshot
| Servings | Difficulty | Course | Cuisine | Prep Time | Cook Time | Rest Time | Total Time | Calories |
| 24 pops | Easy | Dessert | American | 30 min | 25 min | 60 min | 1 hr 55 min | 148 kcal |
Ingredients
For the cake balls:
- 1 box (15.25 oz) chocolate cake mix, plus the eggs, oil, and water listed on the box — a moister cake mix crumbles more evenly than a light, fluffy one
- 1 cup (about 8 oz) vanilla frosting, store bought or homemade — this is what holds the crumbled cake together, so don’t substitute a thin glaze here
For the coating:
- 24 oz candy melts (pink, white, or your choice of color), or 24 oz good quality chocolate chips
- 1 to 2 tablespoons coconut oil or shortening — thins the coating so it sets smooth instead of thick and cracked
- Sprinkles, crushed freeze-dried strawberries, or mini chocolate chips, for topping
Substitution notes: Swap the chocolate cake mix for vanilla, red velvet, or funfetti without changing anything else in the method. If candy melts aren’t available locally, melted white or semisweet chocolate with a spoon of coconut oil works the same way.
Read Also: Strawberry Shortcake
Recipe Timing
Baking the cake itself only takes about 25 minutes, but plan on a full 30 minutes of hands-on prep for crumbling, mixing, and rolling once it’s cooled. The hour of rest is non-negotiable: it’s what keeps the balls from falling apart the second a warm stick or hot candy coating touches them.

Allergen & Dietary Disclosure
This recipe contains gluten (cake mix), dairy (frosting, some candy melts), and often eggs (in the baked cake). For a gluten free version, use a gluten free cake mix labeled as such and confirm your candy melts are also gluten free, since some add-ins vary by brand. For a dairy free version, use a dairy free cake mix and frosting, and choose dairy free chocolate for the coating. If anyone eating these has a severe allergy, check every label yourself; this recipe hasn’t been tested in an allergen-free kitchen.
Equipment Needed
- Lollipop sticks (6 inch, paper): Push the stick in about halfway so the ball doesn’t slide off when you dip it.
- Tall narrow cup or glass: Melt the candy in this instead of a bowl; the deeper pool means one dip covers the whole ball.
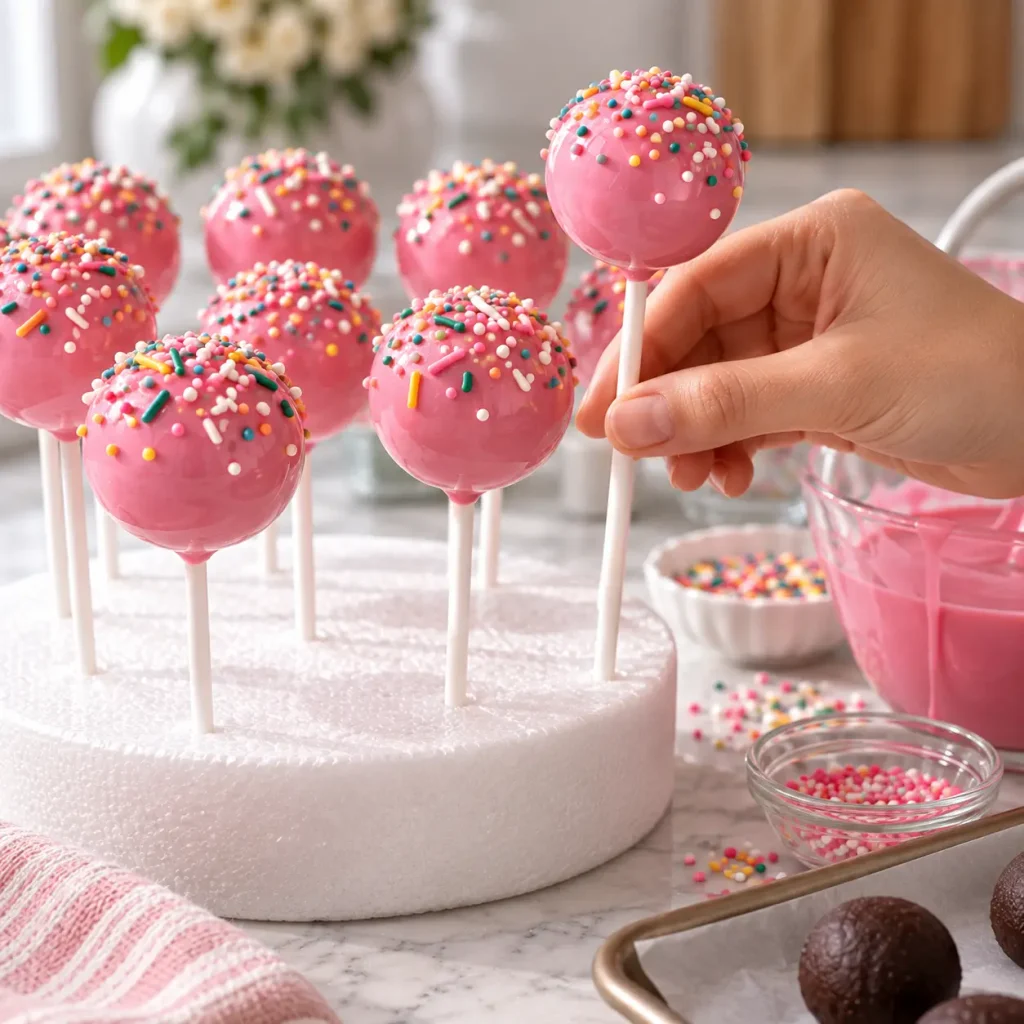
- Styrofoam block or cake pop stand: Gives the sticks somewhere to stand upright while the coating sets, instead of lying flat and getting a bald spot.
- Small cookie scoop: Keeps every ball close to the same size, which matters more for even dipping than for looks.
- Microwave-safe bowl or double boiler: For melting the coating slowly, since scorched candy melts turn grainy and won’t smooth out again.
Preparation
Bake the cake according to the box instructions in a 9×13 pan, then let it cool completely, at least an hour on the counter. Don’t rush this part; a warm cake turns the frosting mixture greasy instead of moldable. Line two baking sheets with parchment paper and set your lollipop sticks and styrofoam block within reach before you start rolling.
Step-by-Step Instructions
Step 1: Crumble the cooled cake
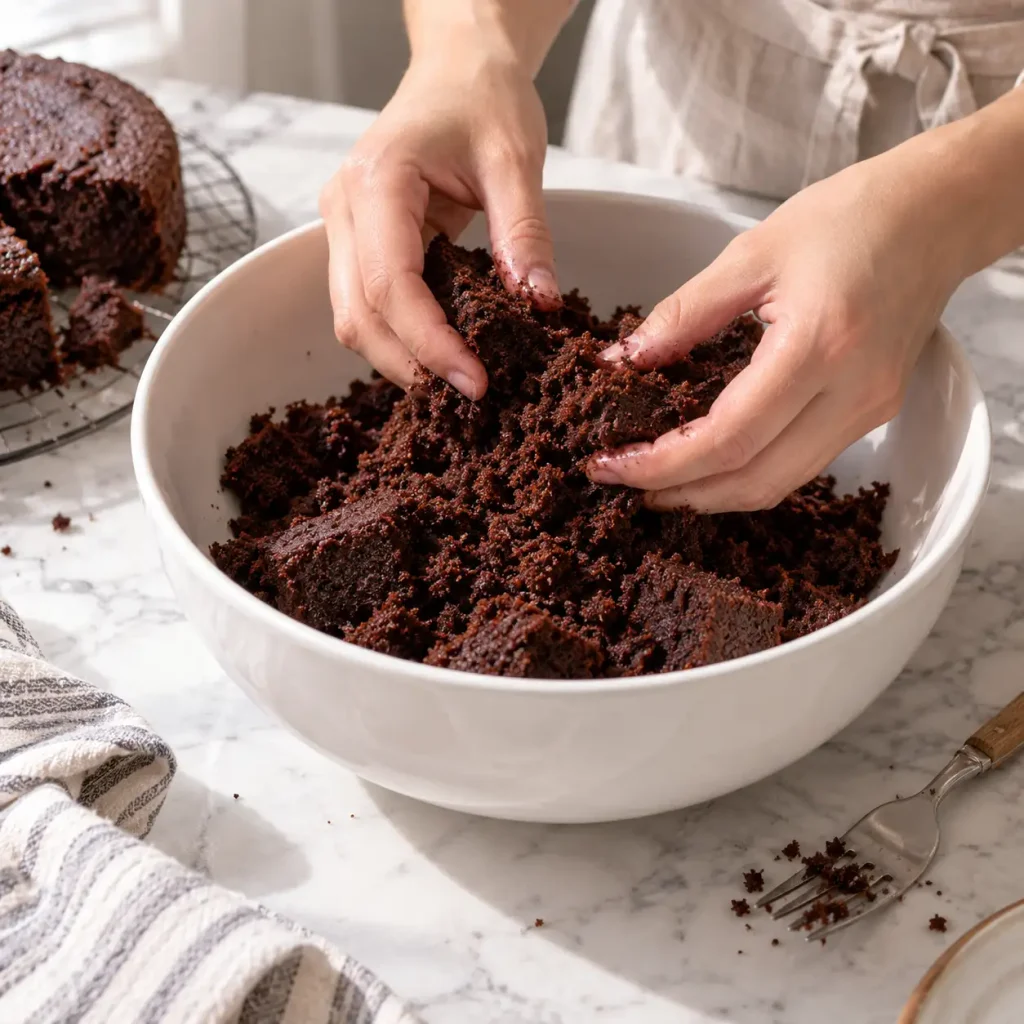
Break the cake into large chunks and crumble it into fine, even crumbs using your hands or a fork, right in the mixing bowl. Pick out and discard any hard, over-baked edge pieces, since those won’t break down and will show up as lumps later.
Step 2: Mix in the frosting
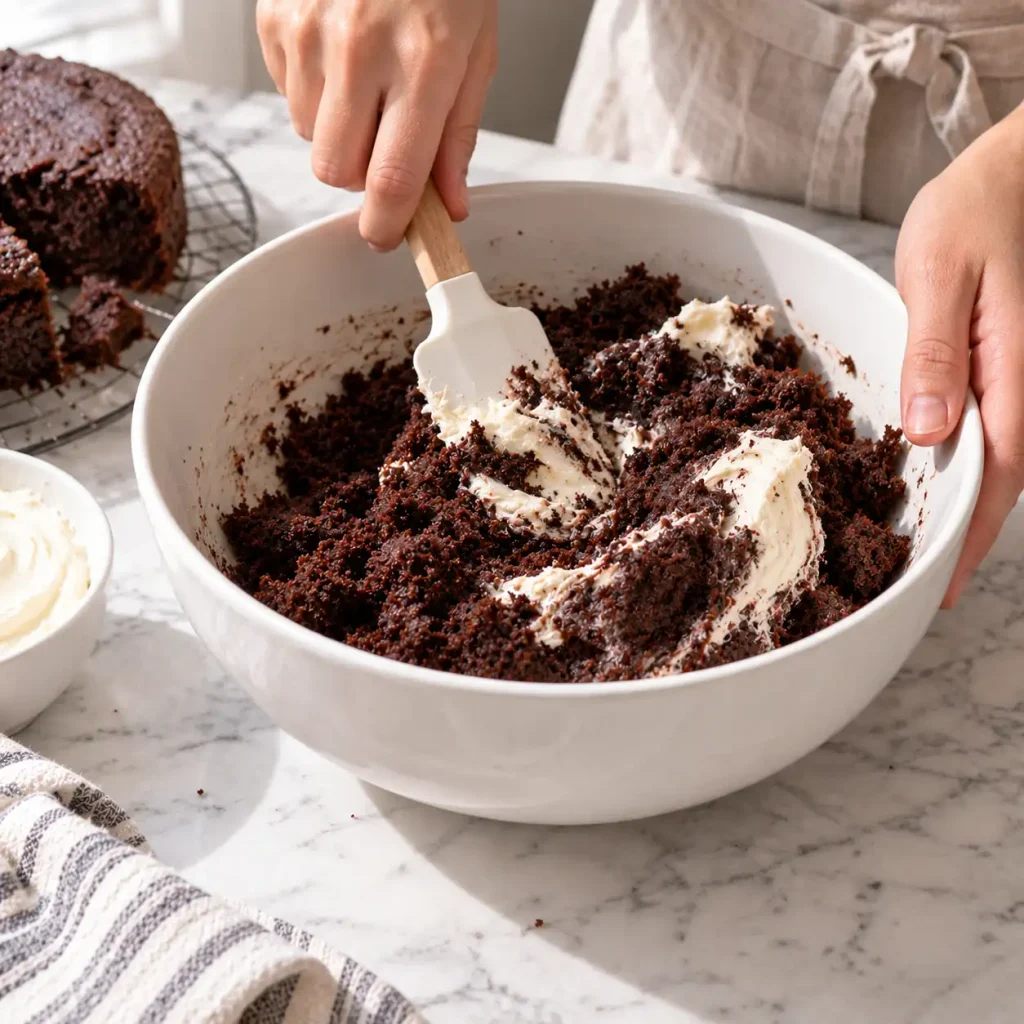
Add the frosting to the crumbs a few spoonfuls at a time, folding it in with a spatula between additions. Stop as soon as the mixture holds together when pressed between your fingers; too much frosting makes the balls greasy and prone to sliding off the stick.
Chef’s Note: The mixture should feel like slightly damp sand, not wet dough. If it’s sticking heavily to your hands, you’ve added too much frosting.
Step 3: Roll into balls
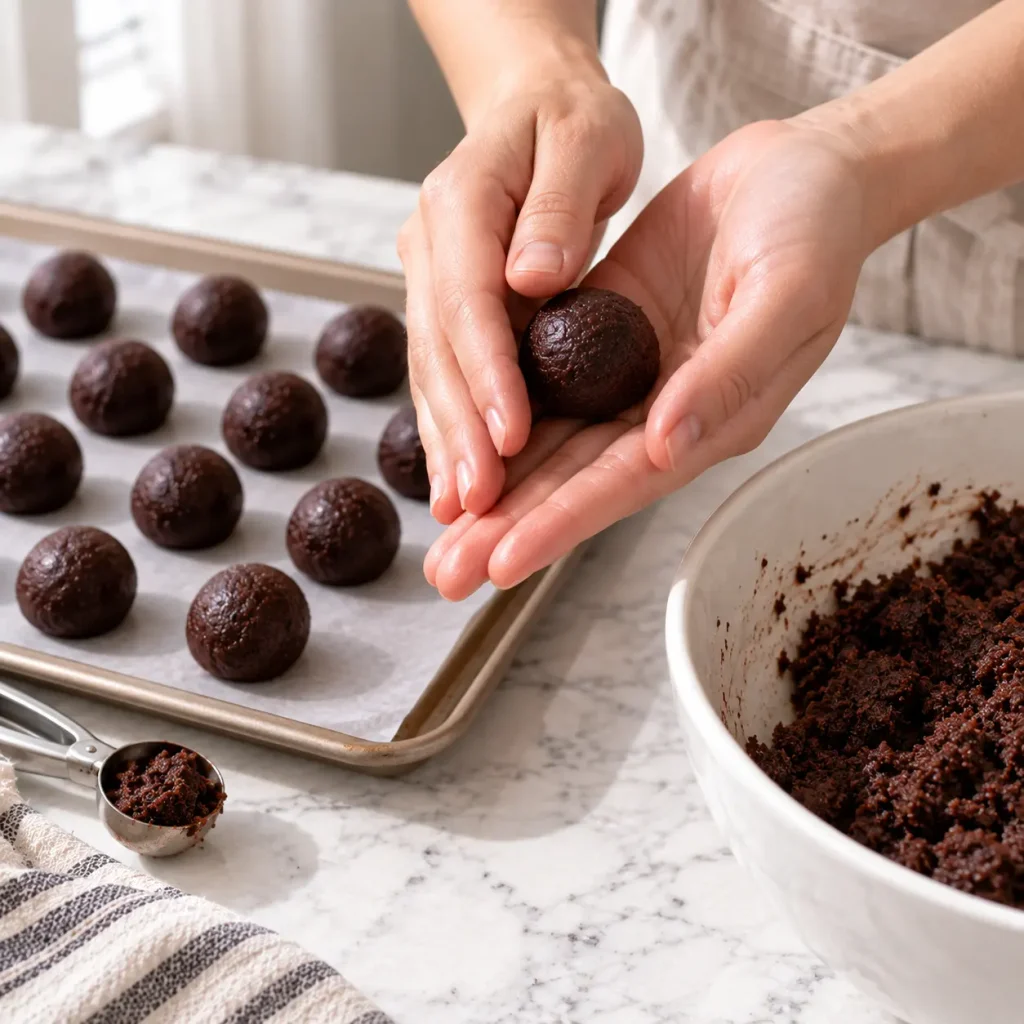
Scoop out tablespoon sized portions and roll each one between your palms into a smooth, even ball, about the size of a walnut. Set each ball on the parchment lined sheet as you go, spacing them so they don’t touch.
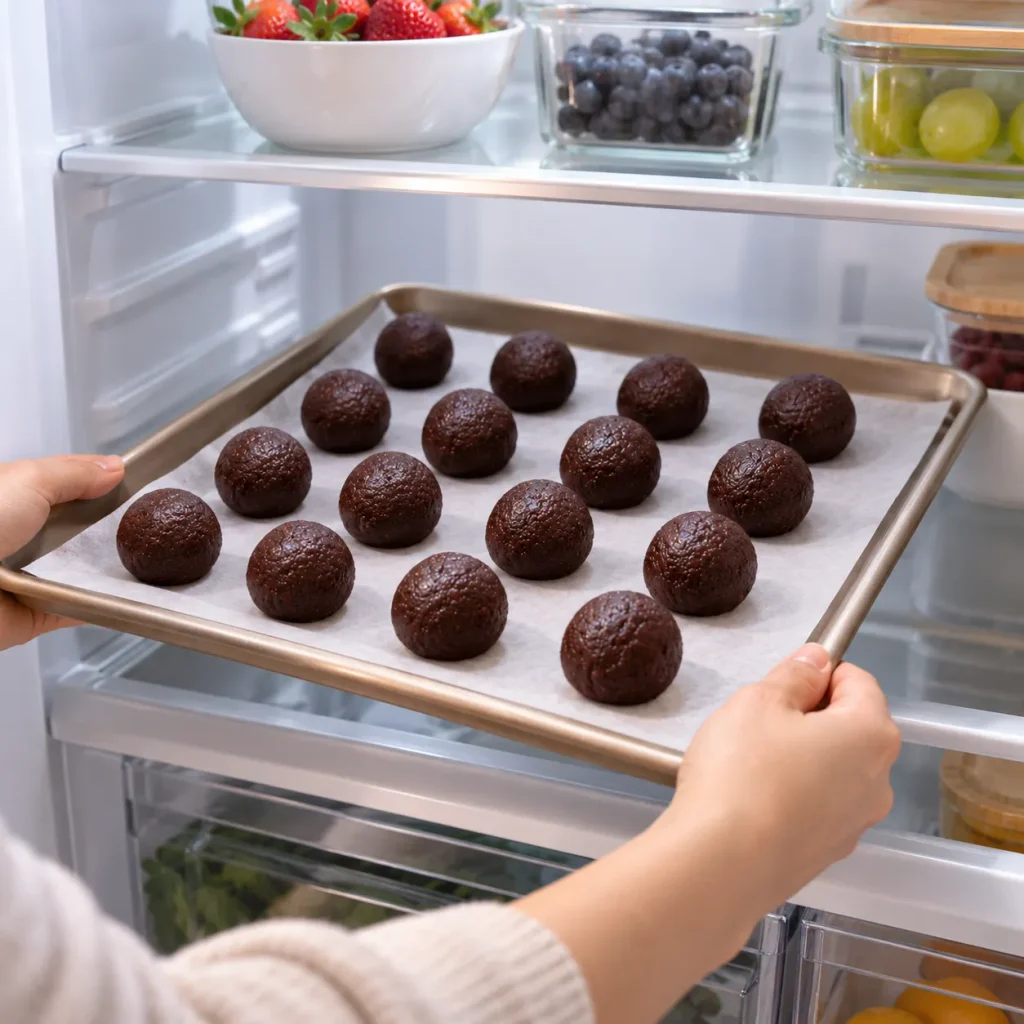
Step 4: Chill the balls
Refrigerate the tray of rolled balls for a full 60 minutes, or freeze for 20 minutes if you’re short on time. This step firms up the fat in the frosting so the balls hold together during dipping instead of falling apart in the coating.
Chef’s Note: Skipping this step is the number one reason cake pops fall off the stick mid-dip. The chill isn’t optional.
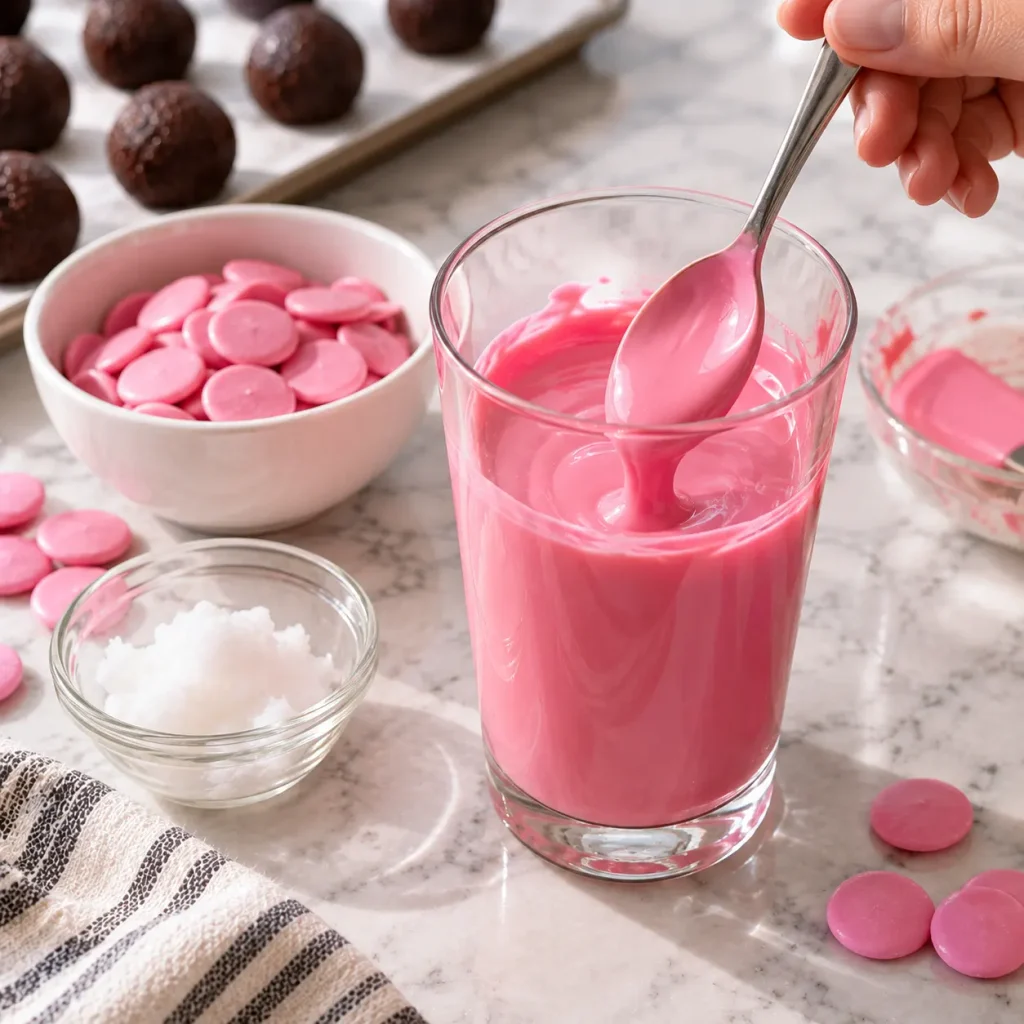
Step 5: Melt the coating
Pour the candy melts into a tall narrow glass or cup and microwave in 20 second bursts, stirring between each one, until smooth. Stir in the coconut oil once the candy is fully melted; this thins it just enough for a clean, even dip.
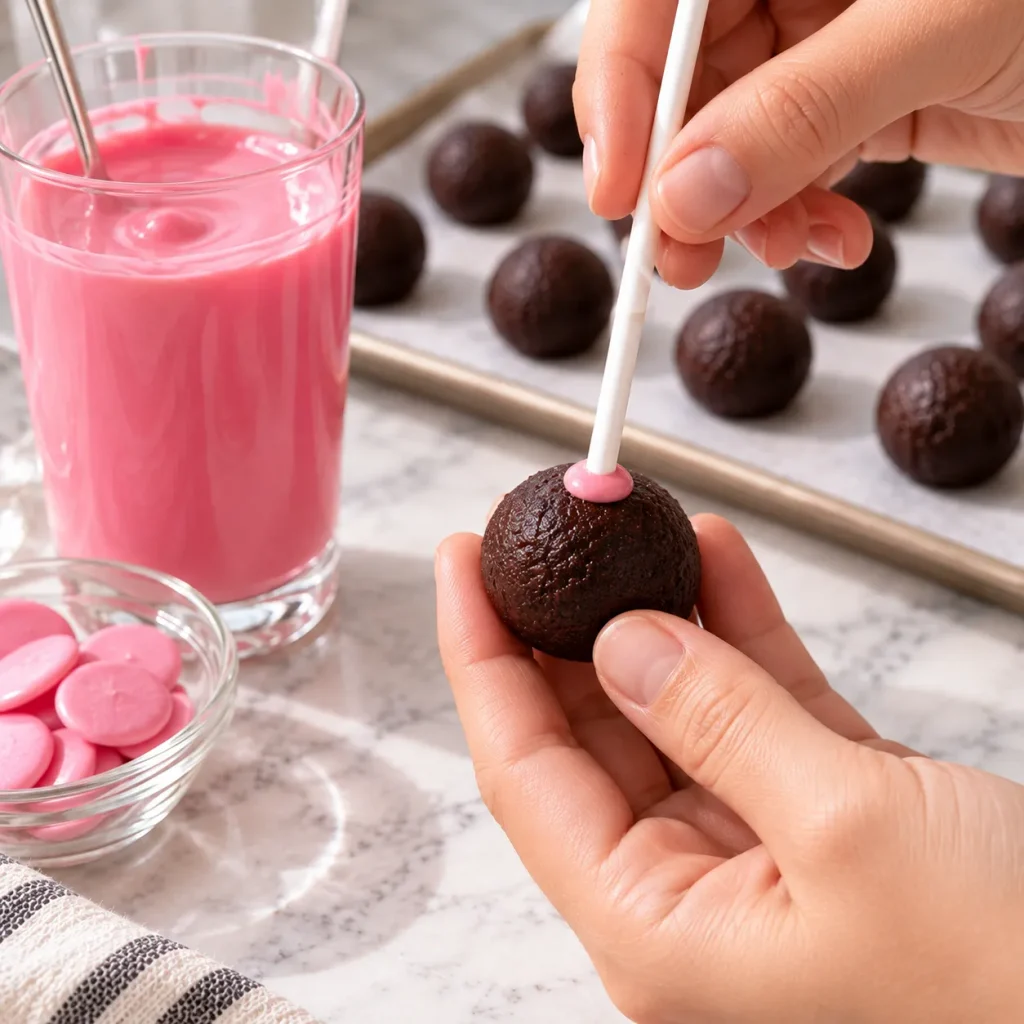
Step 6: Attach the sticks
Dip the tip of a lollipop stick about half an inch into the melted candy, then push it into the center of a chilled cake ball, stopping halfway through. The dab of candy acts as glue, so the ball won’t spin loose on the stick.
Chef’s Note: If a ball cracks slightly when the stick goes in, pinch it back together right away; a small crack seals fine before dipping but grows into a bigger one after.
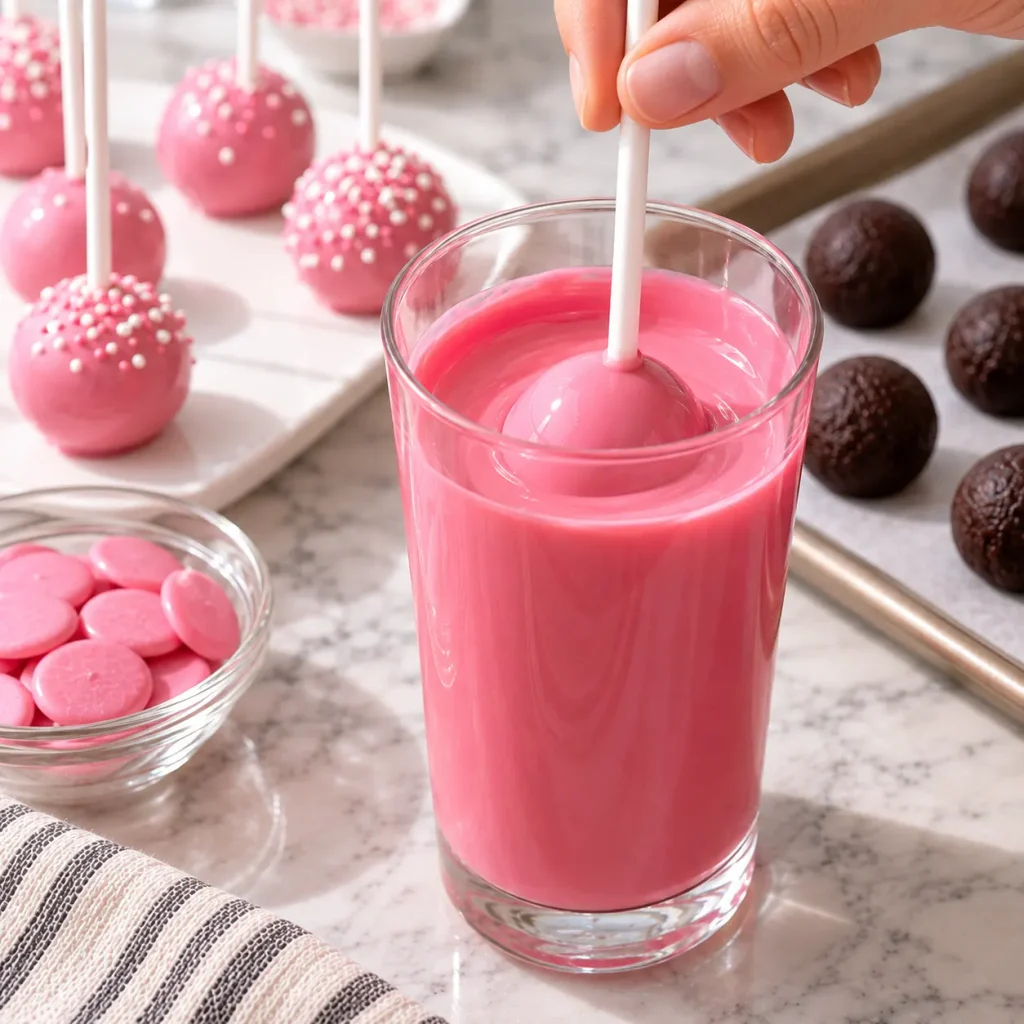
Step 7: Dip and coat
Holding the stick, lower the cake ball straight down into the candy coating until it’s fully submerged, then lift it out and gently rotate to let excess coating drip off for about 10 seconds. Avoid swirling the pop around inside the cup, which traps air bubbles under the surface.
Step 8: Decorate and set
While the coating is still wet, add sprinkles or your topping of choice, then stand the stick upright in the styrofoam block to set for about 15 minutes at room temperature. Once fully hardened, the pops are ready to serve or pack away.
Expert Tips & Tricks
- My biggest early mistake: I used to dip the balls straight from the fridge without letting the coating cool slightly first, and the cold hitting warm candy caused visible cracks. Let the melted candy sit for a minute or two off the heat before dipping.
- Room temperature matters more than you’d think. In a warm kitchen, chill the balls a little longer; the fat needs to actually firm up, not just cool down.
- Make the balls ahead. Roll and chill the cake balls up to two days before you plan to dip them, storing them covered in the fridge.
- Thin the coating gradually. Add coconut oil half a teaspoon at a time; too much turns the shell soft and it never fully sets.
- Tap out air bubbles. After dipping, a light tap of the stick against the counter edge pops any trapped air before it dries into a visible bubble.
- Keep a second stick handy. If a pop cracks on the first stick insertion, pull it, patch the ball, and try a fresh stick rather than reusing the damaged hole.
Common Mistakes & Troubleshooting
| Problem | Why It Happens | How to Fix or Prevent It |
| Cake ball falls off the stick | The ball wasn’t chilled long enough, or too little candy was used as glue at the stick tip | Chill a full 60 minutes before dipping, and dip the stick tip generously before inserting it |
| Coating cracks after dipping | Cold cake ball meets a coating that’s too hot, or the fridge to room temperature swing is too sudden | Let the coating cool slightly before dipping, and let pops set at room temperature rather than back in the fridge |
| Candy coating looks lumpy or seized | Overheated in the microwave, or a drop of water got into the bowl | Melt in short bursts and stir often; keep all tools completely dry |
| Cake balls taste greasy | Too much frosting was mixed into the crumbs | Add frosting gradually and stop as soon as the mixture holds together |
| Sprinkles slide off before they set | Decorating too late, after the coating has already started to firm up | Add toppings within the first few seconds after dipping, while the shell is still wet |
Read Also: Banana Bread
Storage, Reheating, Freezing, Make-Ahead
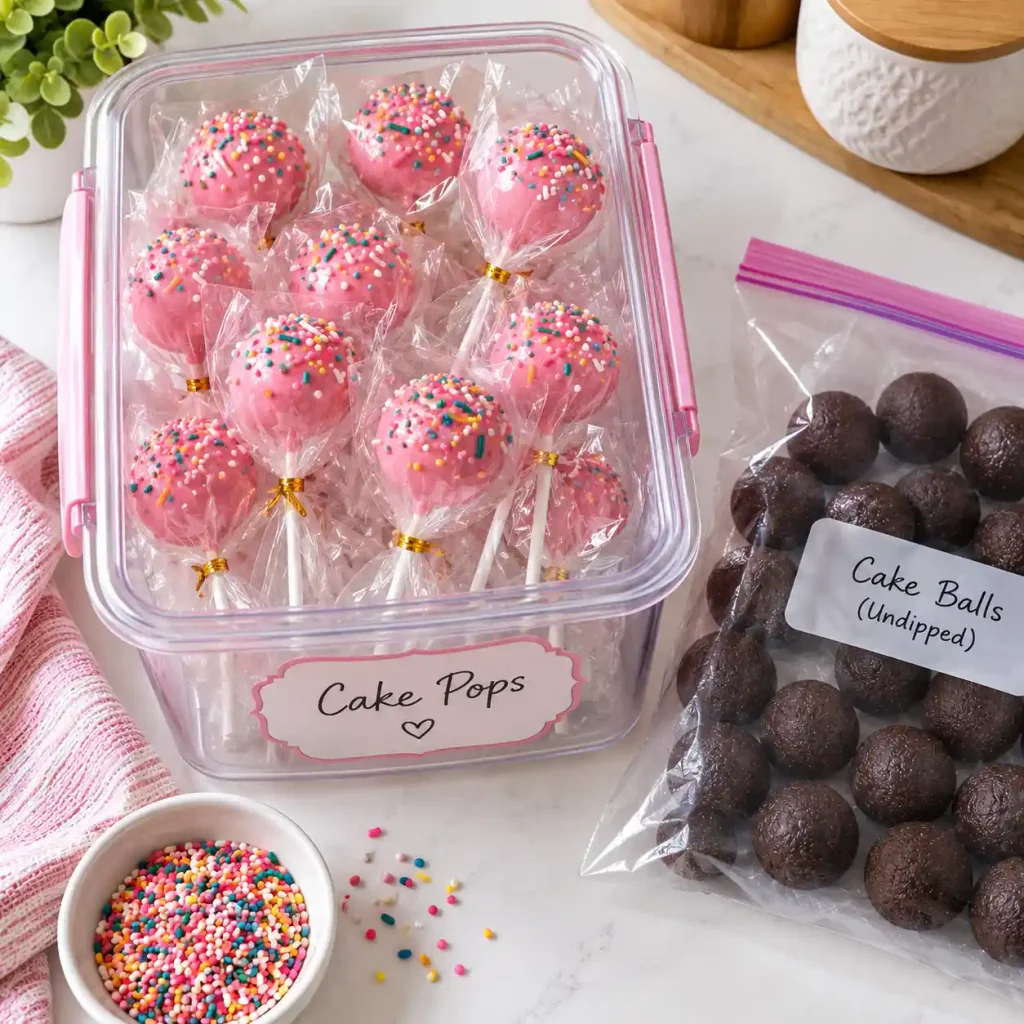
Refrigerator: Store finished cake pops upright or laid flat in a single layer in an airtight container for up to 5 days.
Freezer: Undipped, rolled cake balls freeze well for up to 2 months in a freezer bag; thaw in the fridge overnight before dipping. Dipped and finished pops can also be frozen, wrapped individually in plastic, for up to a month.
Make-Ahead: Rolling and chilling the balls a day or two in advance is the easiest way to break up the workload, leaving only the dipping and decorating for the day you need them.
Personal tip: I always label the freezer bag with the date, since undipped balls that sit longer than two months start to pick up freezer smell from the fridge and it comes through in the flavor.
Variations & Substitutions
- Funfetti version: Swap the chocolate cake mix for a vanilla funfetti mix and fold extra sprinkles into the cake ball mixture itself for color throughout.
- Mild, kid-friendly version: Use vanilla cake and frosting with plain white candy coating, then let kids pick their own sprinkle toppings.
- Vegetarian version: This recipe is naturally vegetarian as written; just double check your candy melts don’t contain gelatin-based additives.
- Gluten free version: Use a gluten free cake mix and confirm your frosting and candy coating are labeled gluten free.
- Coffee flavored version: Add a teaspoon of instant espresso powder to the frosting before mixing it into the crumbs for a subtle mocha flavor.
Serving Suggestions
- Stand a batch in a tall glass filled with dry rice or beans for a quick, stable centerpiece display.
- Pair with a simple fruit platter for a lighter dessert table.
- Serve alongside coffee or hot cocoa for an afternoon treat.
- Match the candy coating color to a party theme for birthdays or baby showers.
- For [INTERNAL LINK: chocolate ganache drizzle recipe], drizzle a contrasting color over the set coating for a two-tone look.
- Pack a few in a small box tied with ribbon as an easy homemade gift.
Nutrition Information
Estimates based on 1 pop per serving, 24 servings per batch.
| Nutrient | Amount |
| Calories | 148 kcal |
| Protein | 1.5 g |
| Carbohydrates | 20 g |
| Fiber | 0.5 g |
| Sugar | 15 g |
| Fat | 7 g |
| Saturated Fat | 4 g |
| Cholesterol | 8 mg |
| Sodium | 95 mg |
Notable nutrients: mostly sugar and fat from the frosting and candy coating, with very little fiber or protein. These numbers are estimates only and will shift depending on the exact brands of cake mix, frosting, and candy melts used, along with how the ingredients are measured.
Why This Recipe Works
Fat is the glue in this recipe. The frosting’s fat content is what binds dry cake crumbs into a cohesive ball, which is why a low-fat or whipped frosting tends to fall apart. Chilling the balls before dipping solidifies that fat again, giving the ball enough structure to survive being fully submerged in warm candy coating without softening or sliding apart.
The coconut oil added to the coating changes its viscosity rather than its flavor. Pure melted candy coating is thick and sets with a heavier, sometimes brittle shell; thinning it with a small amount of fat lets it flow off the pop in an even layer and set with more flexibility, which reduces cracking.
Read Also: Pancake Recipe
Frequently Asked Questions
FAQ Source Note: These questions reflect common patterns from typical baking-related search and forum questions on cake pops, based on general recurring themes rather than a specific live source.
Why do my cake pops crack after dipping?
Cracking almost always comes from a temperature mismatch between a cold cake ball and hot candy coating. Let the melted coating cool slightly before dipping, and let finished pops set at room temperature rather than putting them back in the fridge right away, since that sudden cold shrinks the shell faster than the cake inside it.
Can I make cake pops without buying a special mold?
Yes, and it’s actually the more common method. Rolling the cake mixture by hand into balls gives a more natural, rounded shape than most silicone molds produce, and it requires no extra equipment beyond your hands and a baking sheet.
How far in advance can I make cake pops?
Rolled, undipped cake balls hold well in the fridge for about 2 days or in the freezer for up to 2 months. Fully finished, dipped cake pops keep for up to 5 days in the fridge in an airtight container, though the coating can lose some shine over time.
Can I use a homemade cake instead of a box mix?
Yes, any moist cake works, though denser cakes crumble more evenly than very light, airy ones. If your homemade cake is on the drier side, you may need slightly more frosting to bring the crumbs together into a ball.
Why did my candy coating turn thick and clumpy?
This usually means the candy overheated in the microwave or a drop of water got into the bowl while melting. Melt in short 20 second bursts, stir often, and keep every tool and bowl completely dry, since even a small amount of moisture can seize the coating.
Are cake pops easy to make gluten free?
Yes, swap in a gluten free cake mix and double check that your frosting and candy coating are also labeled gluten free, since some brands include additives that aren’t. The rolling and dipping method stays exactly the same either way.
Conclusion
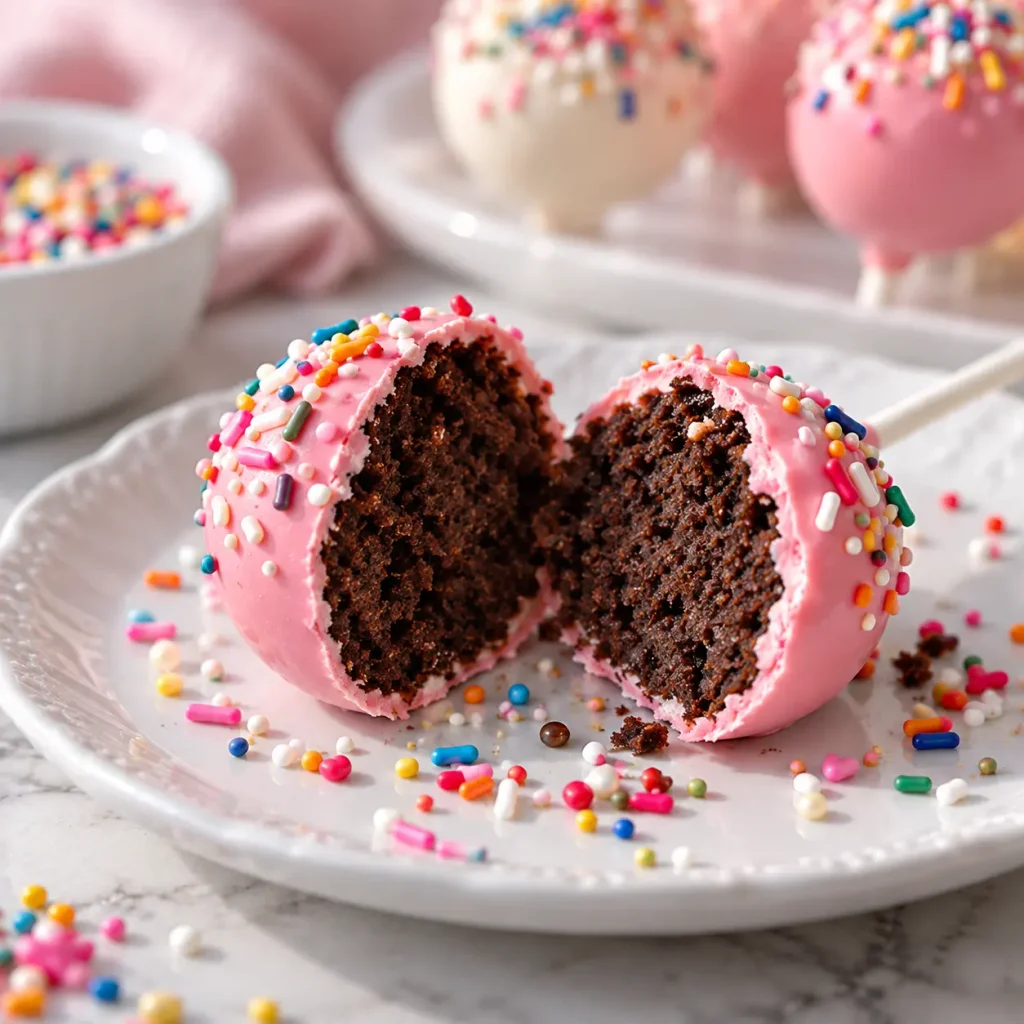
Once you’ve made one batch of cake pops and gotten the chill time right, the whole process stops feeling fussy. The hardest part isn’t the recipe itself, it’s resisting the urge to skip the resting time because you’re impatient to see the finished pops.
If you’re making these for a party, dip a few in advance the night before so you’re not rushing the morning of. Cake pops hold up better than most people expect once they’re properly set.
If you loved this recipe, save it to your Desserts Pinterest board so you can find it easily later!
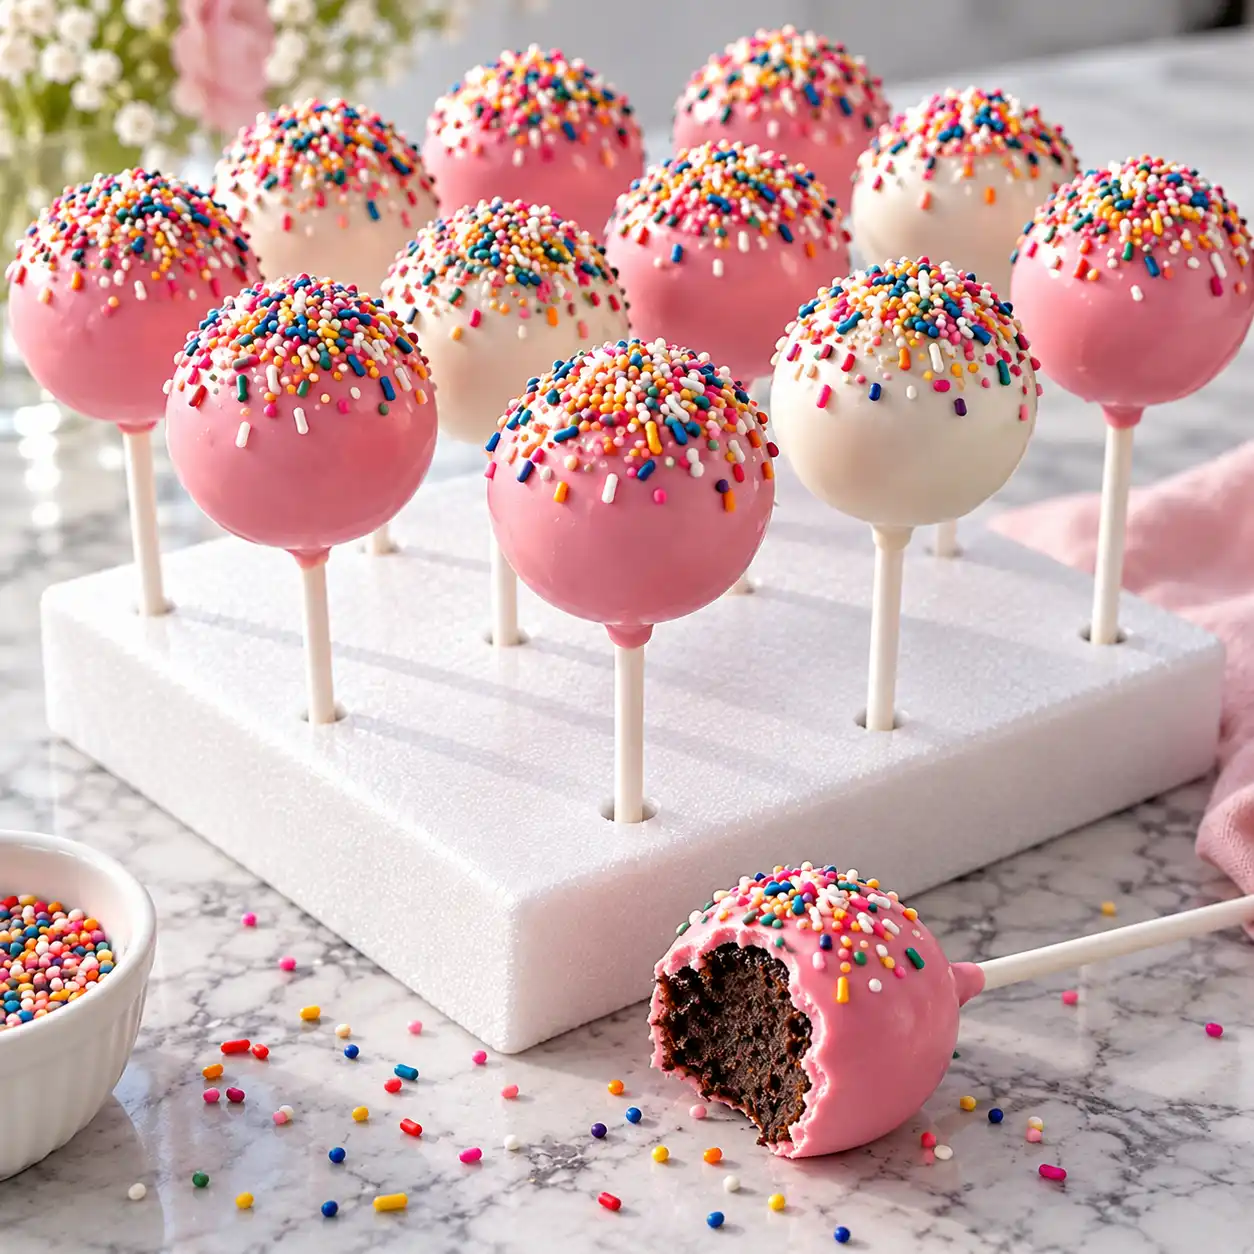
Easy Cake Pops
Ingredients
Method
- Instructions:
- Bake the cake per box instructions and let it cool fully.
- Crumble the cooled cake into fine, even pieces in a large bowl.
- Fold in the frosting gradually until the mixture holds together when pressed.
- Roll into 24 walnut sized balls and place on a parchment lined tray.
- Chill the balls for 60 minutes in the fridge or 20 minutes in the freezer.
- Melt the candy coating in short bursts, stirring until smooth, then stir in the coconut oil.
- Dip a stick tip into the coating and insert it halfway into each chilled ball.
- Dip each ball fully into the coating, let excess drip off, add toppings, and stand upright to set.
Notes
- Chill the cake balls fully before dipping to prevent cracking.
- Undipped balls freeze well for up to 2 months.
- Thin the coating with coconut oil for a smoother, less brittle shell.
- Store finished pops in an airtight container for up to 5 days.