Ultimate Chicken Pot Pie in 90 Minutes, Easy and Flaky

Steam escapes the first cut, and the crust crackles like thin ice under the knife. Beneath it, a thick, silky filling sits ready, still bubbling at the corners, and the whole kitchen smells like butter and thyme.
This chicken pot pie is the version you can pull off on a regular evening. The crust is mixed by hand with cold butter, so you get real layers without a food processor or any special skills. The filling is thickened with a quick roux, which means it slices cleanly instead of flooding the plate. From first chop to first bite, you are looking at 1 hour 30 minutes, and most of that is hands off while the pie bakes.
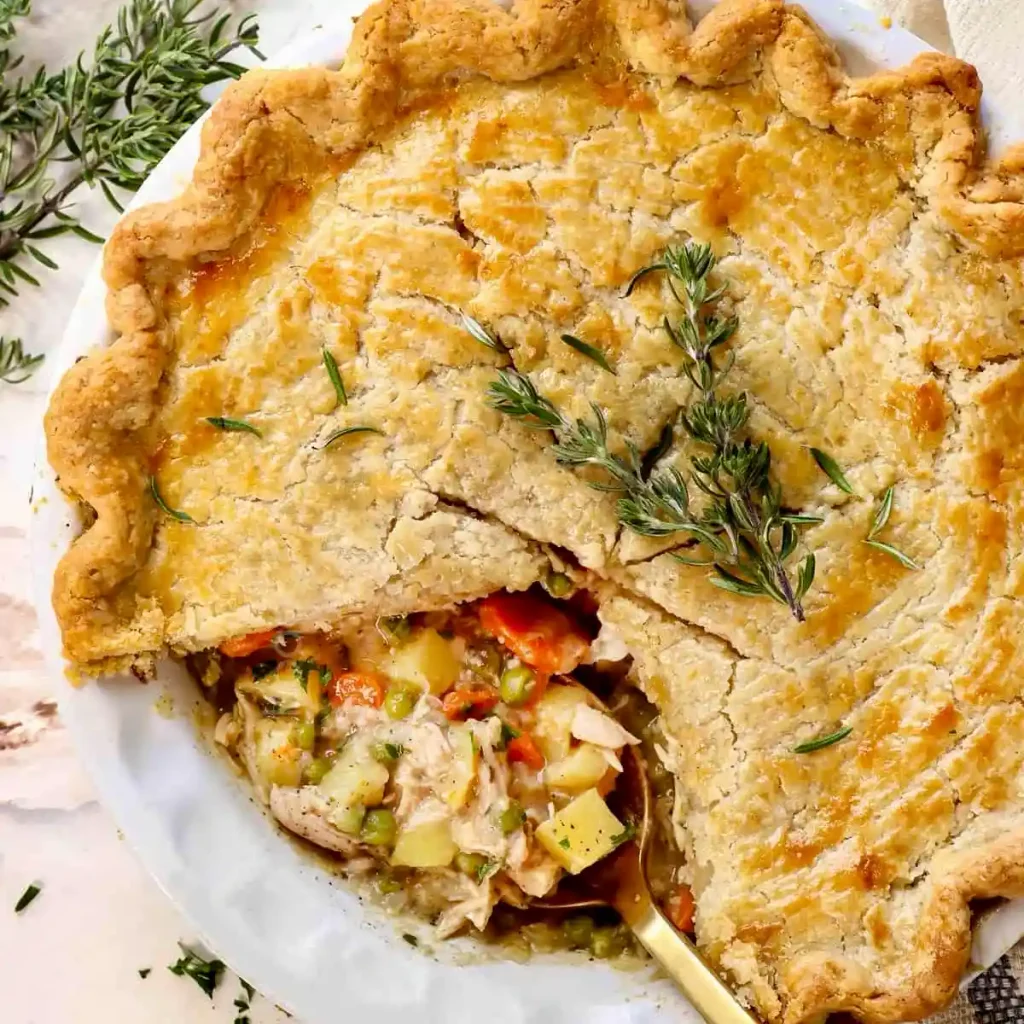
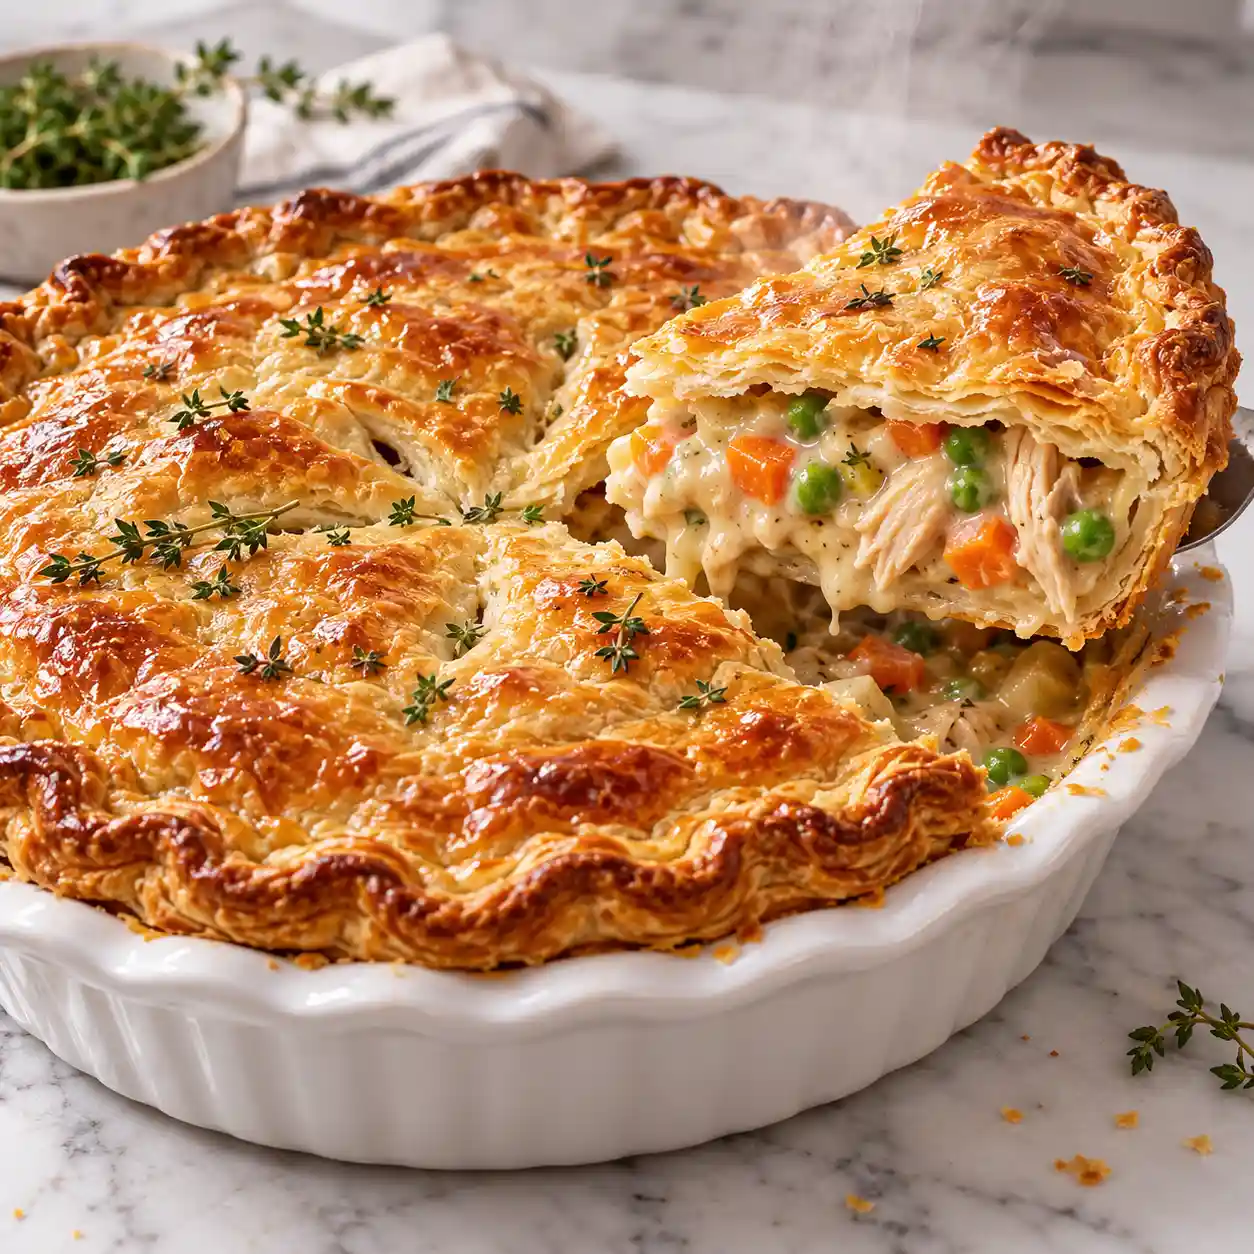
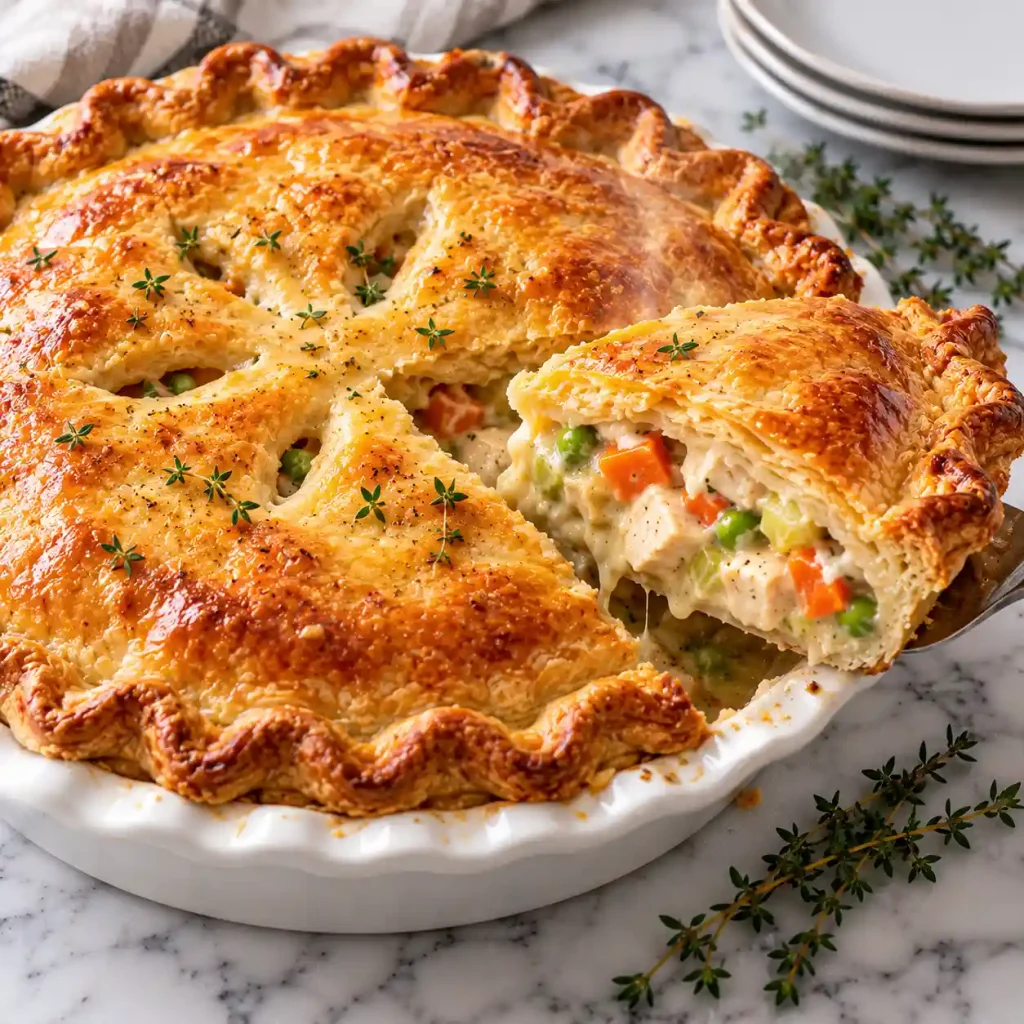
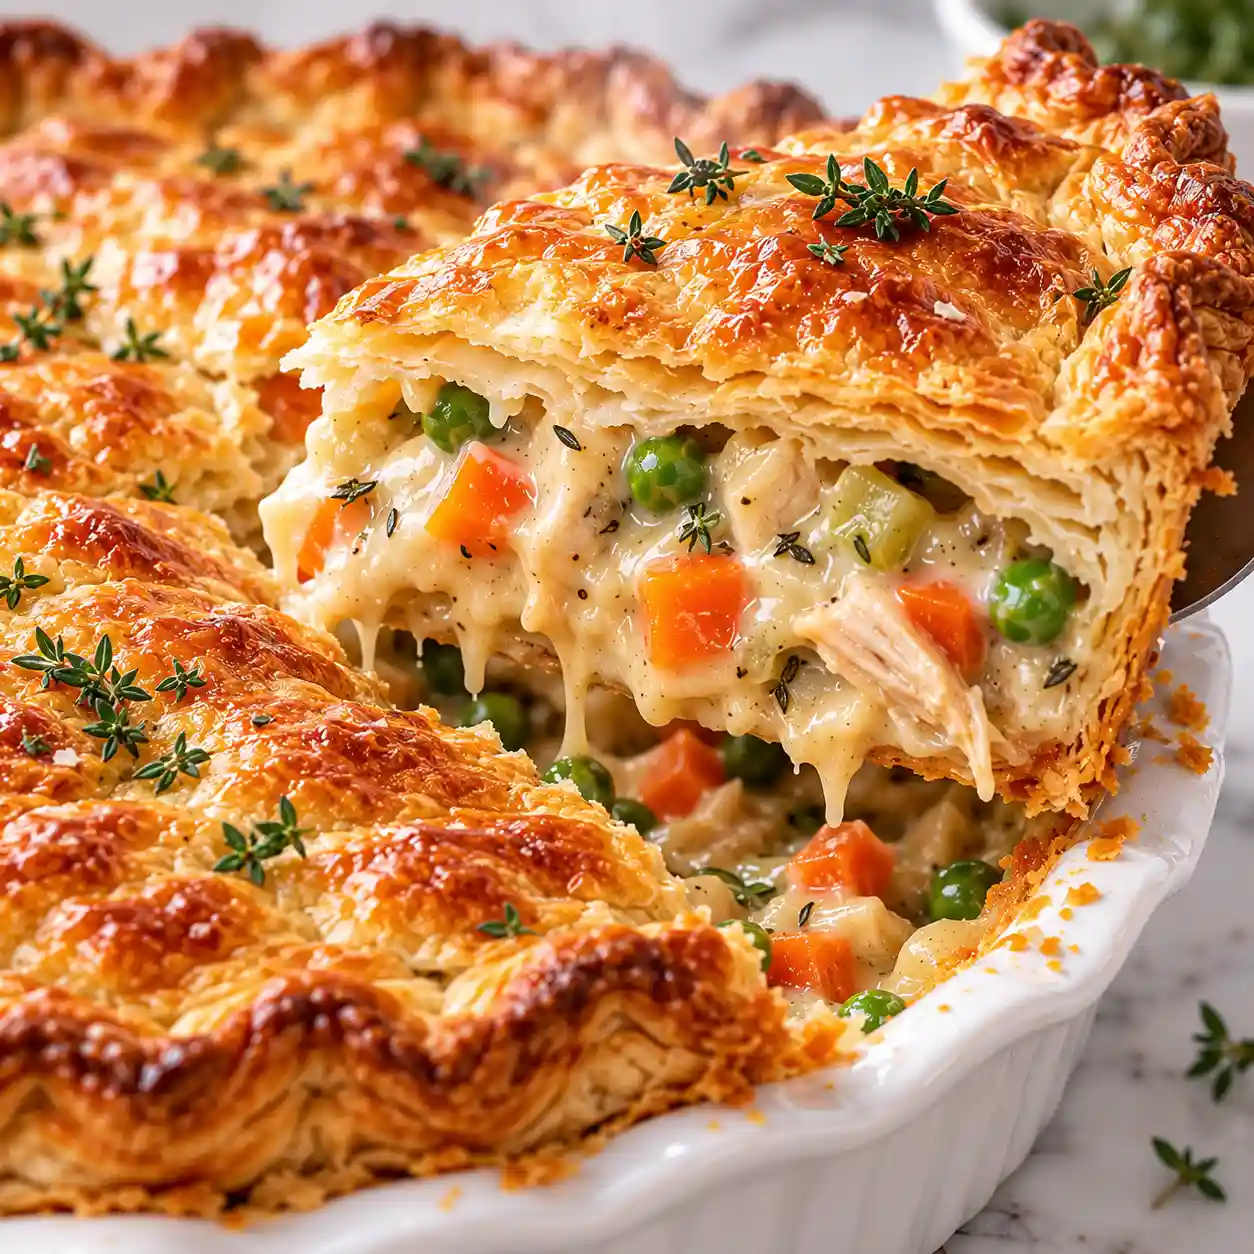
[AI IMAGE PROMPT: Golden amber chicken pot pie in a white ceramic deep dish pie plate, one wedge lifted to reveal creamy filling with carrots and peas, steam rising, flaky crust layers visible, thyme sprig garnish, white marble surface, warm kitchen light, 45 degree food photography angle.]
[IMAGE PLACEHOLDER: alt-text: “Chicken pot pie with one wedge lifted showing creamy filling, carrots, and peas under a flaky crust” | filename: “chicken-pot-pie-hero-shot.jpg” | orientation: horizontal]
Why You’ll Love This Chicken Pot Pie Recipe
- A crust that actually flakes: Cold butter cubes turn into steam pockets in the oven, which push the dough into thin, crisp layers.
- A filling that holds its shape: The flour and butter base thickens the sauce enough to stand up on a plate without turning stiff.
- One pot for the filling: Searing, simmering, and sauce building all happen in a single Dutch oven, so cleanup stays small.
- Pantry friendly ingredients: Everything comes from a normal grocery run, with no canned soup or specialty items.
- Easy to prep ahead: The dough and the filling can both be made a day early, which turns the final assembly into a 10 minute job.
- Feeds a crowd: One 9 inch deep dish pie cuts into 8 generous slices.
Ingredient Selection Tips
Buy boneless, skinless chicken thighs if you can. They stay juicy through the sear and the bake, while breasts dry out faster inside a pie. Look for thighs that are pink and moist with no gray patches or sour smell. For the crust, use real unsalted butter straight from the fridge, because it controls both the salt level and the flakiness. Pick carrots with firm, smooth skin and celery stalks that snap cleanly, since limp vegetables turn mushy in the filling.
Recipe Snapshot
| Servings | Difficulty | Course | Cuisine | Prep Time | Cook Time | Rest Time | Total Time | Calories |
| 8 | Easy | Main Course | American | 25 minutes | 50 minutes | 15 minutes | 1 hour 30 minutes | 590 kcal per serving |
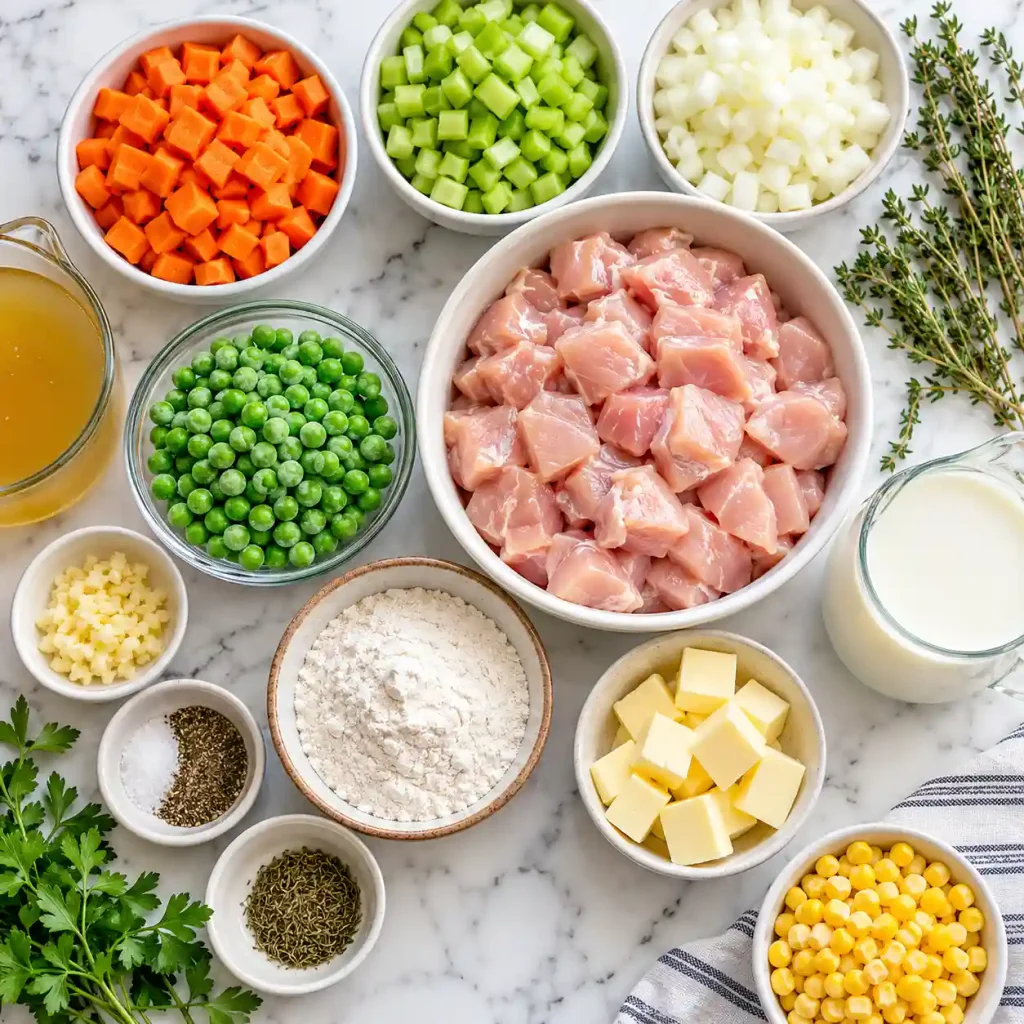
Ingredients
For the crust:
- 2 1/2 cups (312 g) all purpose flour. Gives the dough enough structure to hold a heavy filling.
- 1 teaspoon fine salt
- 1 teaspoon sugar. Helps the top crust brown evenly.
- 1 cup (226 g) cold unsalted butter, cut into 1/2 inch cubes. Cold is the whole secret here, so keep it in the fridge until the moment you use it.
- 6 to 8 tablespoons ice water
For the filling:
- 1 1/2 pounds (680 g) boneless, skinless chicken thighs, cut into 3/4 inch cubes
- 1 1/4 teaspoons fine salt, divided
- 1/2 teaspoon black pepper
- 1 tablespoon olive oil
- 4 tablespoons unsalted butter
- 1 medium yellow onion, diced
- 2 medium carrots, sliced into thin coins
- 2 celery stalks, sliced
- 3 garlic cloves, minced
- 1/3 cup (42 g) all purpose flour. This is the thickener, and cooking it for a minute removes the raw flour taste.
- 1 3/4 cups chicken broth. Low sodium lets you control the salt yourself.
- 3/4 cup whole milk. Adds a rounder, creamier body than broth alone.
- 1 cup frozen peas
- 1 teaspoon fresh thyme leaves (or 1/2 teaspoon dried)
- 1 teaspoon lemon juice. A small splash that wakes up the whole pot.
For the egg wash:
- 1 large egg beaten with 1 tablespoon milk
Substitutions: Chicken breast works if you cut it slightly larger and pull it from the sear a touch early. Fresh green beans or corn can replace the peas.
Recipe Timing
You will spend about 25 minutes on prep, including mixing the dough and rolling both crusts. The stovetop filling and the bake add up to 50 minutes of cooking. A 15 minute rest after baking lets the filling thicken enough to slice. The dough chills while you work on the filling, so that wait does not add to the clock.
Allergen & Dietary Disclosure
This recipe contains wheat (flour), dairy (butter and milk), and egg (egg wash). Here are realistic swaps for each:
- Wheat: Use a 1 to 1 gluten free baking flour in both the crust and the filling. The dough will be more delicate, so roll it between two sheets of parchment.
- Dairy: Use plant based butter sticks and unsweetened oat milk.
- Egg: Brush the top with milk or a plant milk instead.
If you are cooking for someone with a severe allergy, check every label and watch for cross contact in your kitchen, because swaps do not guarantee safety.
Equipment Needed
- 9 inch deep dish pie plate: Ceramic or glass lets you check the bottom crust for browning.
- Rimmed baking sheet: Slide it under the pie to catch drips and give the base direct heat.
- Dutch oven or 12 inch deep skillet: Wide enough to sear the chicken in a single layer.
- Rolling pin: A plain straight one works better than tapered styles for even thickness.
- Instant read thermometer: The only reliable way to confirm the filling reached a safe temperature.
- Pastry brush: A silicone one spreads egg wash evenly without leaving streaks.
Preparation
Heat your oven to 400°F (200°C) and slide the rack to the lower third. Place a rimmed baking sheet on that rack so it heats up too. Dice the onion, slice the carrots and celery, mince the garlic, and cube the chicken. Measure the broth, milk, and flour so everything is within reach once the sauce starts. Keep the butter for the crust in the fridge until you need it.
Step by Step Instructions
Step 1: Mix the Dough
Stir the flour, salt, and sugar together in a mixing bowl, then press the cold butter cubes into the flour with your fingertips until you see pea sized pieces. Drizzle in 6 tablespoons of ice water, tossing with a fork, and add more only if the dough will not clump when squeezed. Split it into two discs, wrap them, and chill for at least 20 minutes.
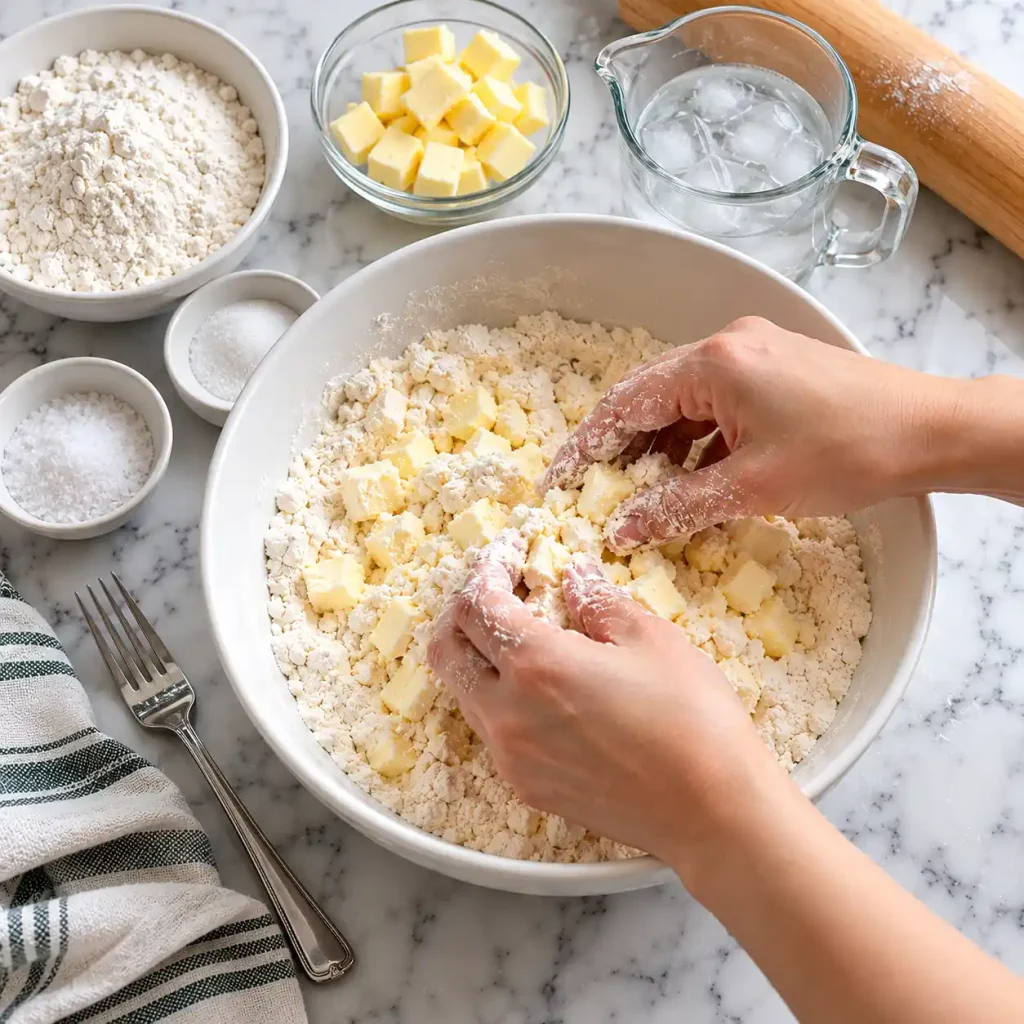
Chef’s Note: Visible butter chunks are a good sign. They melt during baking and leave tiny air pockets, which is what creates flaky layers.
Step 2: Sear the Chicken
Season the chicken cubes with 3/4 teaspoon of the salt and the pepper. Heat the olive oil in a Dutch oven over medium high heat, then cook the chicken in a single layer for about 4 minutes, until the outside turns pale gold. It will not be cooked through yet, which is fine because it finishes in the oven. Move the pieces to a plate and wash your hands, the cutting board, and the knife with hot soapy water after handling raw chicken.
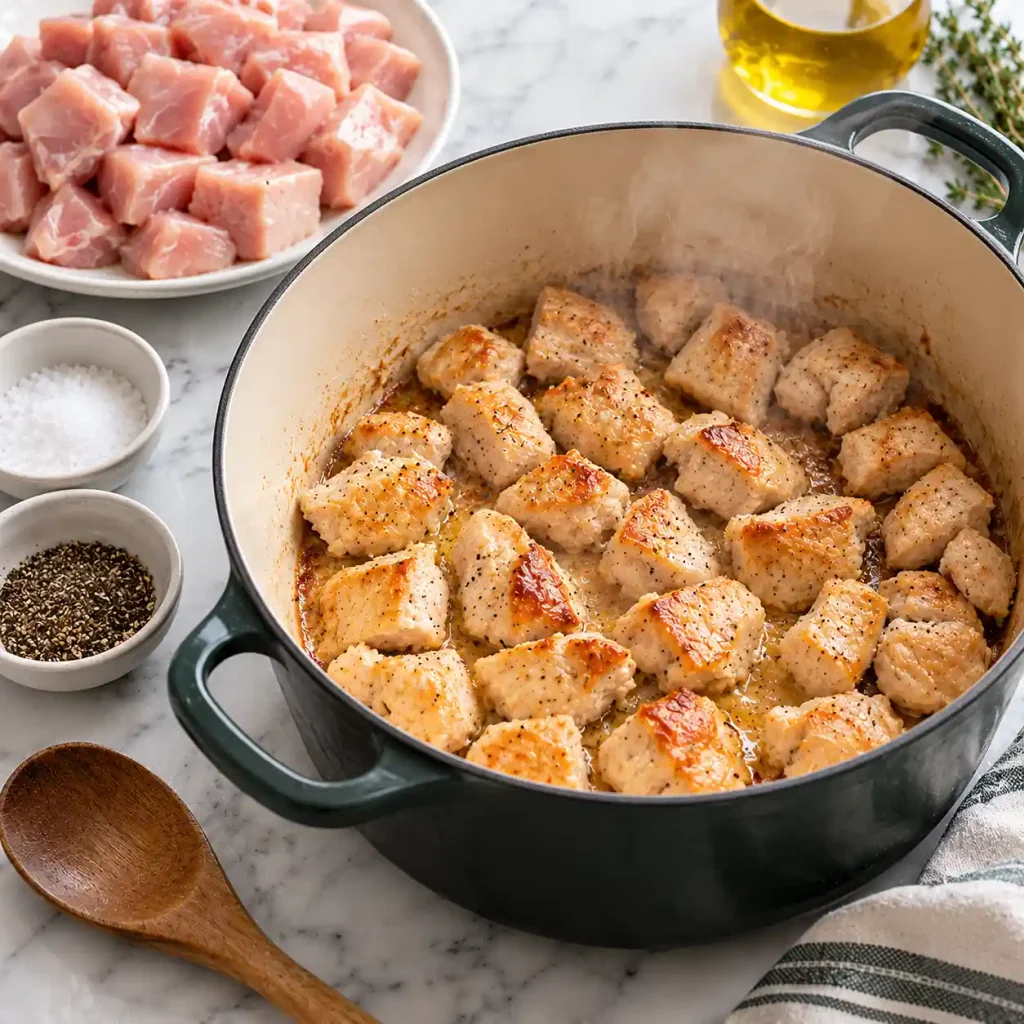
Chef’s Note: Browning the outside builds flavor in the pot, and those stuck bits on the bottom dissolve into the sauce later.
Step 3: Soften the Vegetables
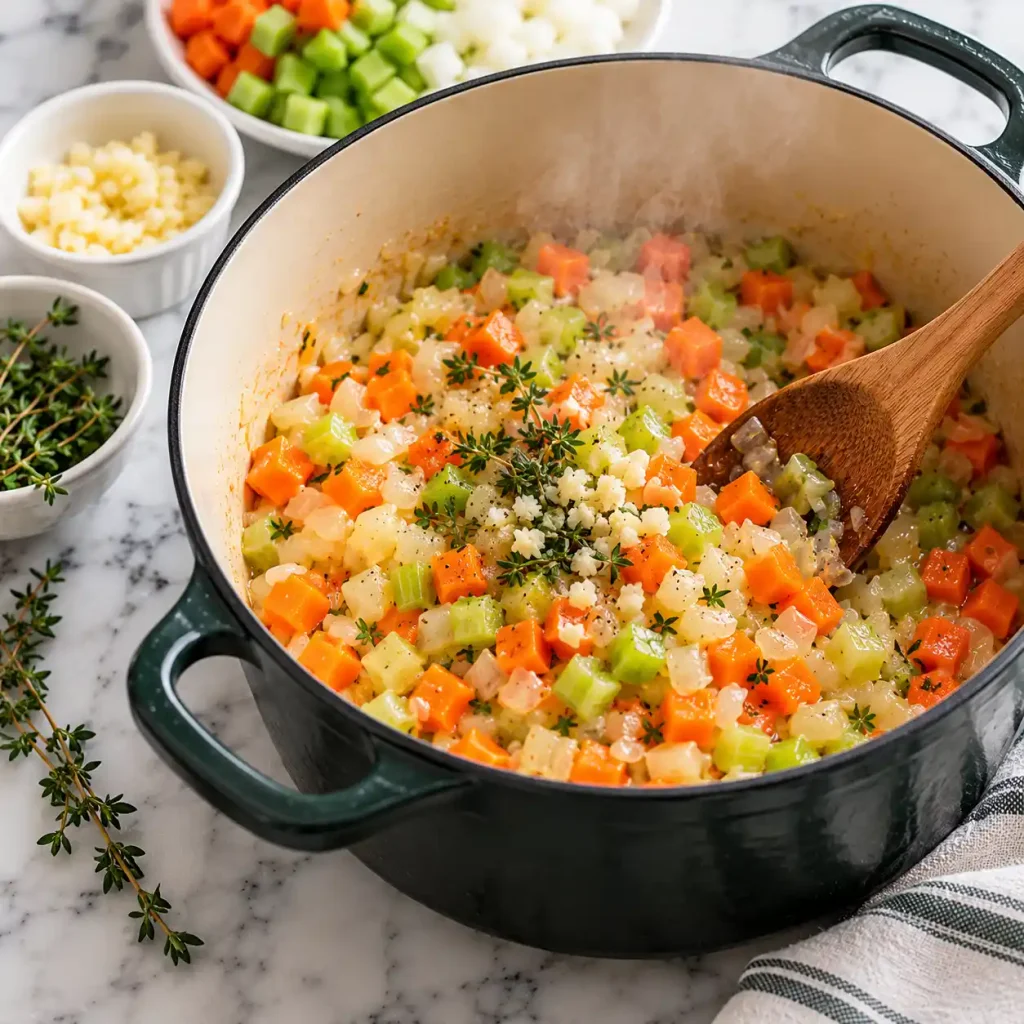
Drop the butter into the same pot over medium heat. Add the onion, carrots, and celery with the remaining 1/2 teaspoon salt, and cook for 6 minutes until the onion turns translucent. Stir in the garlic and thyme for 30 seconds, until fragrant.
Step 4: Build the Sauce
Sprinkle the flour over the vegetables and stir constantly for 1 minute, until no dry streaks remain. Pour in the broth in three additions, whisking after each, then add the milk. Simmer for 3 to 4 minutes, until the sauce coats the back of a spoon and holds a clean line when you drag a finger through it. Fold in the chicken, any juices on the plate, the peas, and the lemon juice.

Chef’s Note: Adding liquid gradually keeps the roux smooth. Dumping it in all at once tends to leave lumps.
Step 5: Roll the Bottom Crust
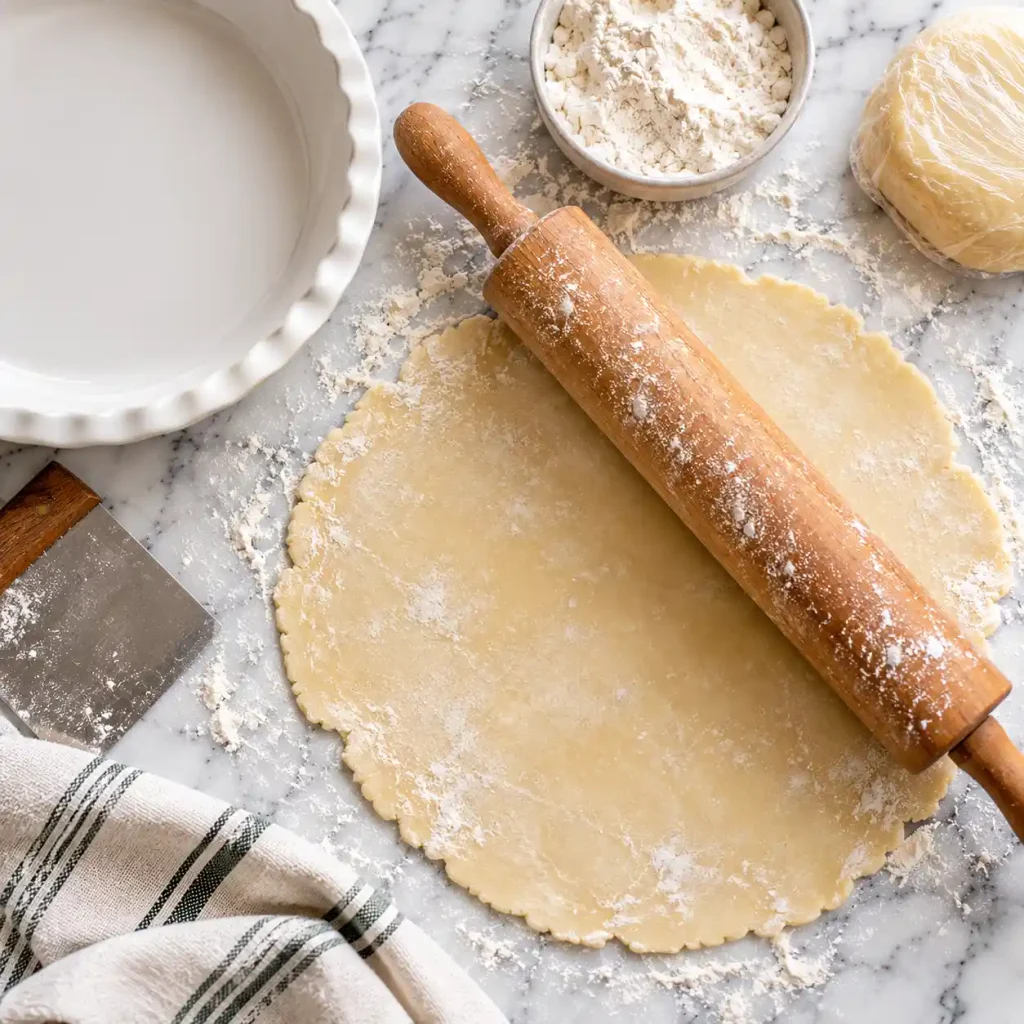
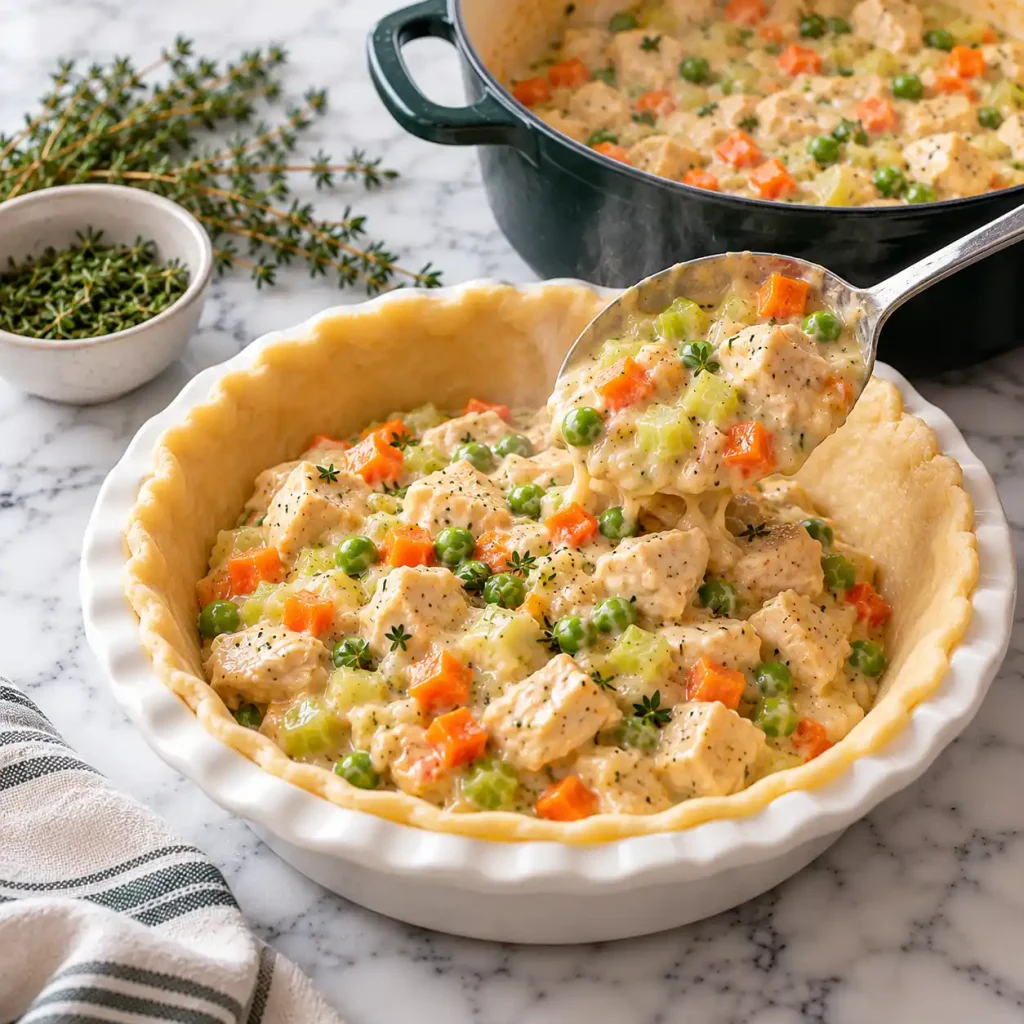
Roll one chilled disc on a floured counter into a 12 inch round about 1/8 inch thick. Ease it into the pie plate, press it into the corners, and trim the overhang to 1/2 inch. Refrigerate the dish while the filling cools for 5 minutes.
Step 6: Fill the Pie
Spoon the warm, not piping hot, filling into the crust and level the top. Hot filling softens the dough before it has a chance to firm up in the oven.
Step 7: Add the Top Crust
Roll the second disc to the same thickness and drape it over the filling. Trim, fold the edges under the bottom crust, and crimp them. Cut four small vents in the center, then brush the whole top with the egg wash.
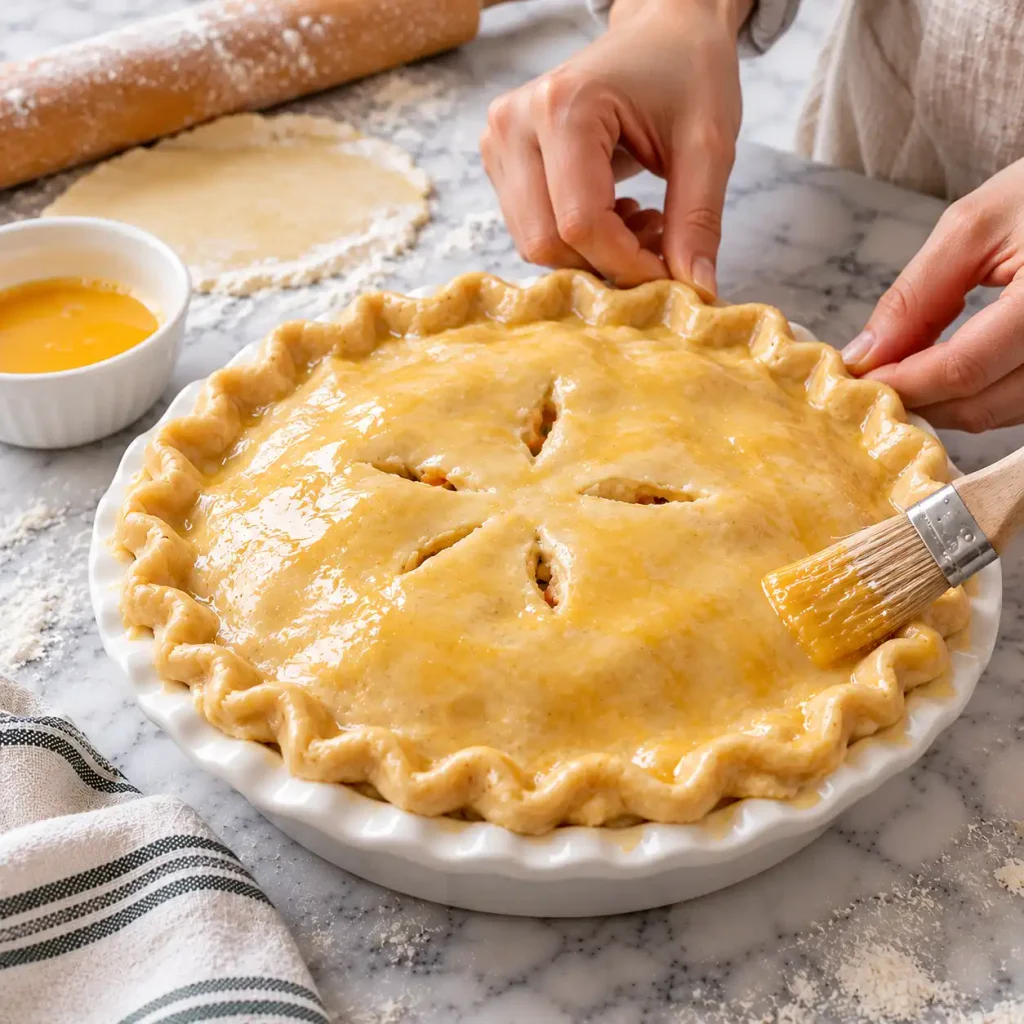
Chef’s Note: Those vents let steam escape, so the filling thickens instead of bubbling out the sides.
Step 8: Bake and Rest
Place the pie on the hot baking sheet and bake for 35 minutes. You want a deep amber crust, thick bubbling at the vents, and a reading of 165°F (74°C) in the center. If the edges darken too fast, tent them with foil. Let the pie rest for 15 minutes before slicing.
Expert Tips & Tricks
- Grate frozen butter for a faster crust: If your kitchen runs warm, freeze the butter for 15 minutes and grate it into the flour, which keeps it cold longer.
- A mistake to avoid: The most common slip is pouring steaming filling into a thin raw crust, which leaves the bottom pale and gummy. Give the filling 5 minutes to settle first.
- Make ahead tip: Cook the filling a day early and chill it, then roll the crusts the next day. Reheat the filling gently before assembling.
- Storage tip: Cover leftover pie tightly or slice it into containers rather than leaving the whole dish out, since the filling cools slowly in a deep pan.
- Texture tip: Cut the vegetables into similar sizes so they soften at the same rate and no bite feels crunchy next to a soft one.
- Time saving tip: Use 3 cups of shredded rotisserie chicken and skip the searing step, which cuts about 5 minutes.
Pro Tip: Check the pie halfway through baking. If one side browns faster, turn the baking sheet 180 degrees so the crust colors evenly.
Common Mistakes & Troubleshooting
| Problem | Why It Happens | How to Fix or Prevent It |
| Soggy bottom crust | Hot filling or a cold, unheated pan | Cool the filling for 5 minutes and bake on a preheated baking sheet |
| Tough crust | Too much water or overworked dough | Add water a spoonful at a time and stop mixing once it clumps |
| Runny filling | Sauce not simmered long enough or cut too soon | Simmer until it coats a spoon and rest the baked pie for 15 minutes |
| Crust shrinks in the oven | Dough was stretched and not rested | Chill the shaped crust and avoid stretching it into the dish |
| Filling bubbles out | No steam vents, or pie overfilled | Cut four vents and leave about 1/2 inch of space at the rim |
Storage, Reheating, Freezing, Make Ahead
Refrigerator
Cool the pie for no more than 2 hours at room temperature, then cover it or move slices into airtight containers. It keeps for 3 to 4 days.
Freezer
Wrap whole baked pies or individual slices in foil, then place in a freezer bag for up to 3 months. An unbaked pie freezes too, and it goes straight into a 375°F oven for 75 to 85 minutes.
Reheating
Warm slices in a 350°F oven for 20 to 25 minutes, covered loosely with foil, until the center is hot throughout. A microwave works for speed, but it softens the crust.
Make Ahead
Make the dough up to 2 days ahead, or freeze it for 1 month. The filling can be cooked and chilled for up to 2 days.
Storage tip: Freeze slices on a tray first, then wrap them, so they do not stick together.
[AI IMAGE PROMPT: Labeled glass meal prep containers holding individual chicken pot pie portions on a white marble counter, foil wrapped slices, a small white ceramic ramekin, soft natural daylight, tidy organized layout, top down flat lay, creamy filling visible, tender chicken chunks, flaky crust edges.]
[IMAGE PLACEHOLDER: alt-text: “Glass containers and foil wrapped slices of chicken pot pie organized for fridge and freezer storage” | filename: “chicken-pot-pie-storage-containers.jpg” | orientation: horizontal]
Variations & Substitutions
- Spicy: Add 1/2 teaspoon cayenne and a pinch of smoked paprika to the roux for a gentle kick.
- Kid friendly: Skip the thyme and lemon, and use extra peas and corn for a sweeter, milder filling.
- Vegetarian: Swap the chicken for sautéed mushrooms and chickpeas, and use vegetable broth.
- Gluten free: Use a 1 to 1 gluten free flour blend for both crust and sauce.
- Puff pastry top: Skip the bottom crust, pour the filling into a deep skillet, and top with one thawed sheet of puff pastry. Bake for 25 to 30 minutes.
- Leftover turkey: Use 3 cups of shredded cooked turkey in place of the chicken.
Serving Suggestions
- Side dish: Pair it with [INTERNAL LINK: creamy mashed potatoes recipe] for a classic cold weather plate.
- Fresh balance: Serve a simple salad, such as [INTERNAL LINK: green salad with lemon vinaigrette], to cut through the richness.
- Garnish: Scatter chopped fresh parsley or a few thyme leaves over each slice.
- Sauce: Keep a small jar of hot sauce or a spoonful of Dijon mustard on the table for people who like a sharper bite.
- Drinks: Sparkling water with lemon, apple cider, or hot tea all pair well.
- Meal pairing: Roasted green beans or glazed carrots round out the plate, and a tip for [INTERNAL LINK: homemade flaky pie crust tips] helps if you plan to bake this often.
Pro Tip: Cut the pie after the full 15 minute rest, and wipe your knife between slices. The filling will hold its shape and the crust edges will stay clean.
Nutrition Information
Serving size: 1 slice (1/8 of the pie). Servings per recipe: 8.
| Nutrient | Amount |
| Calories | 590 kcal |
| Protein | 20 g |
| Carbohydrates | 40 g |
| Fiber | 3 g |
| Sugar | 5 g |
| Fat | 39 g |
| Saturated Fat | 21 g |
| Cholesterol | 125 mg |
| Sodium | 700 mg |
Notable micronutrients: vitamin A from the carrots and niacin from the chicken. These values are estimates and can shift depending on the brands you use and how you measure.
Why This Chicken Pot Pie Recipe Works
Cold butter in the dough is the key to the crust. As the pie bakes, the butter melts and releases steam, which lifts thin layers of dough apart and leaves flaky pockets behind. Chilling the dough before rolling also relaxes the gluten, so the crust holds its shape instead of shrinking.
The filling relies on a roux, which is flour cooked in fat. Cooking the flour for a full minute removes the raw taste and gives the starch time to swell once broth and milk go in. Adding the liquid in stages keeps the sauce smooth, and the final simmer thickens it enough to survive a long bake.
Searing the chicken first creates browned flavor through the Maillard reaction, which dissolves into the sauce. Finishing the chicken in the oven keeps it tender, since it never gets cooked twice on the stove.
Frequently Asked Questions
FAQ Source Note: These questions reflect typical patterns people ask about chicken pot pie online. They are not taken from a live search.
Can I make chicken pot pie ahead of time?
Yes. Assemble the pie, cover it tightly, and refrigerate for up to 24 hours before baking. You can also freeze it unbaked for up to 3 months. Bake the chilled pie as written, adding about 5 minutes if the center is cold. For a frozen pie, skip thawing and bake at 375°F for 75 to 85 minutes, tenting the crust with foil if it darkens too quickly.
Why is my chicken pot pie bottom crust soggy?
Excess moisture and low heat are the usual causes. Cool the filling for 5 minutes before pouring it in, and bake the pie on a preheated baking sheet on the lower rack. The direct heat sets the base before the filling can soak through. A glass or ceramic dish also helps you check the bottom browning.
Can I use store bought crust or puff pastry?
Yes. Two refrigerated pie crusts work for a double crust chicken pot pie, and you can follow the same baking time and temperature. Puff pastry works best as a top crust only, baked in a deep skillet for 25 to 30 minutes. Thaw either one according to the package, since cold, stiff dough cracks as soon as you unroll it.
How do I know when my chicken pot pie is done?
Look for three signs: a deep amber crust, thick filling bubbling at the vents, and a reading of 165°F (74°C) in the center on an instant read thermometer. At 400°F, this takes about 35 minutes. If the crust browns before the center is hot, cover the edges with foil and keep baking.
Can I use rotisserie chicken?
Yes. Use about 3 cups of shredded rotisserie chicken in place of the raw thighs. Skip the searing step, build the sauce, and fold the chicken in right at the end. Since the meat is already cooked, it only needs to warm through, which saves roughly 5 minutes of stovetop time.
Is this chicken pot pie safe for people with allergies?
Not as written. The recipe contains wheat, dairy, and egg. You can swap in gluten free flour, plant based butter and milk, and a plant milk egg wash, but those swaps do not guarantee safety for anyone with a severe allergy. Always read ingredient labels and keep raw ingredients separate to limit cross contact.
Conclusion
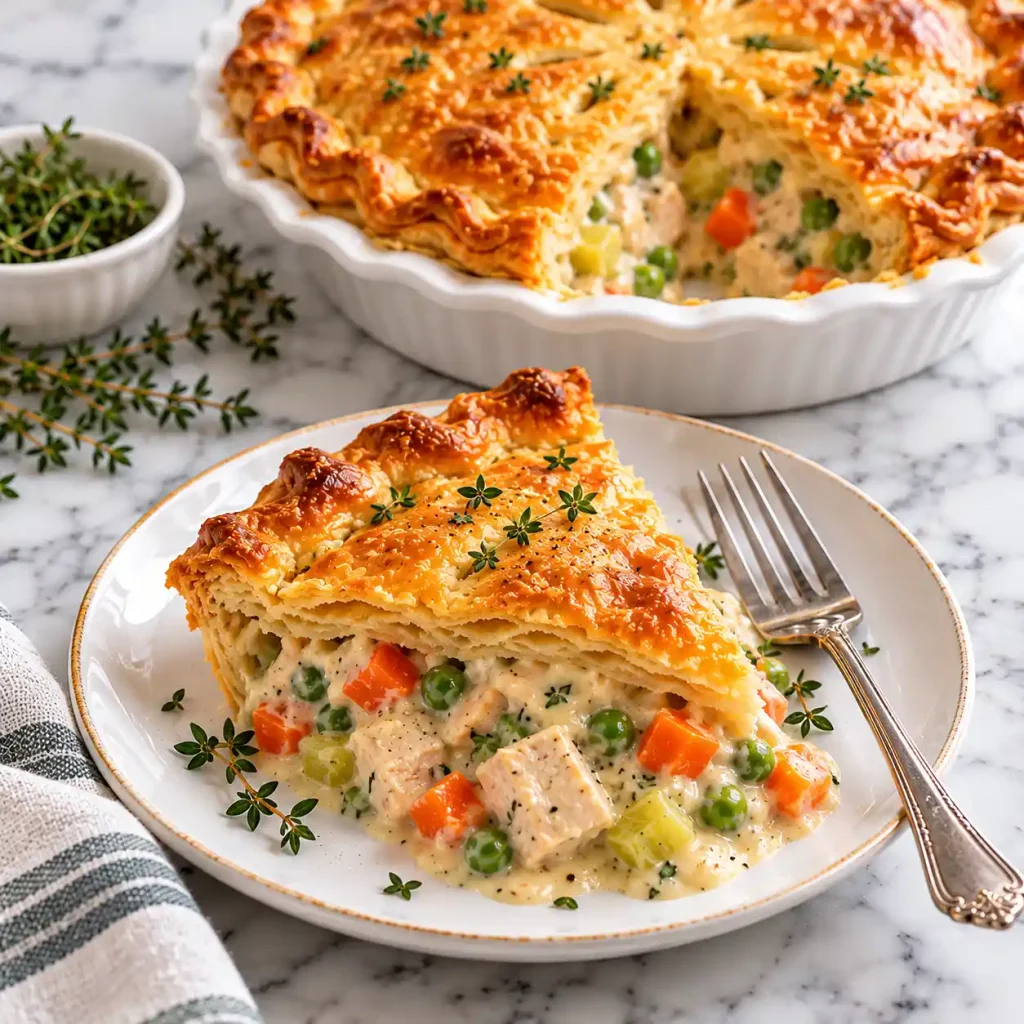
The best chicken pot pie is the one where every part is doing its job: a crisp crust, a thick sauce, and chicken that is still tender after the oven. If there is one habit I would pass on, it is the 15 minute rest. It feels long when the kitchen smells this good, but it decides whether your slice stands up or slumps.
Make this on a cool evening, bake an extra pie for the freezer, and you will have dinner ready for the next busy week. Once you get the dough and the sauce down, this chicken pot pie becomes a recipe you can make without checking the page.
If you loved this recipe, save it to your comfort food Pinterest board so you can find it easily later!
Chicken Pot Pie
Ingredients
Method
- Instructions
- Heat the oven to 400°F (200°C) with a baking sheet on the lower rack. Rub cold butter into the flour, salt, and sugar until pea sized bits remain, then bind with ice water, shape into two discs, and chill 20 minutes.
- Season the chicken with 3/4 teaspoon salt and the pepper. Brown it in hot oil in a Dutch oven for 4 minutes, then transfer to a plate.
- Melt the butter in the pot and cook the onion, carrots, celery, and remaining salt for 6 minutes. Add garlic and thyme for 30 seconds.
- Stir in the flour for 1 minute. Whisk in the broth in three pours, then the milk, and simmer 3 to 4 minutes until thick enough to coat a spoon.
- Return the chicken with its juices, then add the peas and lemon juice. Let the mixture rest for 5 minutes.
- Roll one disc to a 12 inch round, line the pie plate, and trim the edge to 1/2 inch. Pour in the filling.
- Roll the second disc, cover the pie, seal and crimp the rim, cut four vents, and brush with egg wash.
- Bake on the hot baking sheet for 35 minutes, until the crust is deep amber, the filling bubbles, and the center reads 165°F (74°C). Rest for 15 minutes before slicing.
Notes
- Store leftovers covered in the fridge for 3 to 4 days, or freeze slices for up to 3 months.
- Shredded rotisserie chicken (3 cups) can replace the raw thighs, with no searing needed.
- If the edges brown too quickly, tent them with foil for the last 10 minutes.
- Cool the filling for 5 minutes before pouring it into the crust to avoid a soggy base.