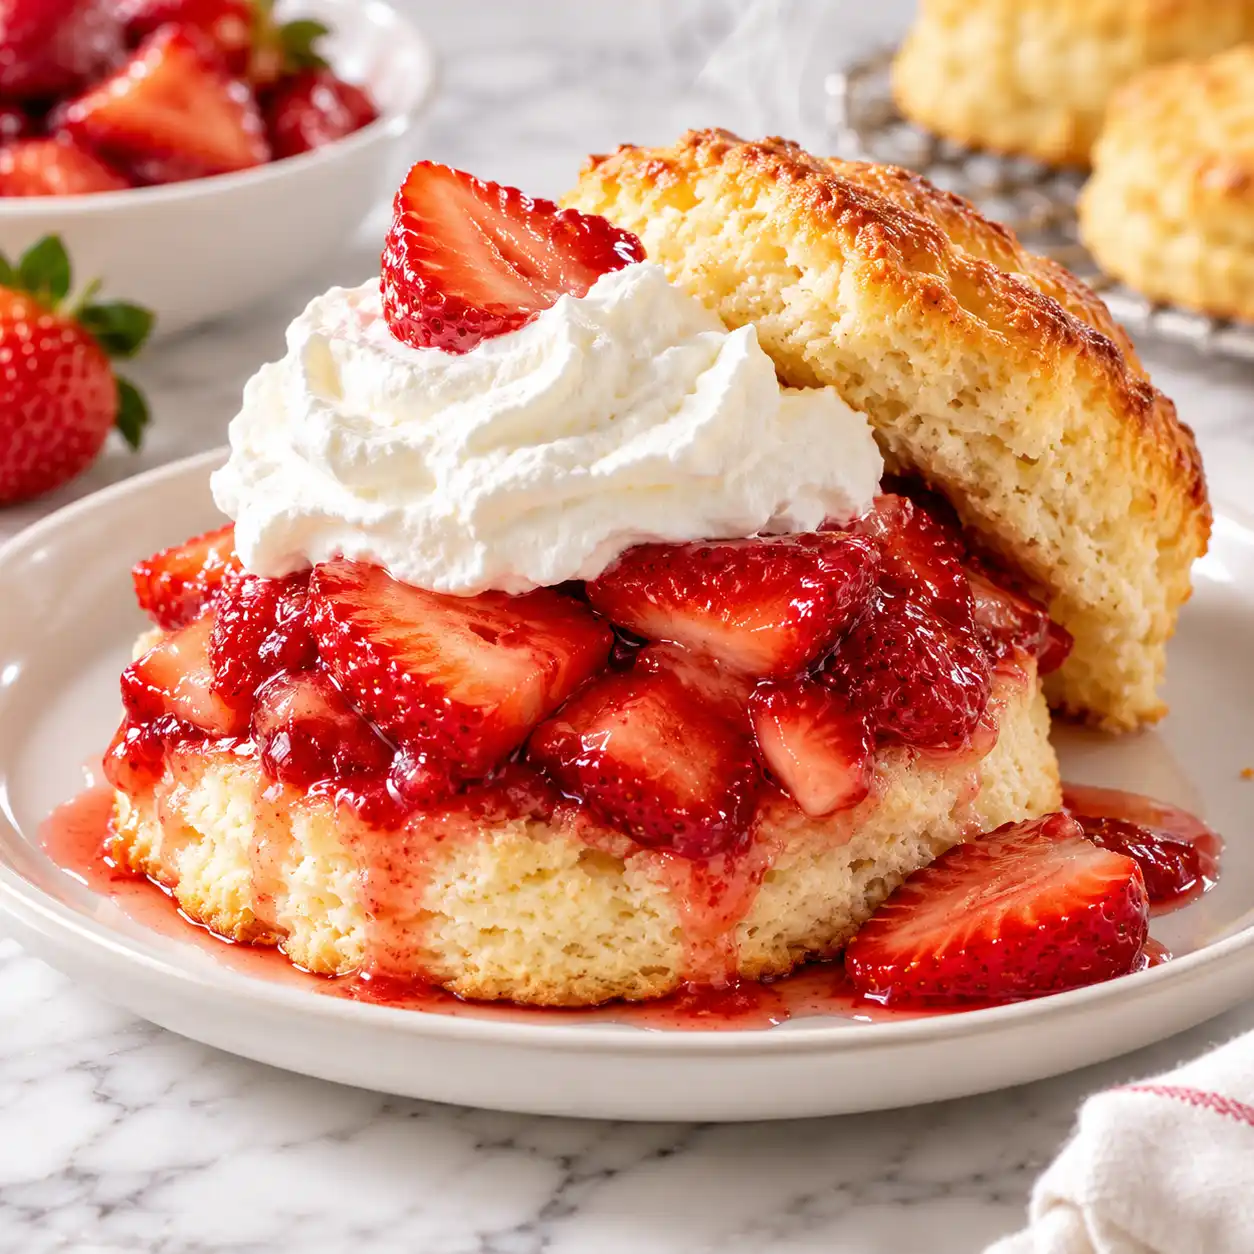

Foolproof Gingerbread House: 8 Easy Steps That Stay Standing

The first thing you notice is the smell: warm, spicy, and a little sweet, drifting out of the oven and settling over the whole house. It signals the start of the holidays faster than any decoration. A gingerbread house takes that scent and turns it into something you can stand on the table and admire.
Most walls fail for three reasons: the dough spreads, the icing is too thin, or the pieces get joined while still warm. This version fixes all three. The dough is low in butter so it holds sharp edges, the icing is thick enough to glue a wall in place, and every rest period is built into the timeline. You need about 3 hours in total, and the method works for first timers and seasoned bakers alike. You end up with a house that survives a car ride to a party and a curious toddler’s fingers.

Why You’ll Love This Gingerbread House
- Sturdy dough: Less butter and sugar means the pieces keep their shape in the oven, so walls meet at clean corners.
- Strong icing: Meringue powder icing dries rock hard, and it avoids raw egg whites.
- Built in rest times: You can stretch the work over two days, which keeps the kitchen calm.
- Simple templates: Every piece is a rectangle or a basic five sided shape, so you only need a ruler and paper.
- Edible and decorative: The spiced flavor is mild enough to enjoy as a cookie if you plan to eat it.
- Great for groups: Kids can pipe, press candy, and dust snow while you handle the structure.
Ingredient Selection Tips
Choose unsulphured dark molasses, not blackstrap, which tastes bitter and darkens the dough too much. Check the date on your ground ginger and cloves, since spices older than six months taste flat. Meringue powder sits in the baking aisle near the cake decorating supplies, and it is worth buying for icing that sets hard. For candy, look for pectin based gumdrops, which stay soft and bite cleanly, while gelatin gummies turn rubbery and bleed color onto white icing.
Recipe Snapshot
| Servings | Difficulty | Course | Cuisine | Prep Time | Cook Time | Rest Time | Total Time | Calories |
| 1 house (12 cookie sized servings) | Medium | Dessert | German | 1 hour | 15 minutes | 1 hour 45 minutes | 3 hours | 460 per serving |
Gingerbread House Ingredients
For the gingerbread dough:
- 3 1/2 cups (440 g) all purpose flour. It gives the walls their structure, so spoon it into the cup and level it.
- 1 tablespoon ground ginger
- 2 teaspoons ground cinnamon
- 1/2 teaspoon ground cloves. A small amount adds depth without turning bitter.
- 1/2 teaspoon ground nutmeg
- 1/2 teaspoon baking soda. Just enough to tenderize, not enough to puff the pieces.
- 1/2 teaspoon fine salt
- 1/2 cup (113 g) unsalted butter, softened
- 1/2 cup (100 g) packed dark brown sugar
- 1/2 cup (170 g) unsulphured molasses. It adds color, moisture, and that classic flavor.
- 1 large egg
- 1 tablespoon water, only if the dough looks crumbly
For the royal icing:
- 3 tablespoons meringue powder. It lets the icing harden without raw egg whites.
- 4 cups (480 g) powdered sugar, sifted
- 5 to 6 tablespoons warm water
For building and decorating:
- 1 sturdy cake board, about 10 by 12 inches
- 20 to 30 pectin based gumdrops
- 12 round peppermint candies
- 24 pretzel sticks
- 1 cup mini frosted wheat cereal squares, for roof shingles
- Powdered sugar, for dusting
Substitution notes: Dark corn syrup can replace molasses in the same amount, though the color and flavor turn milder. Any hard candy works in place of peppermints.
Recipe Timing
Plan on one hour of hands on work spread across the day: mixing, cutting, icing, building, and decorating. Baking takes 15 minutes in two batches. The longer part is waiting. The dough chills for 1 hour, the pieces cool for 30 minutes, and the finished walls need about 15 minutes to firm up before the roof goes on. That adds up to a 3 hour project, or you can split it across two days.

Allergen & Dietary Disclosure
This gingerbread house contains wheat (gluten), dairy, and egg.
- Gluten: Use a 1 to 1 gluten free baking flour blend that includes xanthan gum, plus gluten free pretzels and cereal.
- Dairy: Swap the butter for firm plant based baking sticks.
- Egg: Replace the egg in the dough with 3 tablespoons unsweetened applesauce, and chill the dough a little longer. Meringue powder contains egg white, so look for a plant based version.
Brands vary, so read every label. This recipe cannot be guaranteed safe for any specific allergy, especially a severe one.
Equipment Needed
- Paper templates and a ruler: Cut them from stiff paper so you can trace the same shapes every time.
- Rolling pin with guide rings: Even 1/4 inch thickness keeps all the pieces baking at the same speed.
- Pizza cutter: It cuts straighter lines than a knife and drags less in the dough.
- Piping bags with a small round tip: A zip bag with a snipped corner works if you have nothing else.
- Wire cooling rack: Air underneath the pieces stops the bottoms from softening.
Preparation
Cut your templates first: two long walls (6 by 4 inches), two gable ends (4 inches wide, 4 inches tall at the sides, rising to a 6 inch peak), and two roof panels (6 1/2 by 3 1/2 inches). Set an oven rack in the middle and heat the oven to 350°F (175°C). Measure all the dough ingredients before you start, and keep the butter at soft room temperature.
Step by Step Instructions
Step 1: Mix the dough
Whisk the flour, spices, baking soda, and salt in a bowl. In a larger bowl, beat the butter and brown sugar for 2 minutes, then mix in the molasses and egg. Stir in the dry mix until no flour streaks remain and the dough feels stiff but smooth. Wash your hands and tools after touching the raw egg.
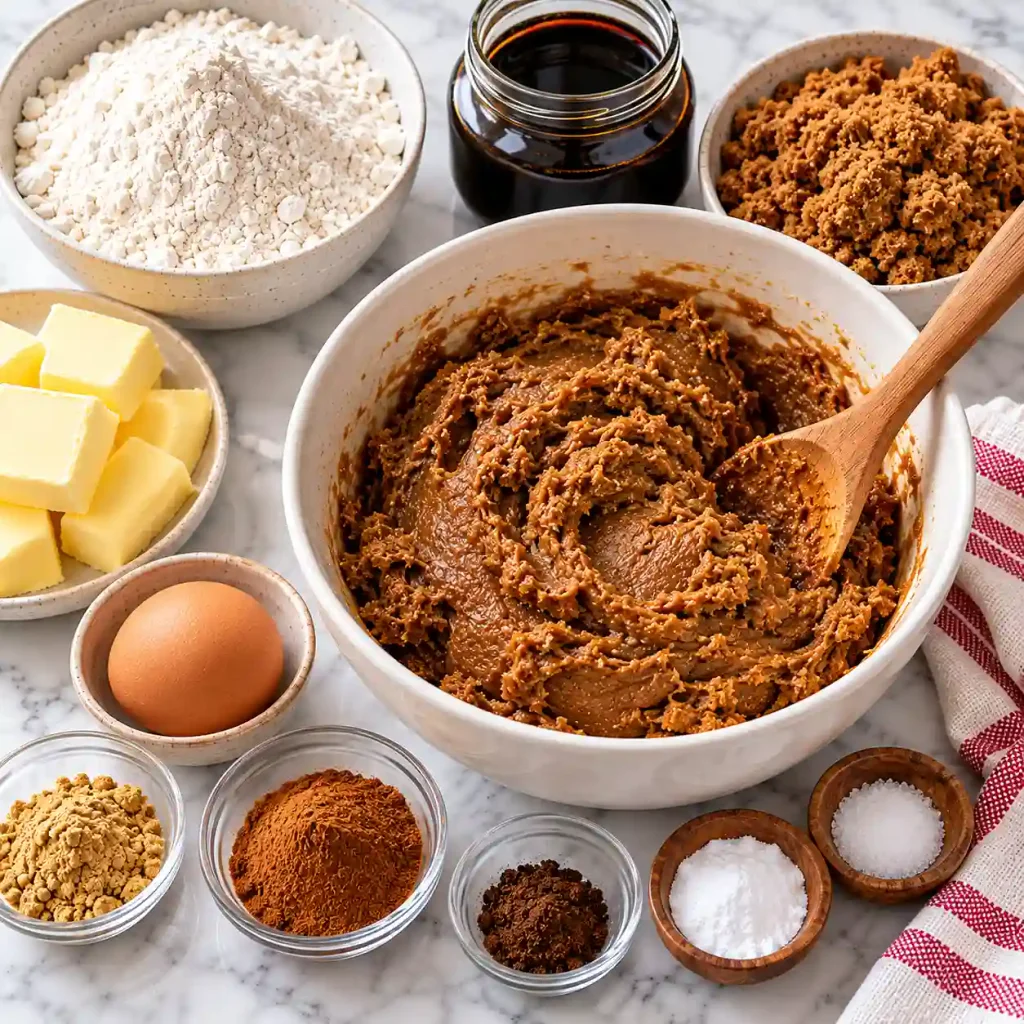
Chef’s Note: Stirring the flour in gently, rather than beating it, keeps the dough tender and stops it from becoming tough and elastic.
Step 2: Chill the dough
Split the dough into two flat discs and wrap each tightly. Refrigerate them for 1 hour, until firm enough to hold a fingerprint without sticking to your hand.
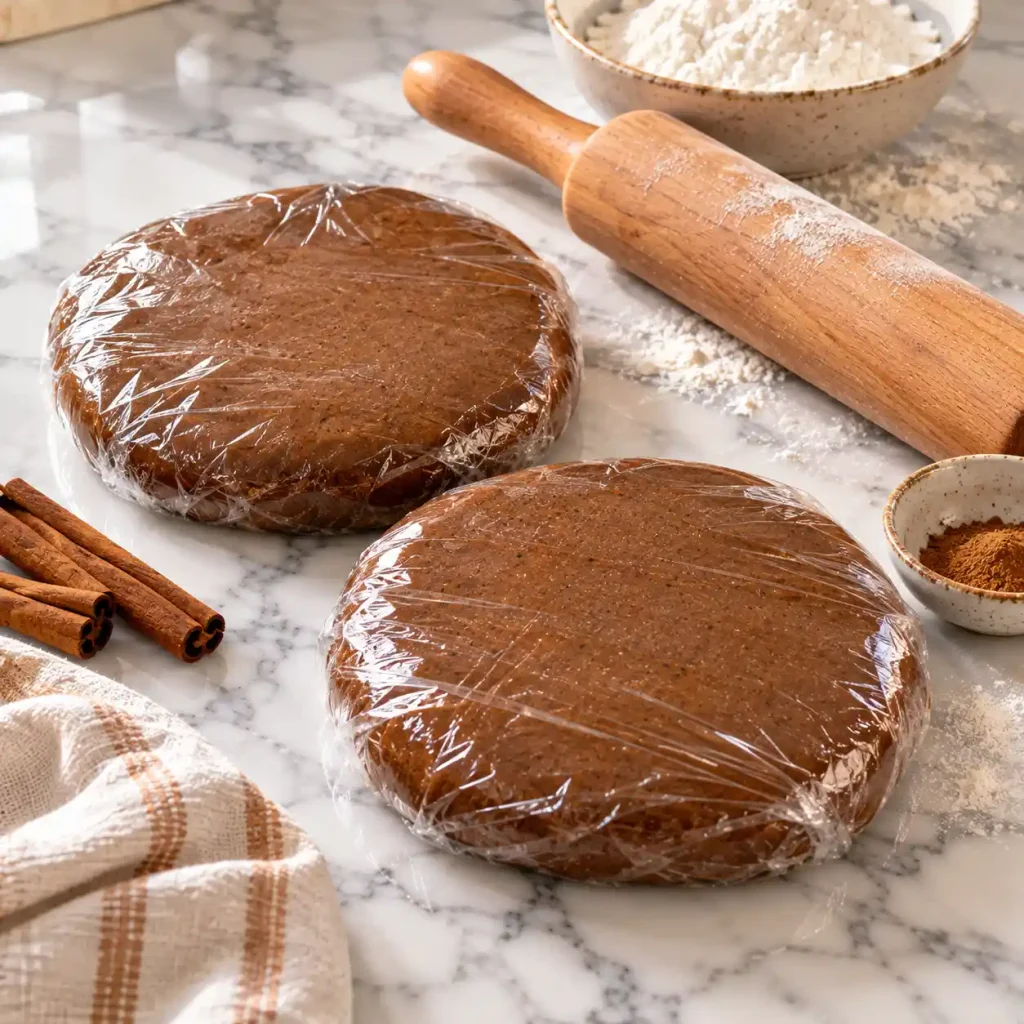
Chef’s Note: Cold butter melts slowly in the oven, which is what stops the walls from spreading and losing their sharp corners.
Step 3: Roll and cut
Roll one disc between two sheets of baking paper to 1/4 inch (6 mm) thick. Peel off the top sheet, lay a template on the dough, and cut around it with a pizza cutter. Cut all six pieces, then roll the scraps again for extras like a door or a chimney.
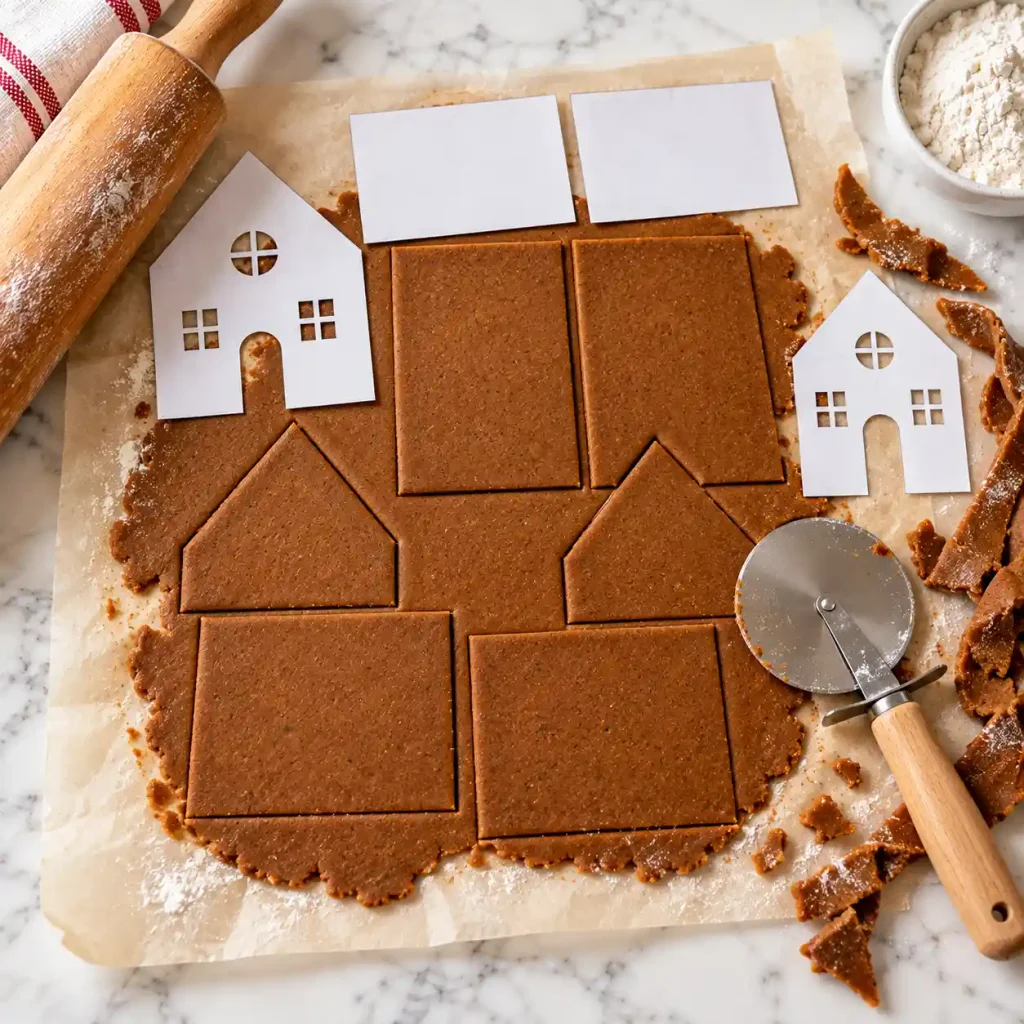
[AI IMAGE PROMPT: A metal pizza cutter slicing rolled gingerbread dough into wall panels on a white marble countertop, paper templates beside it, soft rolled dough with speckled spices, warm kitchen light, a fine dusting of flour on the surface, 45 degree food photography angle.]
[IMAGE PLACEHOLDER: alt-text: “Pizza cutter slicing rolled gingerbread dough into wall panels beside paper templates” | filename: “cutting_gingerbread_house_pieces.jpg” | orientation: horizontal]
Step 4: Bake the pieces
Slide the dough, still on its baking paper, onto a heavy baking sheet. Bake for 10 to 12 minutes, until the edges look deep brown and feel firm when pressed lightly. While the pieces are still warm, lay the templates on top and trim any puffed edges. Move them to a wire rack and leave them for at least 30 minutes.
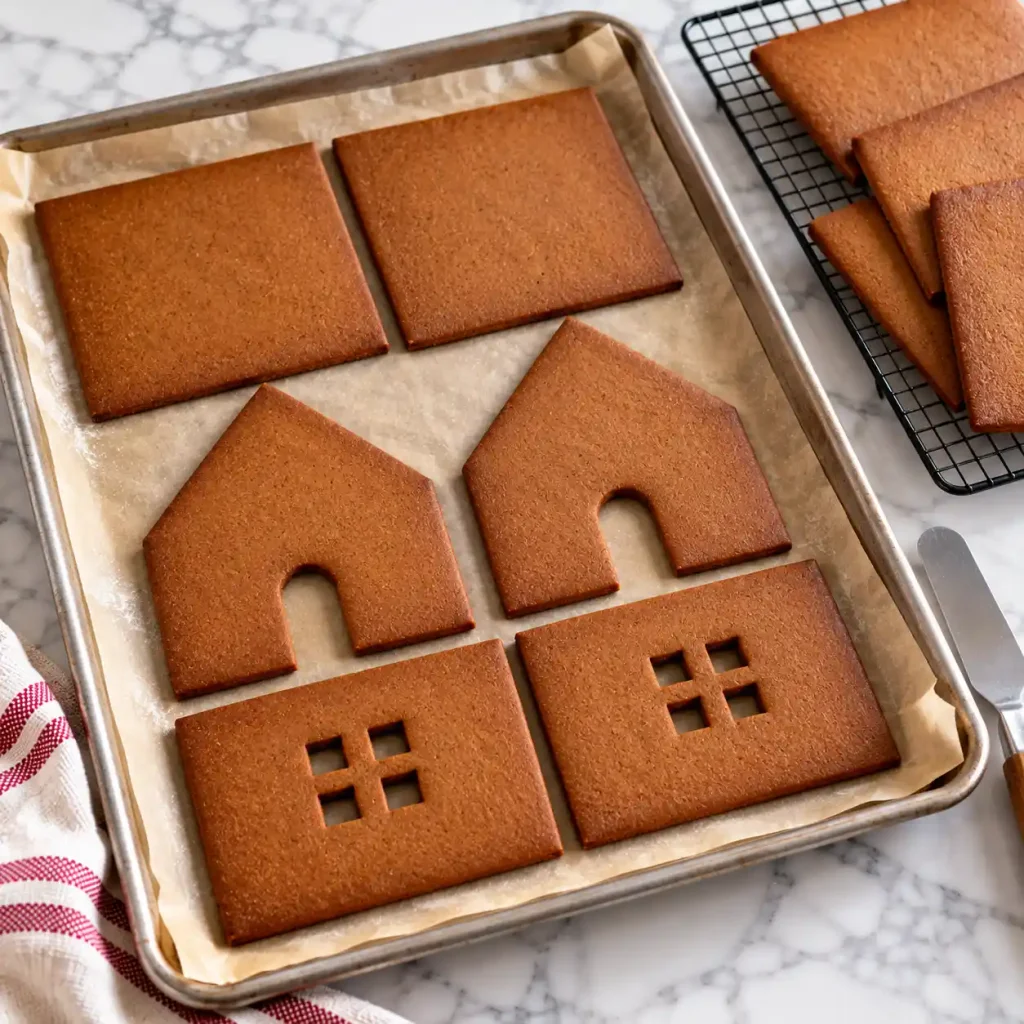
Chef’s Note: Trimming right out of the oven works because the dough is still soft enough to cut cleanly, and it fixes any shape drift for tight joins later.
Step 5: Mix the icing
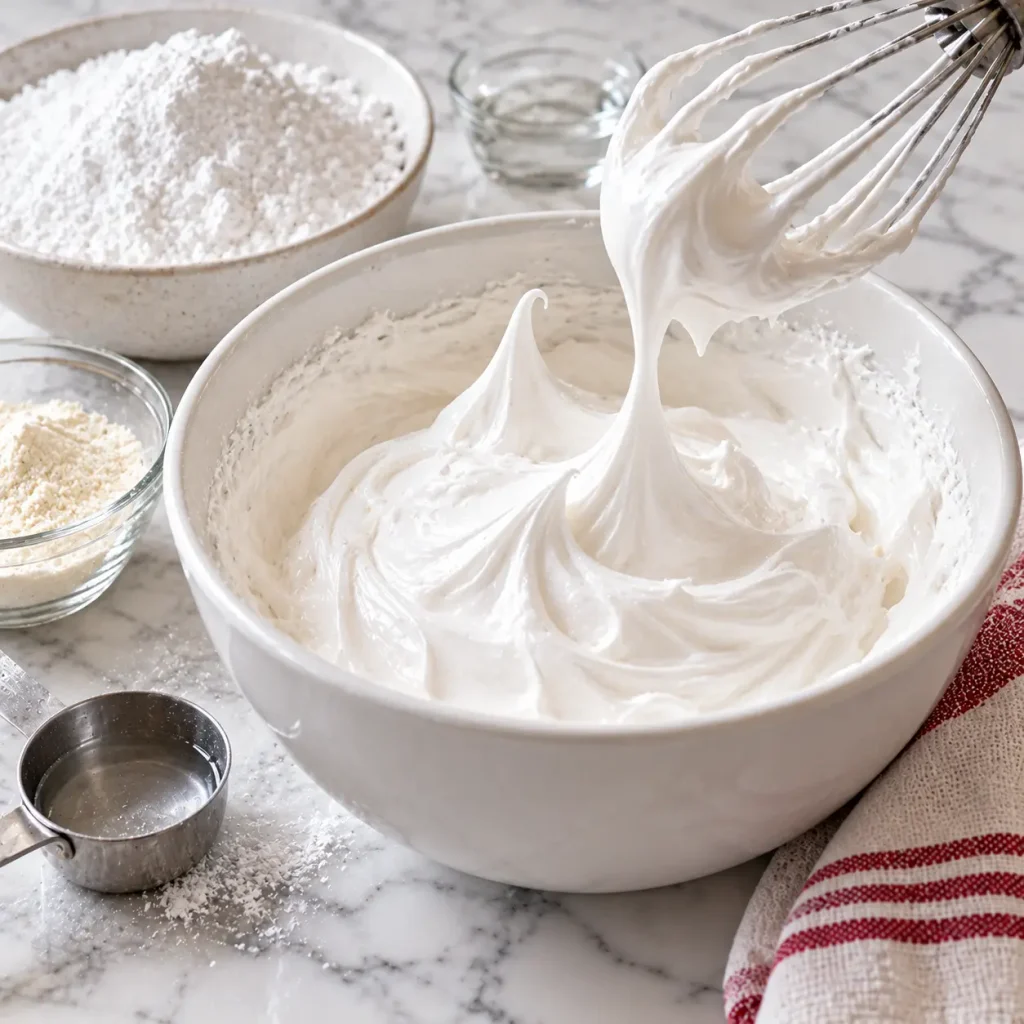
Beat the meringue powder with 5 tablespoons of warm water until foamy. Add the powdered sugar and beat on medium high for 4 to 5 minutes, until the icing forms stiff peaks that stand upright. Add the last tablespoon of water only if it feels too stiff to pipe. Keep the bowl covered with a damp towel, since icing forms a crust fast.
Step 6: Build the walls
Pipe a thick line of icing on the cake board and press one long wall into it. Pipe icing along the vertical edge, add a gable end, and repeat until all four walls form a box. Prop the walls with tall cans for 15 minutes while the icing firms up.
Chef’s Note: Icing that holds a peak acts like cement, so a thick, generous bead along every seam matters more than neat piping.
[AI IMAGE PROMPT: Piping thick white royal icing from a piping bag along the edge of a gingerbread wall standing on a white marble board, warm kitchen light, glossy ridges of icing, a small white ceramic bowl of extra icing behind, low 30 degree side angle.]
[IMAGE PLACEHOLDER: alt-text: “Piping white royal icing along the edge of a gingerbread wall on a white marble board” | filename: “piping_icing_gingerbread_house_walls.jpg” | orientation: vertical]
Step 7: Add the roof
Pipe a thick line of icing along the top edges of both gable ends and the tops of the long walls. Rest one roof panel in place, hold it for 30 seconds, then add the second. Pipe icing along the peak where the two panels meet and let the roof firm up for 15 minutes.
Step 8: Decorate
Cover the roof seam with a line of icing, then press cereal squares on the roof as shingles. Use gumdrops for a path, pretzel sticks for a fence, and peppermints as windows. Pipe icicles under the roof edge, then dust powdered sugar over everything for snow.
[AI IMAGE PROMPT: Hands pressing red and green pectin gumdrops onto a gingerbread house roof on a white marble board, small white ceramic dishes of candies and pretzel sticks nearby, warm kitchen light, glossy icing, a fine mesh sifter resting beside, top down flat lay angle.]
[IMAGE PLACEHOLDER: alt-text: “Pressing red and green gumdrops onto a gingerbread house roof beside dishes of candy” | filename: “decorating_gingerbread_house_with_gumdrops.jpg” | orientation: horizontal]
Expert Tips & Tricks
- Weigh your flour: A cup of flour can vary by 30 grams or more, and that extra flour makes cracked, dry pieces.
- My roof mistake: The first time I built one, I joined warm walls and watched the roof slide off within ten minutes. Now I wait for the full cooling time.
- Make ahead: Bake the pieces up to 7 days early and store them in an airtight container. Build on the day you want to decorate.
- Storage tip: Keep the finished house away from the stove and kettle, because steam softens the walls.
- Texture control: Bake 2 minutes less if you plan to eat the house, and 2 minutes more for a house meant to last all season.
- Time saver: Fill several piping bags with icing before the kids arrive, so decorating never stalls.
- Extra support: Slide spare cans or jars against the walls while the icing sets, then remove them gently after 15 minutes.
Quick tip: Draw your window and door shapes with a sharp knife before baking, so the pieces keep the cutouts clean and don’t crack when you cut them later.
Common Mistakes & Troubleshooting
| Problem | Why It Happens | How to Fix or Prevent It |
| Pieces spread and lose their shape | Dough was warm or too buttery | Chill the dough and the cut pieces for 10 minutes before baking |
| Walls lean or slide | Icing is too thin or pieces are warm | Beat icing to stiff peaks and cool pieces for 30 minutes |
| Roof slips off | Icing was not given time to firm | Prop the walls and wait 15 minutes before adding the roof |
| Pieces crack or feel crumbly | Too much flour or overbaked | Weigh the flour and bake just until the edges feel firm |
| Icing hardens in the bowl | Surface dried out | Keep it covered with a damp towel and stir before piping |
Storage, Reheating, Freezing, Make Ahead
Room temperature: A decorated house stays fresh for about 3 days for eating, or up to 2 weeks as a display piece, in a dry spot.
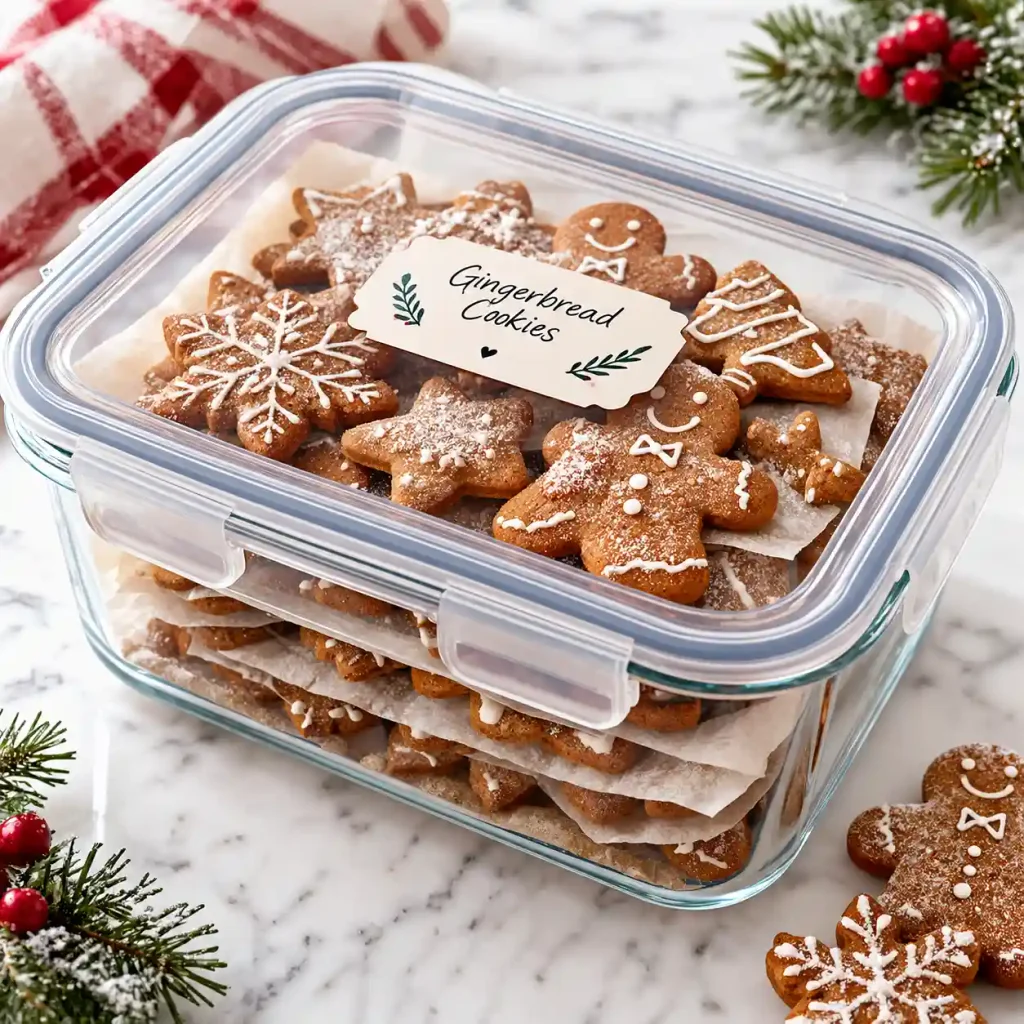
Baked pieces: Store in an airtight container for up to 1 week.
Freezer: Freeze baked, uncut pieces between sheets of baking paper for up to 2 months, and thaw them on the counter.
Dough: Refrigerate for up to 3 days, or freeze for 2 months and thaw overnight in the fridge.
Icing: Store in an airtight container in the refrigerator for up to 2 weeks and re beat before using.
My storage tip: write the baking date on the container with a piece of tape, so you never wonder how old the pieces are.
[AI IMAGE PROMPT: Gingerbread cookies layered between sheets of baking paper inside a clear glass storage container with a snap lid, a small handwritten label on top, white marble table, soft natural daylight, crisp spiced edges, lightly dusted with powdered sugar, 45 degree food photography angle.]
[IMAGE PLACEHOLDER: alt-text: “Gingerbread pieces layered in a clear glass container with a snap lid and handwritten label” | filename: “storing_gingerbread_house_pieces.jpg” | orientation: horizontal]
Variations & Substitutions
- Mild and kid friendly: Cut the ground ginger to 2 teaspoons and skip the cloves.
- Bold spice: Add 1/2 teaspoon black pepper and a pinch more ginger for a sharper bite.
- Chocolate: Replace 1/4 cup of the flour with unsweetened cocoa powder for a dark, rich wall.
- Citrus: Stir 1 tablespoon of orange zest into the butter for a bright, fresh finish.
- Gluten free: Use a 1 to 1 gluten free flour blend with xanthan gum, and chill the dough for 90 minutes.
- Mini houses: Halve every template and bake for 8 to 9 minutes to make individual houses.
Serving Suggestions
- Serve the house on a snowy looking table with powdered sugar and a few candy canes. See [INTERNAL LINK: Christmas table decoration ideas].
- Pair slices of the roof or walls with hot chocolate. [INTERNAL LINK: hot chocolate recipe]
- Offer spiced tea or warm milk for a cozy afternoon treat.
- Break the house into pieces after the holidays and share them with milk.
- Add small fruit like clementines on the side to balance the sweetness.
- Bake the leftover dough scraps into cookies and arrange them beside the house. [INTERNAL LINK: Christmas cookie box ideas]
Nutrition Information
Serving size: 1/12 of the house, including icing and candy. Servings per recipe: 12.
| Nutrient | Amount |
| Calories | 460 |
| Protein | 4 g |
| Carbohydrates | 94 g |
| Fiber | 1 g |
| Sugar | 62 g |
| Fat | 8 g |
| Saturated Fat | 5 g |
| Cholesterol | 36 mg |
| Sodium | 215 mg |
Notable micronutrients: about 1.5 mg of iron from the molasses, plus small amounts of calcium and potassium. These values are estimates and will shift depending on the brands you use and how you measure.
Why This Gingerbread House Recipe Works
The dough uses less butter and sugar than a typical cookie dough, so it spreads less in the oven. That keeps the edges sharp, and sharp edges make walls that meet cleanly. The small amount of baking soda tenderizes the dough just enough without making it puff, which would warp the pieces.
Molasses attracts moisture, which keeps the baked pieces from turning brittle too quickly, while still baking firm enough to stand. Chilling the dough keeps the butter solid until the oven sets the structure around it.
The icing works through simple science. Meringue powder contains egg white protein, and when the water evaporates, the protein and sugar set into a hard, glue like shell. That is why thick, stiff icing holds a wall together, and why thin icing never will.
Frequently Asked Questions
FAQ source note: These questions follow typical question patterns that bakers search for, not a live search.
Can I make a gingerbread house ahead of time?
Yes. Bake the pieces up to 7 days before and keep them in an airtight container at room temperature. You can also freeze baked pieces for 2 months. Moisture is the main enemy of any gingerbread house. Build it 1 or 2 days before you need it so the icing has time to harden fully, then keep it in a dry spot away from the stove or kettle.
Why did my gingerbread house walls collapse?
Most collapses come from warm pieces, thin icing, or no support while the icing sets. Let every wall cool for at least 30 minutes, beat your icing until it holds a stiff peak, and prop the walls with tall cans for 15 minutes after joining them. A thick bead of icing along each seam also adds strength, so do not be shy with it.
What can I use instead of molasses?
Dark corn syrup is the closest swap, used in the same amount. Honey also works, though it gives a lighter color and a milder taste, and the dough may feel a bit softer, so chill it a little longer. Maple syrup is too thin and makes pieces spread. Avoid blackstrap molasses, which tastes bitter and can make your gingerbread house pieces darker than you want.
How do I know the pieces are baked enough?
Look at the edges first. They should be a shade darker than the center and feel firm when you press lightly with a fingertip. The center may still seem slightly soft while hot, but it firms up as the pieces cool on a rack. If a piece bends when you lift it after cooling, return it to the oven for 2 more minutes.
Is this gingerbread house safe for people with allergies?
This recipe contains wheat, dairy, and egg, so it is not suitable as written for anyone avoiding those. The substitutions in the allergen section help, but labels on butter alternatives, meringue powder, pretzels, and cereal differ between brands. Meringue powder in particular contains egg white. Check each one, and do not rely on this recipe as guaranteed safe for any specific allergy, especially a severe one.
Can I eat a gingerbread house after it has been decorated?
Yes, if you built it with clean hands and food safe decorations, and it has not sat out for more than a week or so. A house kept uncovered for weeks turns very hard and attracts dust, so treat it as decor after that point. For best flavor, eat it within 3 days, or bake extra cookies from the same dough.

[AI IMAGE PROMPT: Eye level view of a finished gingerbread house on a white ceramic cake stand, white marble table, snowy royal icing icicles, glossy gumdrop path, pretzel fence, soft natural daylight, tender spiced walls, tall vertical composition, 2:3 ratio, soft blurred background.]
[IMAGE PLACEHOLDER: alt-text: “Tall view of a finished gingerbread house with icicles, gumdrop path, and pretzel fence on a white cake stand” | filename: “gingerbread_house_final_plated_shot.jpg” | orientation: vertical]
Conclusion
A good gingerbread house comes down to patience more than skill. Cool pieces, thick icing, and a little waiting time between steps do most of the work, and the decorating is where you can relax and play. Skip the pressure to make it look like a magazine photo.
The year I finally stopped rushing, my house stayed upright for the entire holiday season, and nobody even noticed the crooked roof. Bake the pieces a few days early, invite a few helpers on build day, and let the candy go wherever it wants. The best houses are rarely the neatest ones.
If you loved this recipe, save it to your Christmas baking Pinterest board so you can find it easily later!
Gingerbread House
Ingredients
Method
- Instructions:
- Cut paper templates for two long walls, two gable ends, and two roof panels, then heat the oven to 350°F (175°C).
- Stir together the flour, spices, baking soda, and salt. Beat the butter and brown sugar for 2 minutes, add the molasses and egg, then mix in the dry ingredients until smooth and stiff.
- Shape the dough into two flat discs, wrap them, and refrigerate for 1 hour.
- Roll each disc to 1/4 inch (6 mm) thick between baking paper sheets. Cut the pieces using the templates.
- Bake the pieces on a heavy baking sheet for 10 to 12 minutes, until the edges are deep brown and firm. Trim while warm, then cool on a rack for 30 minutes.
- Whip the meringue powder with 5 tablespoons of warm water, add the powdered sugar, and beat for 4 to 5 minutes until stiff peaks hold.
- Glue the four walls to the cake board with thick icing, and prop them for 15 minutes.
- Attach the roof panels with more icing, wait 15 minutes, then decorate with cereal shingles, gumdrops, pretzels, peppermints, and powdered sugar.
Notes
- Bake the pieces up to 7 days ahead and store them airtight.
- Dark corn syrup can replace molasses in the same amount.
- Keep the finished house in a dry place, away from steam.
- Store extra icing in the refrigerator for up to 2 weeks.