Easy White Chicken Chili in 40 Minutes

Steam curls off the pot the second you lift the lid, and the smell of cumin and roasted chiles hits before anything else. This is the kind of dinner that makes a kitchen feel warm in about the time it takes to fold laundry.
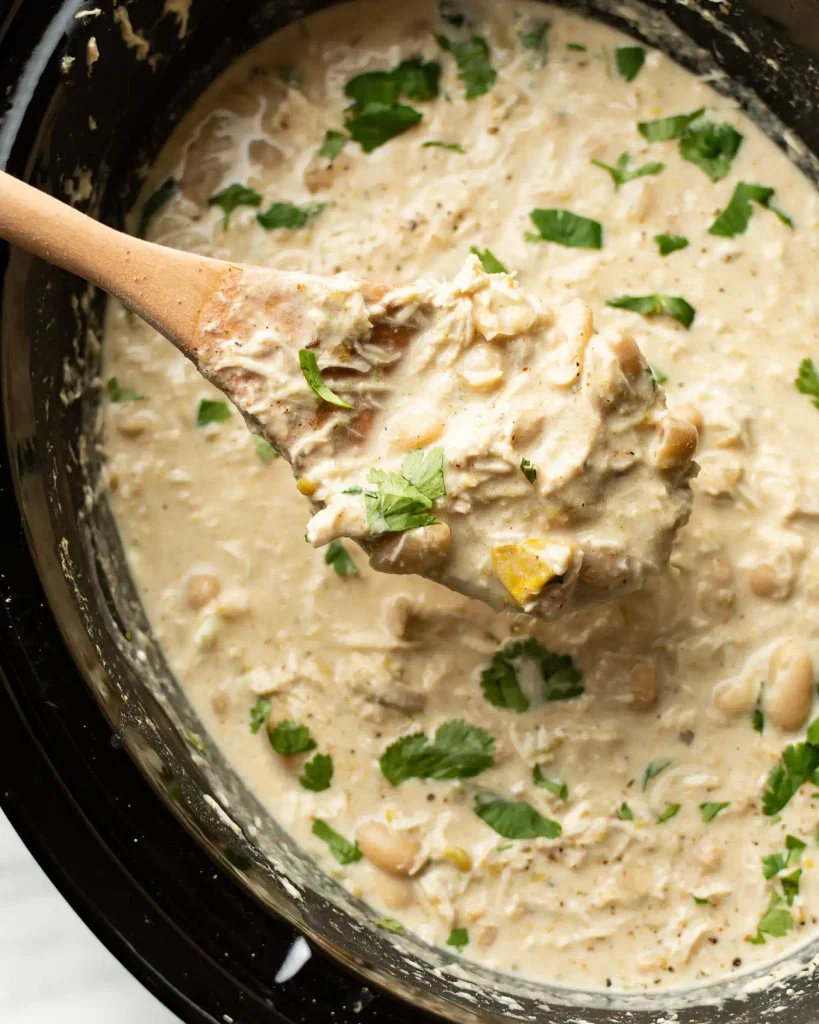
This version leans on rotisserie chicken and canned white beans, so most of the work is stirring and tasting. You get a full pot of white chicken chili in around 40 minutes, with a creamy broth that comes from pureed beans instead of heavy cream or a flour roux.
Why You’ll Love This Recipe
- One pot, minimal cleanup. Everything cooks in a single Dutch oven or soup pot, so you’re not juggling three pans on a weeknight.
- Naturally creamy without cream. Mashing a portion of the beans thickens the broth, which keeps the dish lighter than versions loaded with cream cheese.
- Rotisserie chicken shortcut. Using a store-bought rotisserie chicken cuts your active cooking time down to about 15 minutes.
- Freezer-friendly in real portions. This chili holds its texture well after freezing, unlike cream-based soups that can separate.
- Adjustable heat level. The spice comes from diced green chiles and cumin, so you can scale it up or down without changing the base recipe.
Ingredient Selection Tips
Look for canned white beans (cannellini or great northern) with a firm bite rather than a mushy texture; give the can a light shake and you should hear individual beans rather than a solid thud. For the green chiles, mild canned diced chiles work well for most households, but a can of fire-roasted variety adds a smokier edge if you have it. If you’re shredding your own chicken instead of using rotisserie, chicken thighs stay juicier through the simmer than breast meat.
Recipe Snapshot
| Servings | Difficulty | Course | Cuisine | Prep Time | Cook Time | Total Time | Calories |
| 6 | Easy | Main Course | Tex-Mex | 15 minutes | 25 minutes | 40 minutes | 385 kcal |
Ingredients
For the base:
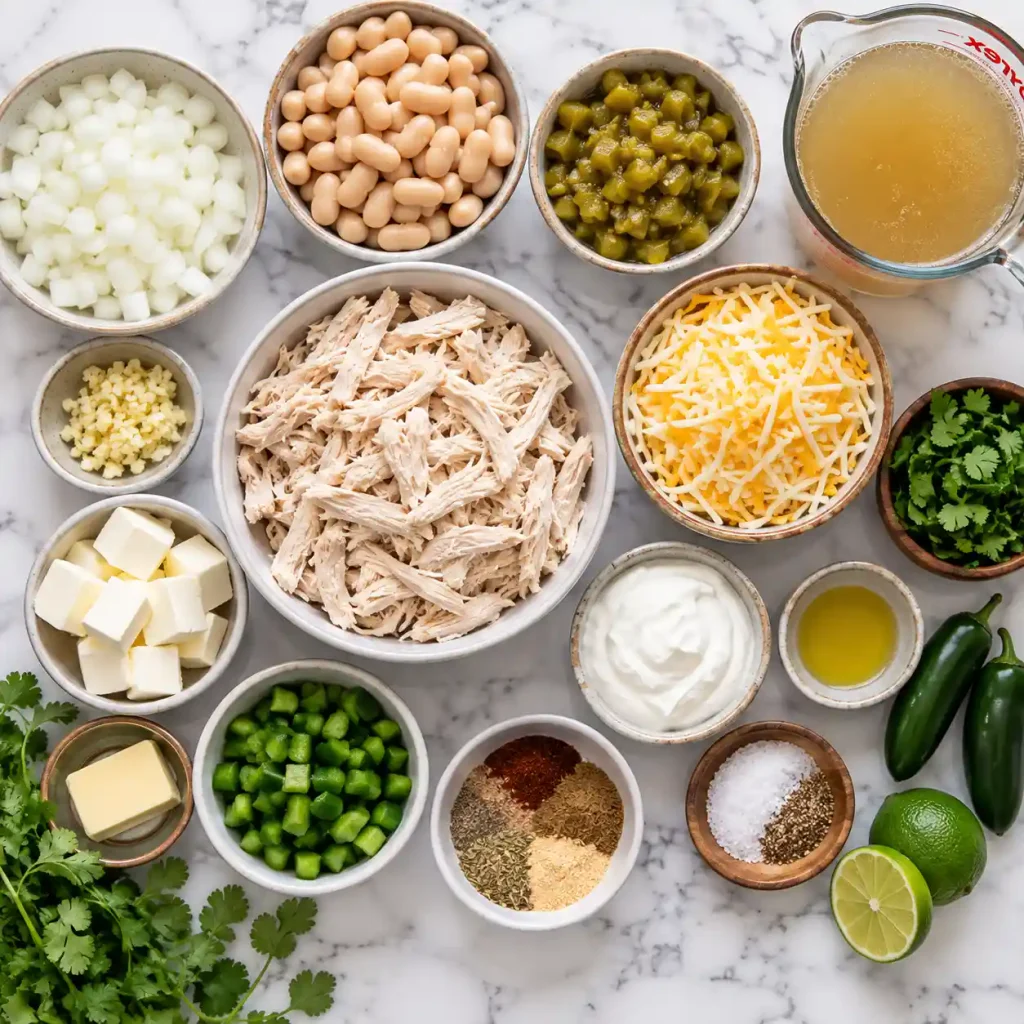
- 2 tablespoons olive oil
- 1 medium yellow onion, diced
- 3 garlic cloves, minced — fresh garlic gives a sharper bite than the jarred version here, since it cooks for a shorter time
- 1 tablespoon ground cumin
- 1 teaspoon dried oregano
- 1/2 teaspoon ground coriander
- 1/4 teaspoon cayenne pepper (optional, for heat)
- 4 cups low-sodium chicken broth
- 2 (15-ounce) cans white beans (cannellini or great northern), divided
- 2 (4-ounce) cans diced green chiles
- 3 cups shredded cooked chicken (rotisserie chicken works well)
- 1 cup frozen or fresh corn kernels
For serving:
- 1/2 cup shredded Monterey Jack cheese
- 1/4 cup chopped fresh cilantro
- 1 lime, cut into wedges
- Sliced jalapeño (optional)
Read Also: Breakfast Casserole
Recipe Timing
Prep runs about 15 minutes, mostly spent dicing the onion and shredding chicken if you haven’t done that ahead. The chili itself only needs 25 minutes on the stove once everything hits the pot, which is enough time for the beans and chiles to soften into the broth without turning the chicken stringy.
Allergen & Dietary Disclosure
This recipe contains dairy from the cheese topping; leave it off or swap in a dairy-free shredded cheese alternative if needed. The broth itself is naturally gluten-free, but double-check your chicken broth label since some brands add wheat-based thickeners. If anyone eating has a severe food allergy, read every label carefully rather than relying on this note alone.
Equipment Needed
- Dutch oven or heavy-bottomed soup pot — even heat distribution keeps the base from scorching while it simmers.
- Potato masher or large fork — used right in the pot to mash a portion of the beans for thickness.
- Box grater — freshly grated cheese melts smoother into the hot chili than pre-shredded bags, which are coated in anti-caking starch.
- Kitchen shears — the fastest way to shred rotisserie chicken straight off the bone.
Preparation
Dice the onion and mince the garlic before you turn on the stove, since the cumin and spices move fast once the pan is hot. Drain and rinse one can of the beans, leaving the second can with its liquid intact for a thicker broth later. Shred the chicken into bite-sized pieces if it isn’t already, and measure out the corn.
Step-by-Step Instructions
Step 1: Build the aromatic base Warm the olive oil in a Dutch oven over medium heat, then add the diced onion. Cook for 4 to 5 minutes, stirring occasionally, until the pieces turn soft and slightly translucent at the edges.
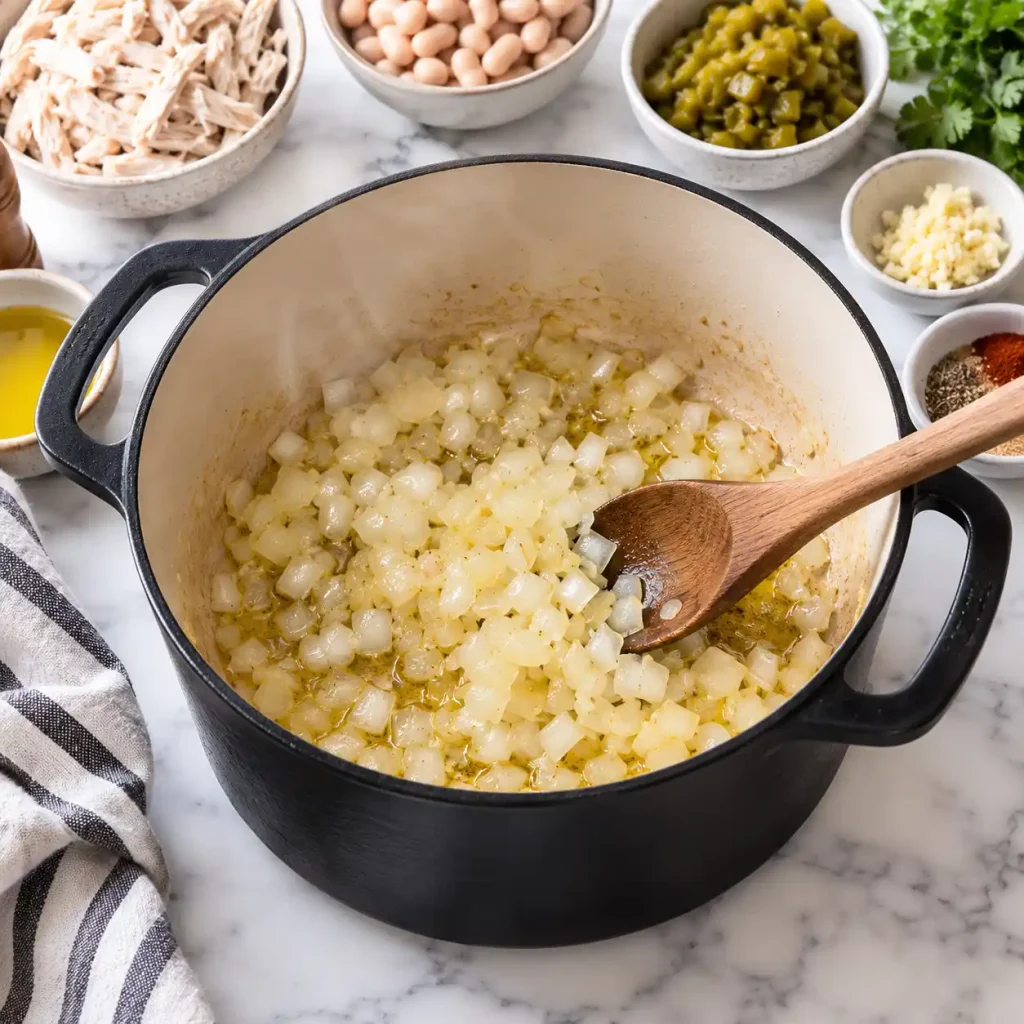
Step 2: Bloom the spices Stir in the minced garlic, cumin, oregano, coriander, and cayenne if using. Cook for about 30 seconds, just until the spices smell toasted rather than raw.
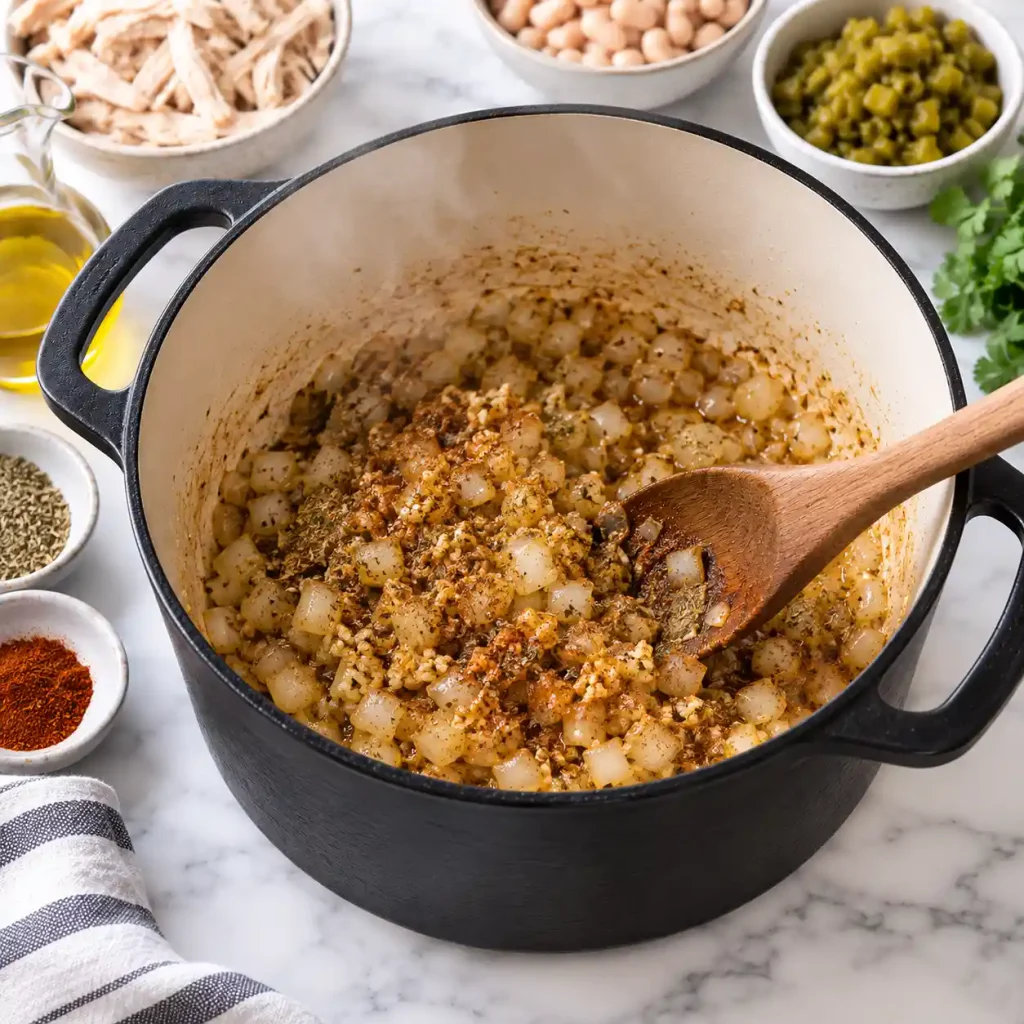
Chef’s Note: Cooking the spices in oil for even 30 seconds before adding liquid pulls out more flavor than dumping them straight into broth. This is the same principle behind toasting whole spices before grinding them.
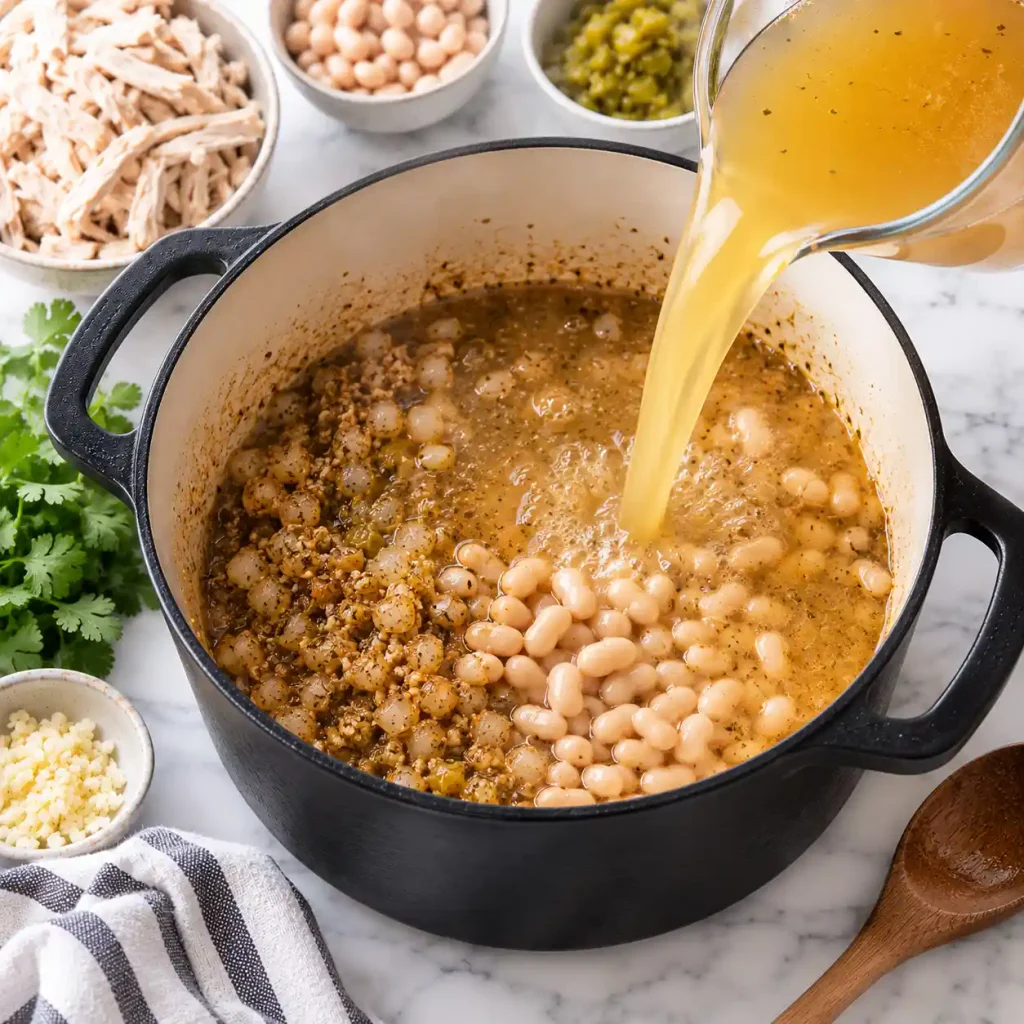
Step 3: Add the broth and one can of beans Pour in the chicken broth along with the undrained can of white beans. Bring the pot to a gentle simmer over medium-high heat, then reduce to medium.
Step 4: Mash for thickness Use a potato masher or fork to mash the beans directly in the pot, breaking most of them down while leaving some texture. Continue simmering for 5 minutes so the broth starts to thicken.
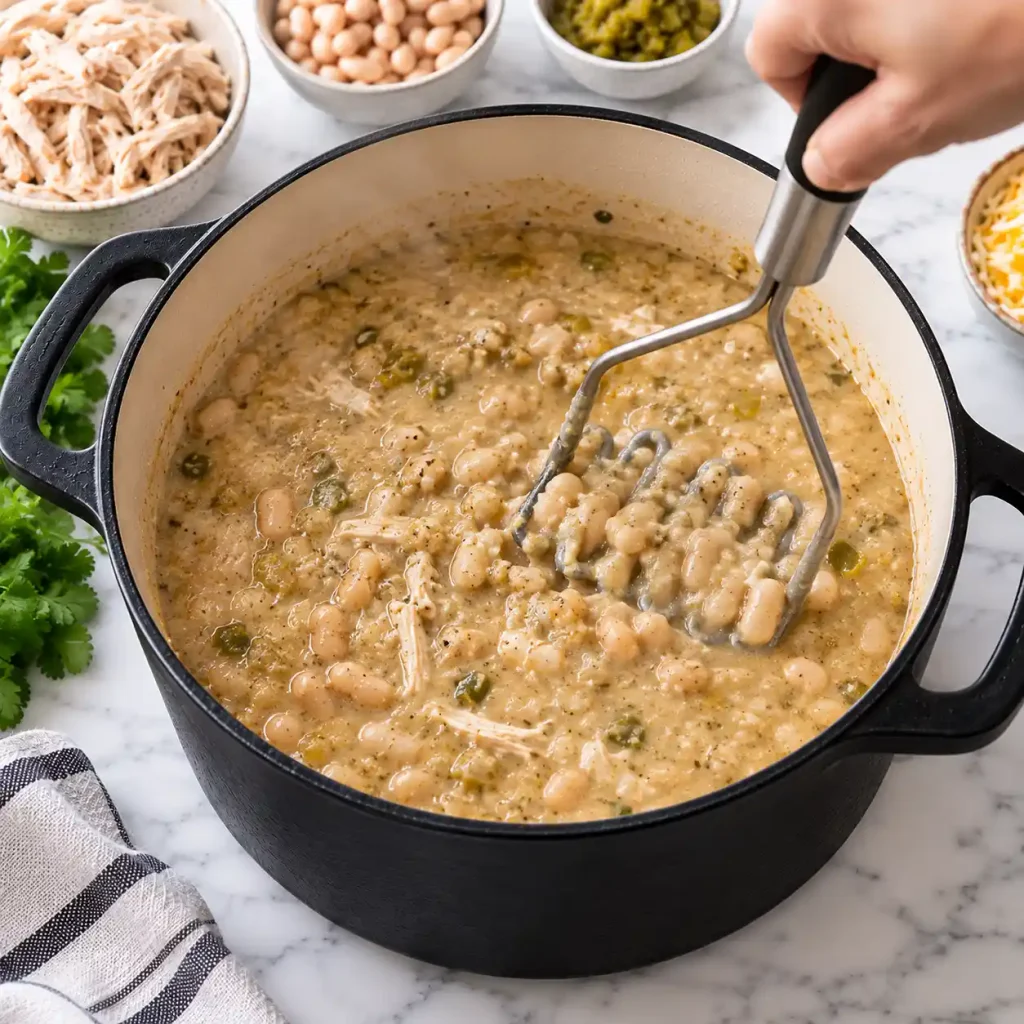
Chef’s Note: Mashing beans instead of adding cream or a cornstarch slurry gives the broth body without diluting the chili’s flavor or adding extra fat.
Step 5: Add the remaining ingredients Stir in the second, drained can of beans, both cans of green chiles, the shredded chicken, and the corn. Return the pot to a gentle simmer.
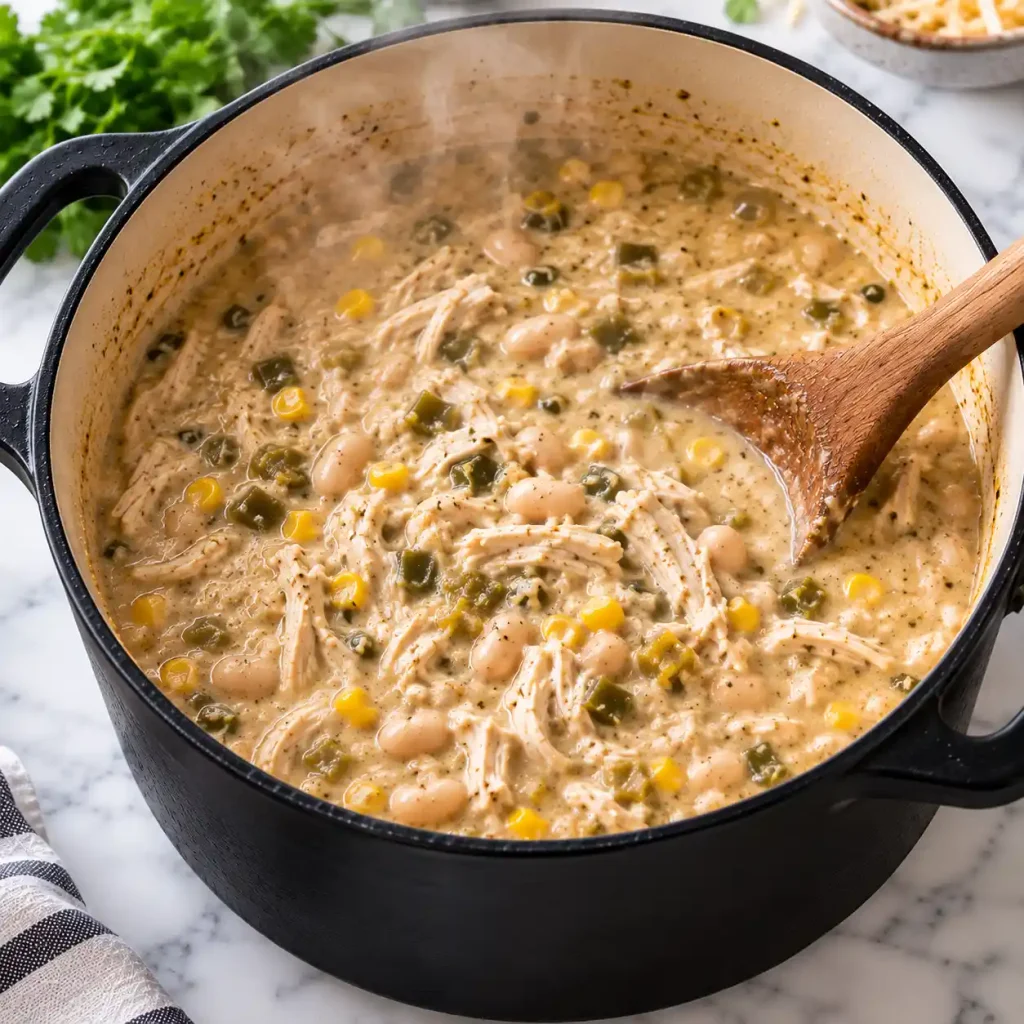
Step 6: Simmer to finish Let the chili simmer uncovered for 15 to 20 minutes, stirring every few minutes, until the broth has thickened to coat the back of a spoon and the corn is tender. Since the chicken is already cooked, this step is about developing flavor and reducing the liquid rather than cooking any raw protein through.

Chef’s Note: If the chili gets thicker than you’d like as it sits, a splash of broth loosens it back up without watering down the flavor.
Step 7: Taste and adjust Taste the broth and add salt as needed, since canned beans and broth vary in sodium. Add extra cayenne here if you want more heat now that the flavors have melded.

Step 8: Serve hot Ladle the chili into bowls and top with shredded cheese, cilantro, and a squeeze of lime while it’s still steaming, so the cheese melts on contact.

Read Also: Buffalo Chicken Dip
Expert Tips & Tricks
- Shred chicken while it’s warm. Warm rotisserie chicken pulls apart with a fork far more easily than chicken that’s gone cold in the fridge.
- Don’t skip mashing the beans. The first time I made this, I left all the beans whole and ended up with a thin, watery broth instead of the creamy texture the dish is known for.
- Make the base a day ahead. The chili actually tastes better on day two, once the spices have had time to settle into the broth.
- Freeze in flat bags. Laying portions flat in freezer bags lets them thaw faster and stack more efficiently than round containers.
- Toast extra spice if using dried chiles. A quick 20-second toast in the dry pan before adding oil deepens flavor if you’re using whole dried chiles instead of canned.
- Grate your own cheese. Pre-shredded cheese can turn slightly grainy when it hits hot broth, while freshly grated cheese melts into smooth ribbons.
Common Mistakes & Troubleshooting
| Problem | Why It Happens | How to Fix or Prevent It |
| Broth stays thin and watery | Beans weren’t mashed, or too much broth was added at once | Mash more of the beans directly in the pot, or simmer uncovered longer to reduce the liquid |
| Chicken turns stringy or dry | Chili simmered too long after the chicken was added | Add pre-cooked chicken only in the last 15 to 20 minutes and keep the heat at a gentle simmer, not a boil |
| Chili tastes flat | Spices weren’t bloomed in oil, or salt wasn’t adjusted at the end | Toast spices briefly before adding liquid, and always taste and season again right before serving |
| Cheese topping turns clumpy | Cheese was added to chili that had cooled too much | Serve the chili while still hot and add cheese right before eating, not during cooking |
| Too spicy for the table | Extra cayenne or a spicier can of chiles was used without tasting first | Start with mild green chiles and add cayenne in small increments, tasting as you go |
Storage, Reheating, Freezing, Make-Ahead
Refrigerator: Store cooled chili in an airtight container for up to 4 days. The flavor actually improves after the first day.
Freezer: Freeze in airtight, freezer-safe containers or bags for up to 3 months. Leave about an inch of headroom in containers since liquids expand as they freeze.
Reheating: Warm gently on the stovetop over medium-low heat, stirring occasionally, or microwave in 60-second intervals. Add a splash of broth if the chili has thickened too much in the fridge.
Make-Ahead: The spiced onion base can be made up to 2 days in advance and refrigerated separately, then combined with the remaining ingredients when you’re ready to finish the dish.
A tip from my own kitchen: I portion leftovers into single-serving containers right after cooking, since the chili reheats more evenly in smaller batches than as one large block.
[AI IMAGE PROMPT: Overhead shot of labeled glass meal-prep containers filled with white chicken chili, neatly stacked on a light wood counter, soft natural daylight, top-down flat lay angle, minimal styling] [IMAGE PLACEHOLDER — alt-text: “Labeled containers of white chicken chili ready for the freezer” | filename: “white-chicken-chili-storage-containers.jpg” | orientation: horizontal]
Variations & Substitutions
- Spicy version: Add a diced jalapeño with the onion and double the cayenne for a sharper heat throughout the broth.
- Kid-friendly version: Skip the cayenne entirely and use mild green chiles, keeping the cumin and oregano for flavor without heat.
- Vegetarian version: Swap the chicken for an extra can of white beans and use vegetable broth instead of chicken broth.
- Slow cooker version: Combine everything except the corn and cheese in a slow cooker on low for 6 hours, then stir in corn during the last 20 minutes.
- Extra creamy version: Stir in 2 ounces of softened cream cheese at the end for a richer, silkier broth.
Serving Suggestions
- Serve over a scoop of white rice to soak up the broth.
- Pair with warm cornbread or flour tortillas on the side.
- Top with sliced avocado or a dollop of sour cream for extra richness.
- Add a simple side salad with lime vinaigrette to balance the richness of the chili.
- Serve alongside [INTERNAL LINK: homemade cornbread recipe] for a complete meal.
- A cold Mexican-style lager or sparkling limeade pairs well with the warm spice.
Nutrition Information
Nutrition values are estimates only and will vary depending on the specific brands and measuring methods used.
Serving size: approximately 1.5 cups | Servings per recipe: 6
| Nutrient | Amount |
| Calories | 385 kcal |
| Protein | 32g |
| Carbohydrates | 34g |
| Fiber | 8g |
| Sugar | 4g |
| Fat | 13g |
| Saturated Fat | 4g |
| Cholesterol | 75mg |
| Sodium | 680mg |
This chili is a solid source of fiber thanks to the white beans, and the chicken keeps the protein count high relative to the calories.
Why This Recipe Works
The creaminess in this chili comes entirely from technique, not added dairy. Mashing a portion of the white beans releases their starch directly into the broth, which thickens the liquid the same way a bean puree thickens many Southwestern soups. This means you get a rich mouthfeel without relying on cream or a butter-and-flour roux.
Blooming the ground spices in oil before adding any liquid matters more than most home cooks expect. Cumin, coriander, and oregano all contain flavor compounds that dissolve into fat far more readily than into water, so that brief 30-second step in hot oil pulls more flavor out of the same amount of spice.
Using already-cooked chicken and adding it late in the simmer protects the texture. Chicken that’s already cooked only needs to warm through and absorb flavor, so a long simmer at that stage just toughens the muscle fibers instead of adding anything useful.
Read Also: Chicken Tortilla Soup
Frequently Asked Questions
FAQ Source Note: The following questions reflect common patterns typically seen in searches and forum discussions around white chicken chili, based on general and commonly known search behavior rather than a specific live source.
Can I make white chicken chili ahead of time?
Yes, and it often tastes better the next day once the spices have had time to settle into the broth. Store it in an airtight container in the refrigerator for up to 4 days, and reheat gently on the stovetop with a splash of broth if it has thickened.
Why is my white chicken chili too thin?
This usually happens when the beans weren’t mashed enough to release their starch into the broth. Mash more of the beans directly in the pot with a fork or masher, or let the chili simmer uncovered for a few extra minutes to reduce the liquid.
Can I use dried beans instead of canned?
You can, though you’ll need to soak and cook them separately before adding them to the chili, since raw dried beans won’t soften enough during the chili’s short simmer time. About 1.5 cups of cooked dried beans replaces one standard can.
How do I know when the chicken is fully heated through?
Since the chicken is already cooked before it goes into the pot, you’re really just checking that it’s steaming hot throughout, which typically takes 15 to 20 minutes of gentle simmering. An instant-read thermometer should show at least 165°F if you want to confirm.
Is white chicken chili gluten-free?
The base ingredients are naturally gluten-free, but always check your specific chicken broth brand, since some varieties include wheat-based thickeners or flavor additives. Cross-check any packaged corn or beans as well if you’re cooking for someone with celiac disease.
Can I freeze white chicken chili?
Yes, it freezes well for up to 3 months in an airtight, freezer-safe container. Leave some headroom in the container since the liquid expands as it freezes, and thaw overnight in the refrigerator before reheating.
What can I substitute for green chiles?
A small diced poblano or Anaheim pepper, roasted and peeled, works as a fresh substitute for canned green chiles and adds a similar mild heat with a slightly smokier flavor.
[AI IMAGE PROMPT: Beautifully plated bowl of white chicken chili with melted cheese, fresh cilantro, and a lime wedge on the rim, rustic ceramic bowl, dark wood table, warm side lighting, 45-degree food photography angle, steam visible] [IMAGE PLACEHOLDER — alt-text: “Final plated bowl of white chicken chili garnished with cheese and lime” | filename: “white-chicken-chili-final-bowl.jpg” | orientation: horizontal]
Conclusion
White chicken chili earns its place in a weeknight rotation because it delivers a creamy, well-seasoned pot of food without much hands-on effort. Once you’ve made it once, you’ll notice how easily it adapts to whatever heat level or toppings your household prefers.
I keep coming back to this version specifically because the mashed-bean method means one less can of cream cheese to buy and one less thing to worry about curdling. It’s a dependable pot of white chicken chili you can make again without checking the recipe twice.
If you loved this recipe, save it to your comfort food Pinterest board so you can find it easily later!

Easy White Chicken Chili
Ingredients
Method
- Instructions:
- Sauté the diced onion in olive oil over medium heat for 4 to 5 minutes, until soft.
- Add garlic and spices, cooking for about 30 seconds until fragrant.
- Pour in the broth and one undrained can of beans, then bring to a simmer.
- Mash the beans in the pot until the broth thickens slightly, about 5 minutes.
- Stir in the second can of drained beans, green chiles, shredded chicken, and corn.
- Simmer uncovered for 15 to 20 minutes, stirring occasionally, until thickened.
- Season with salt to taste and adjust spice level as desired.
- Ladle into bowls and top with cheese, cilantro, and lime juice before serving.
Notes
- Leftovers keep in the refrigerator for up to 4 days.
- Freezes well for up to 3 months in an airtight container.
- Swap chicken broth and beans for a vegetarian version.
- Add jalapeño for extra heat.