
Easy Pizza Dough Recipe with 5 Simple Ingredients

The first time your dough puffs up under a towel and fills the kitchen with that warm, yeasty smell, ordering delivery starts to feel pointless. That smell is where a good pizza night really begins, and all it takes is a bowl and a spoon.
This pizza dough recipe uses five pantry staples and takes 2 hours and 5 minutes from first stir to bubbling crust, but only about 15 of those minutes need your hands. The dough is soft enough to stretch without a fight, yet strong enough to carry a heavy pile of toppings. It bakes into a crisp bottom, a chewy middle, and the airy, blistered edge you usually only get at a pizzeria. You can knead it by hand or in a stand mixer, and the steps below cover both.

Why You’ll Love This Pizza Dough Recipe
- Only 5 ingredients: Flour, water, yeast, salt, and olive oil are all you need, so there is no special shopping trip.
- Mostly hands off: You work for about 15 minutes, and the dough does the rest while it rises.
- Real pizzeria texture: A hot oven and a well hydrated dough give you a crisp base with a chewy, airy rim.
- Makes two pizzas: One batch gives you two 12 inch crusts, so you can bake one tonight and save the other dough ball.
- Flexible for planning: You can use it the same day, or park it in the fridge for up to 3 days.
Ingredient Selection Tips
Bread flour makes the biggest difference here. Look for a protein level around 12 to 13 percent on the label, since that extra protein builds the stretchy, chewy structure pizza needs. Check the date on your instant yeast, because old yeast is the most common reason dough refuses to rise. Store opened yeast in the fridge. For the oil, a mild extra virgin olive oil works well, and fine salt dissolves more evenly into the dough than coarse flakes.
Quick Tip: If you only have a measuring cup, spoon the flour into it and level the top with a knife. Scooping straight from the bag packs in extra flour and makes the dough dry.
Pizza Dough Recipe Ingredients
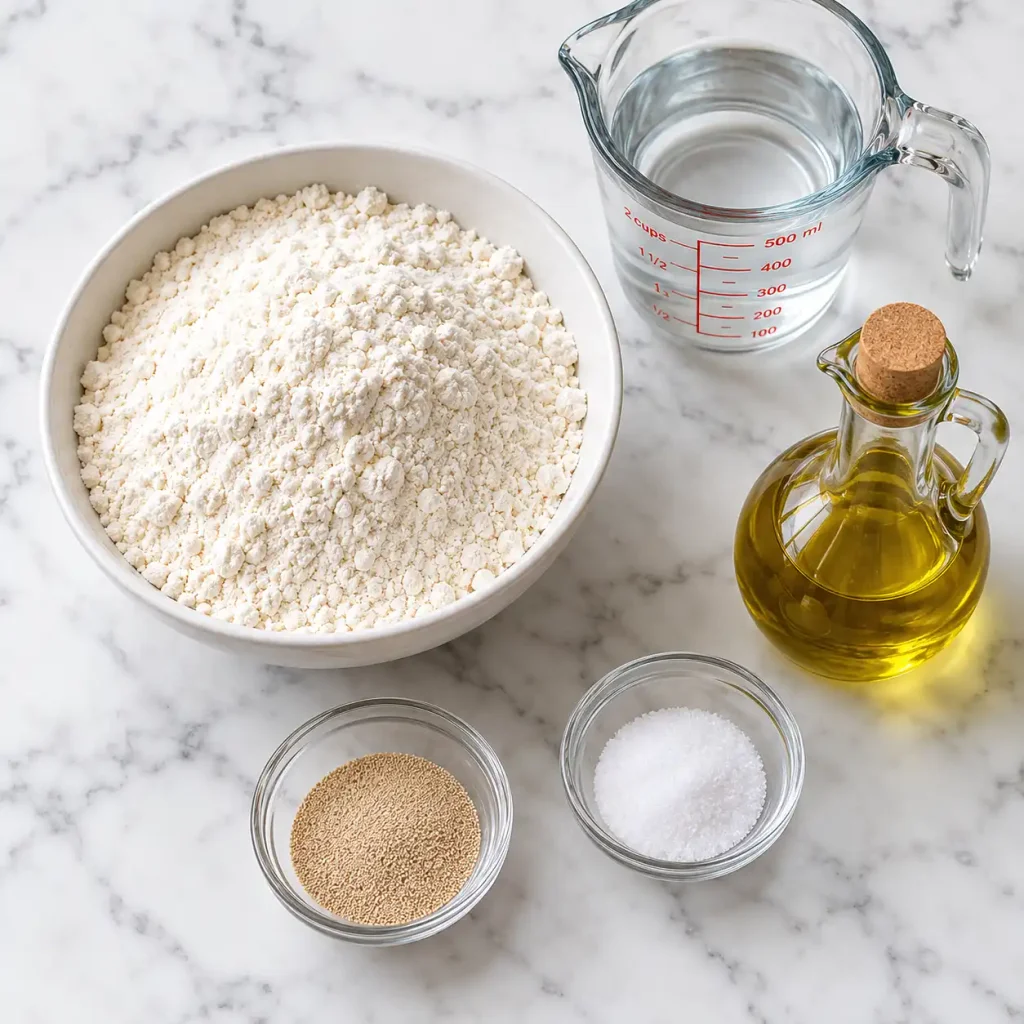
- 500 g (about 4 cups) bread flour: The protein in bread flour creates a chewy bite and a crust that holds toppings.
- 325 ml (1 1/3 cups) warm water, 105 to 110°F (40 to 43°C): Warm water wakes up the yeast without harming it.
- 7 g (2 1/4 teaspoons) instant yeast: It mixes straight into the flour with no proofing step.
- 10 g (about 1 3/4 teaspoons) fine salt: Salt adds flavor and tightens the gluten so the dough holds its shape.
- 1 tablespoon (15 ml) olive oil, plus 1 teaspoon for the bowl: Oil keeps the crust tender and stops the dough from drying out while it rises.
Substitutions:
- Swap in 9 g (about 2 3/4 teaspoons) of active dry yeast if that is what you have, and stir it into the warm water for 5 minutes first.
- All purpose flour works too. The crust will be a little softer, so start with 300 ml of water and add more only if the dough feels dry.
Recipe Timing
Mixing and kneading take about 15 minutes. The dough then rests for 90 minutes, which covers a 75 minute rise and a 15 minute break after shaping. Baking two pizzas, one at a time, adds roughly 20 minutes. Heat your oven during the last 45 minutes of the rise so it is ready when the dough is.
Allergen & Dietary Disclosure
This dough contains wheat and gluten. It has no dairy or eggs, which makes it vegan as written, although your toppings may change that. For a gluten free version, use a 1 to 1 gluten free pizza flour blend and expect a softer, stickier dough. If you or a guest has a severe allergy, check every label and consider cross contact during processing, because this recipe cannot be guaranteed safe for any specific allergy.
Equipment Needed
- Kitchen scale: Weighing flour is the easiest way to get the same dough every time.
- Pizza stone or baking steel: It stores heat and crisps the bottom. A heavy baking sheet turned upside down works as a backup.
- Bench scraper: It cuts the dough cleanly and lifts sticky spots off the counter.
- Instant read thermometer: It checks the water temperature, which matters more than most people expect.
- Large mixing bowl and plastic wrap or a damp towel: A deep bowl gives the dough room to double without spilling over.
Preparation
Weigh or measure everything first so you are not hunting for yeast with floury hands. Rinse the water thermometer and check that the water sits between 105 and 110°F. About 45 minutes before the rise ends, put the pizza stone on the middle rack and heat the oven to 500°F (260°C). Lightly flour your counter and have a sheet of parchment ready for each pizza. If you want sauce and cheese on the pizza, have them measured and at room temperature.
Step-by-Step Instructions
Step 1: Build the dry base
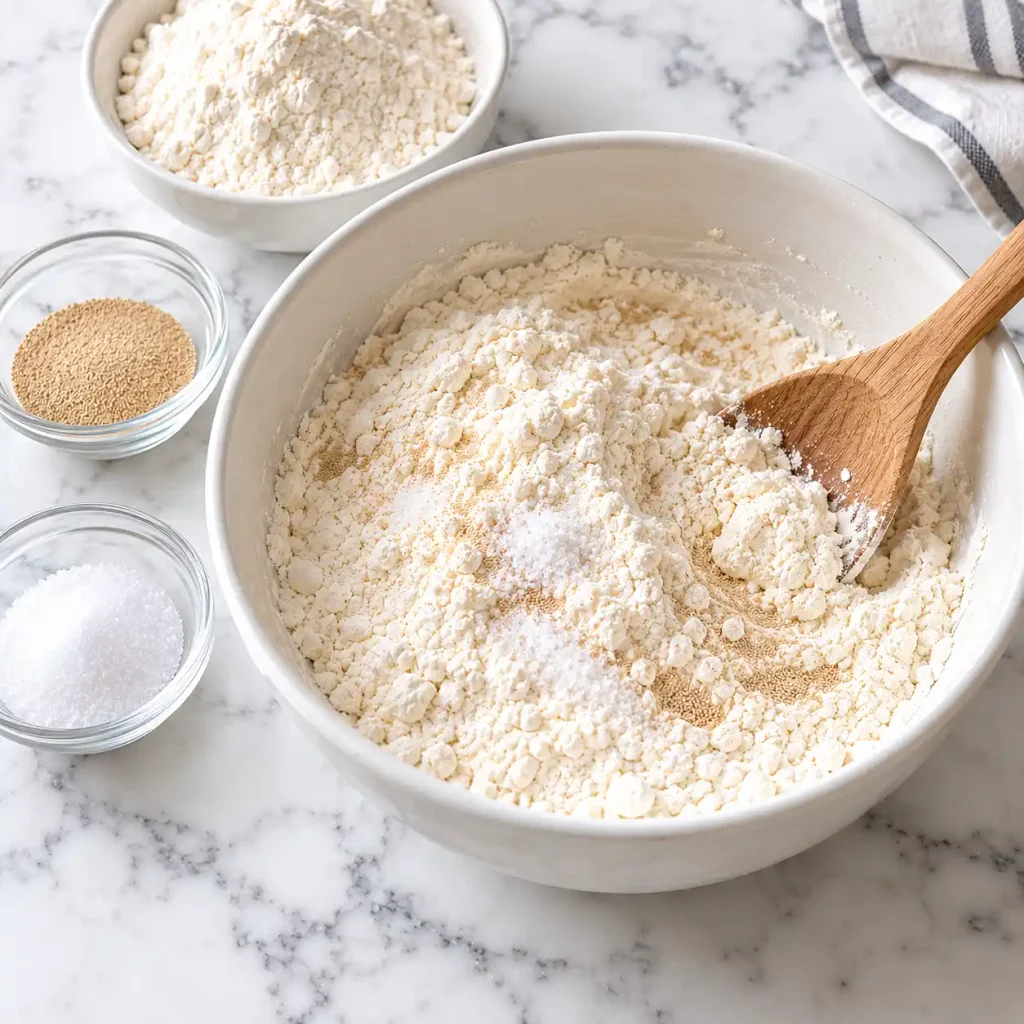
Stir the flour, yeast, and salt in a wide mixing bowl until the mixture looks even and no yeast clumps show. Mixing the dry ingredients first keeps salt from sitting directly on the yeast.
Step 2: Add the water and oil
Pour in the 325 ml of warm water and the tablespoon of olive oil. Mix with a sturdy spatula until no dry flour is left and the dough looks shaggy and rough.
Chef’s Note: Water that feels like a warm bath is ideal. Cold water slows the yeast, and water that feels hot can kill it before it starts working.
Step 3: Knead until smooth
Turn the dough onto a lightly floured counter and knead for 8 to 10 minutes, pushing it away with the heel of your hand and folding it back. In a stand mixer, use the dough hook on medium low for 5 to 6 minutes. The dough is ready when it feels smooth, slightly tacky, and springs back slowly when you poke it.
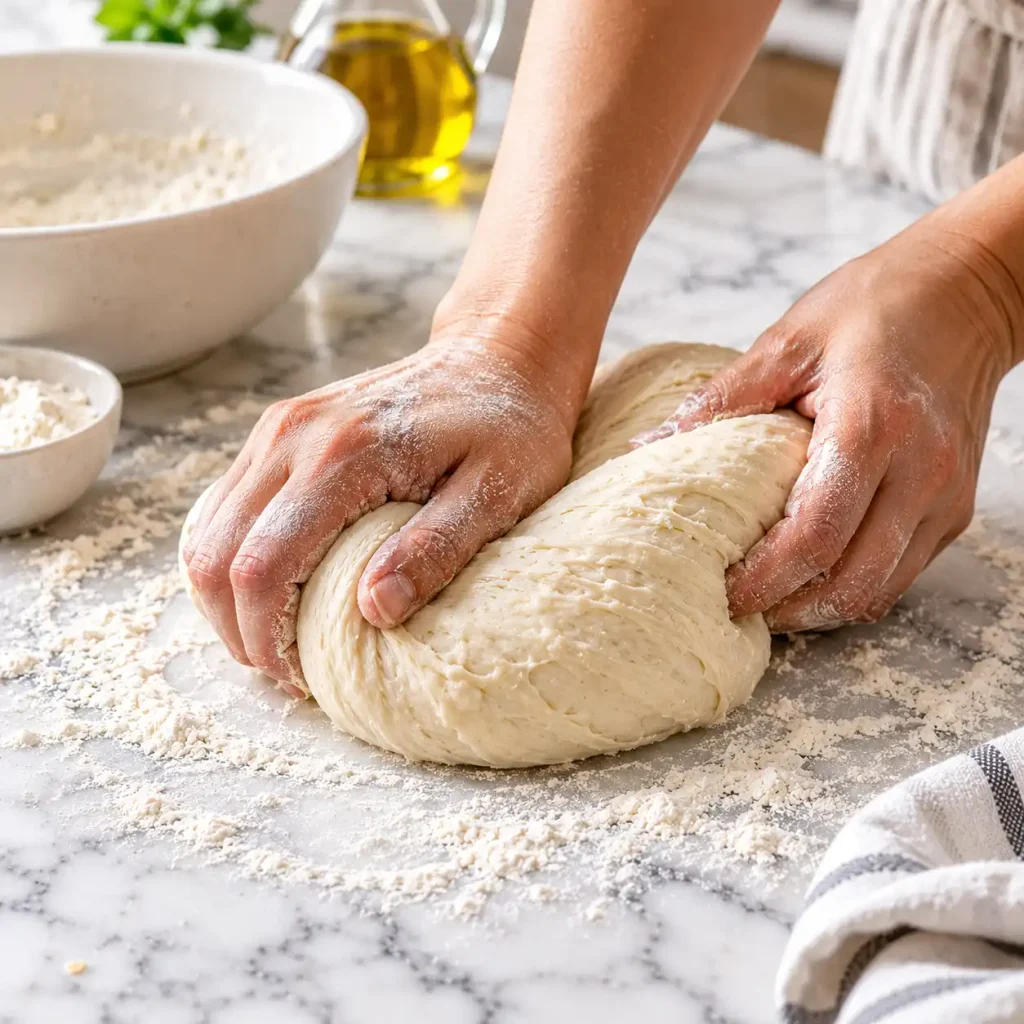
Chef’s Note: Kneading lines up the gluten proteins into a stretchy network. That network traps the gas the yeast makes, which is what gives you an airy crust.
Step 4: Let it rise
Rub 1 teaspoon of olive oil inside a deep bowl, add the dough, and turn it once to coat. Cover with a damp towel and leave it in a draft free spot around 75°F for about 75 minutes. The dough should look doubled with a domed, bubbly top, and a floured finger pressed in 1 inch should leave a dent that fills back in slowly.
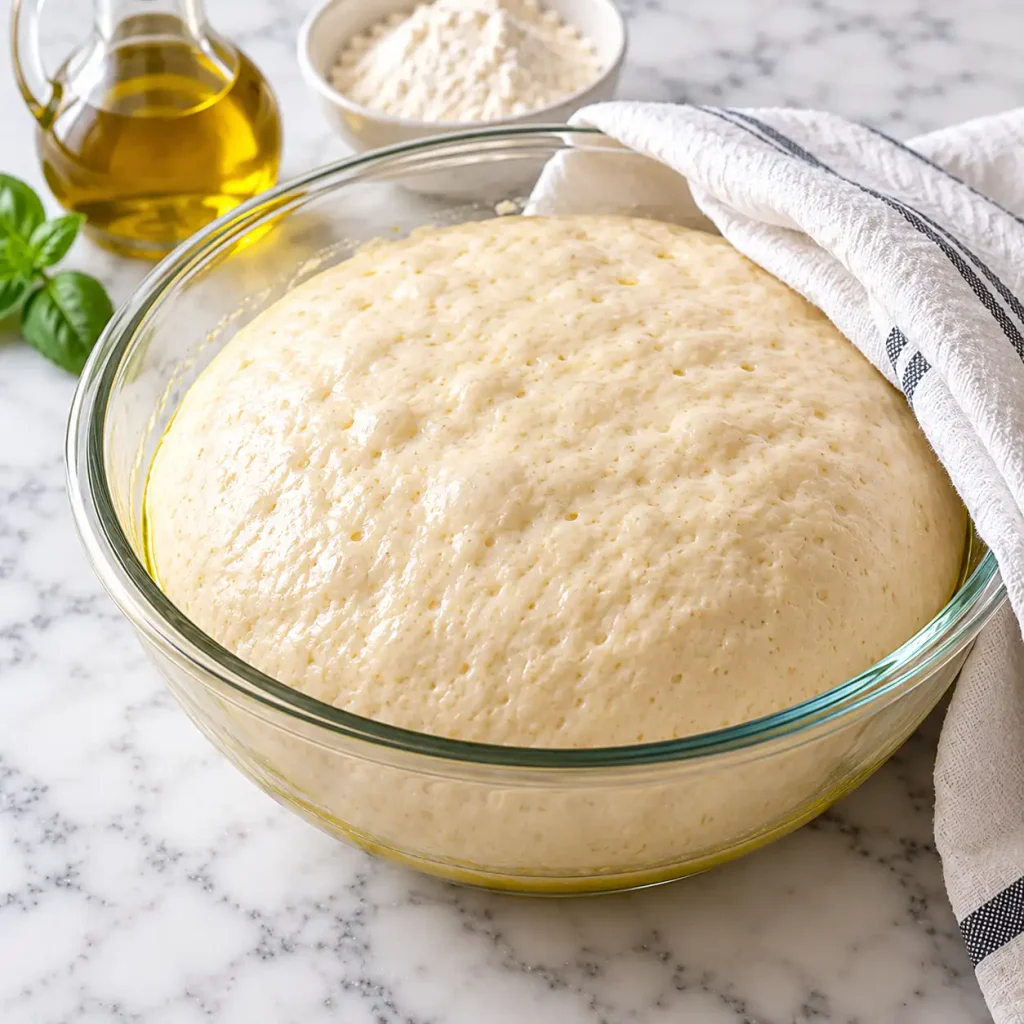
Chef’s Note: A cooler kitchen means a slower rise. Judge the dough by how it looks and feels, not just by the clock.
Step 5: Divide and rest
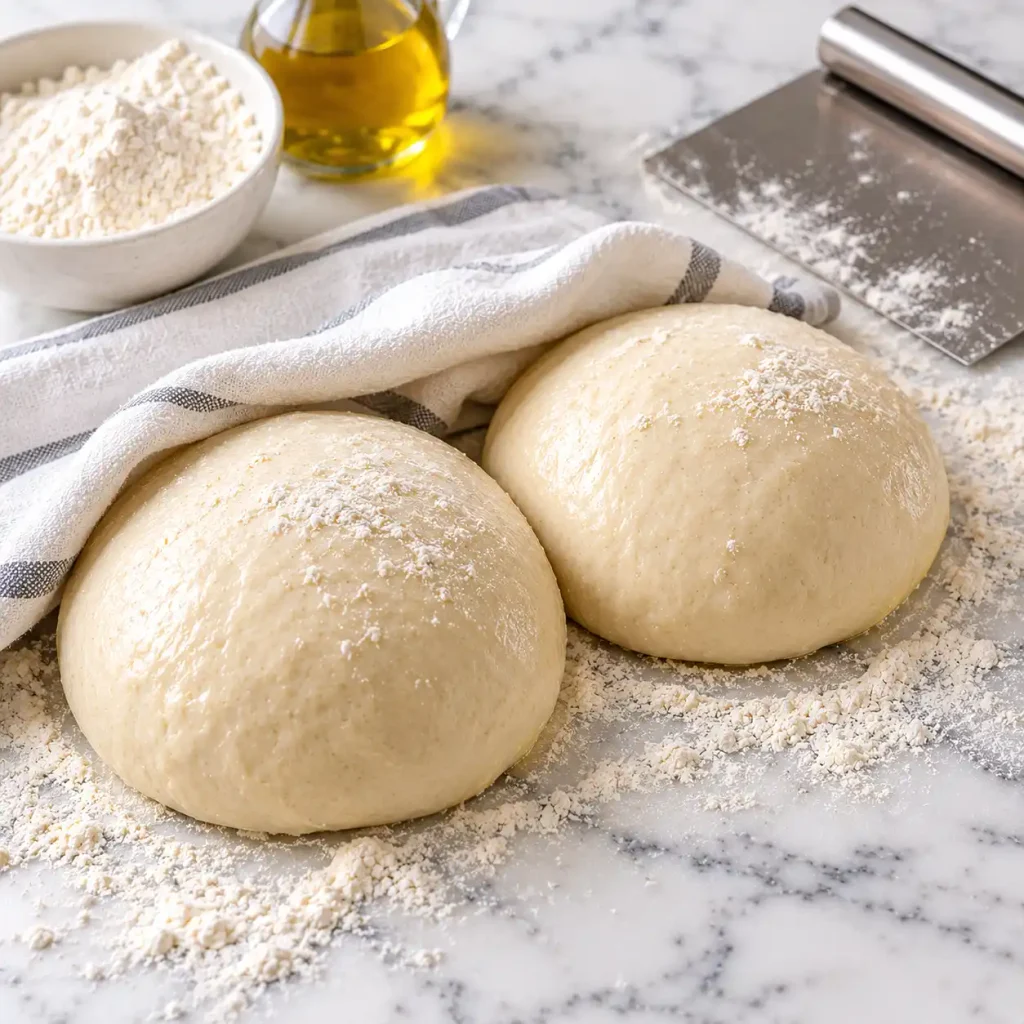
Tip the dough onto the counter, press out the big bubbles gently, and cut it into two pieces of about 420 g each. Tuck each piece into a tight ball, cover loosely, and let them rest for 15 minutes so the gluten relaxes.
Step 6: Stretch the dough
Press one ball flat on a floured surface, starting at the center and moving outward, and leave a 1 inch rim untouched. Lift it and let it drape over your knuckles, rotating it until it reaches about 12 inches. The center should look thin but not torn, and the rim should stay puffy.
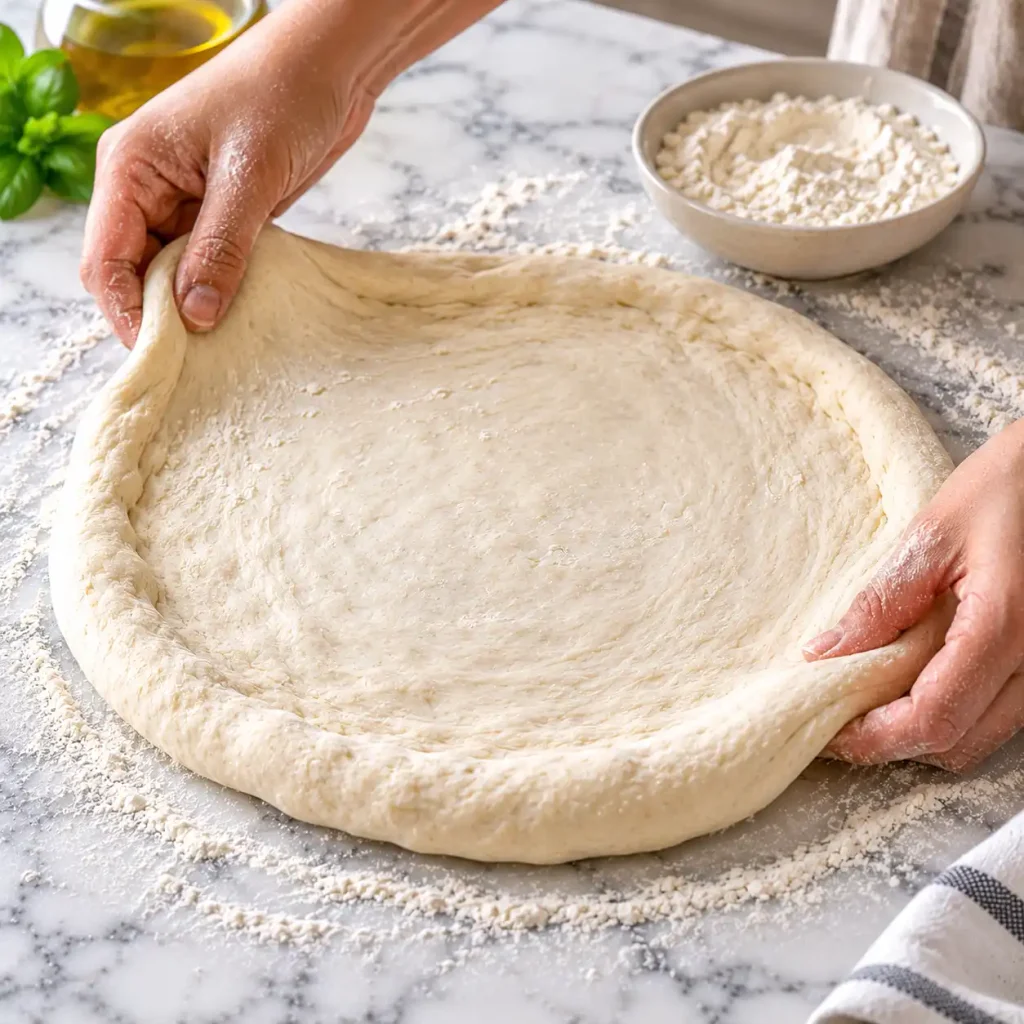
Chef’s Note: Skip the rolling pin. It crushes the gas bubbles that create the open, airy edge.
Step 7: Top and bake
Slide the stretched dough onto a parchment sheet, spread on a thin layer of sauce, and add cheese. Transfer it, parchment and all, onto the hot stone and bake for 8 to 10 minutes. It is done when the rim is deep bronze with a few charred blisters and the cheese bubbles at the edges. Repeat with the second ball.

Food safety: Raw flour and raw dough can carry bacteria, so do not taste the dough before baking, and wash your hands and tools after handling it.
Expert Tips & Tricks
- Weigh your flour: A scooped cup can hold 30 grams more flour than a spooned one, and that gap is enough to turn a soft dough into a stiff one.
- My early mistake: I once used water straight from a hot tap, and the dough never rose. Now I check it with a thermometer every time.
- Keep it slightly tacky: A dough that feels a little sticky bakes into a lighter, chewier crust than a dry, firm one.
- Make ahead: After kneading, put the oiled dough in the fridge for 24 to 72 hours. The cold rise builds deeper flavor and better blisters.
- Storage tip: Freeze extra dough balls in lightly oiled zip bags so they never stick to the plastic.
- Time saver: Start heating the oven when the dough is about halfway through its rise, so you are not waiting on the stone afterward.
Common Mistakes & Troubleshooting
| Problem | Why It Happens | How to Fix or Prevent It |
| Dough does not rise | Old yeast, or water that was too hot or too cold | Check the yeast date and use water at 105 to 110°F |
| Crust is tough and dense | Too much flour or too little rising time | Weigh the flour and let the dough fully double |
| Dough shrinks when stretched | Gluten is tight and has not rested | Cover and rest 10 to 15 minutes, then stretch again |
| Pale, soft bottom | Stone or oven was not hot enough | Heat the stone for a full 45 minutes at 500°F |
| Dough sticks to the counter | Not enough flour, or dough is too wet | Dust the surface lightly and use a bench scraper to lift |
Storage, Reheating, Freezing, Make Ahead
Refrigerator
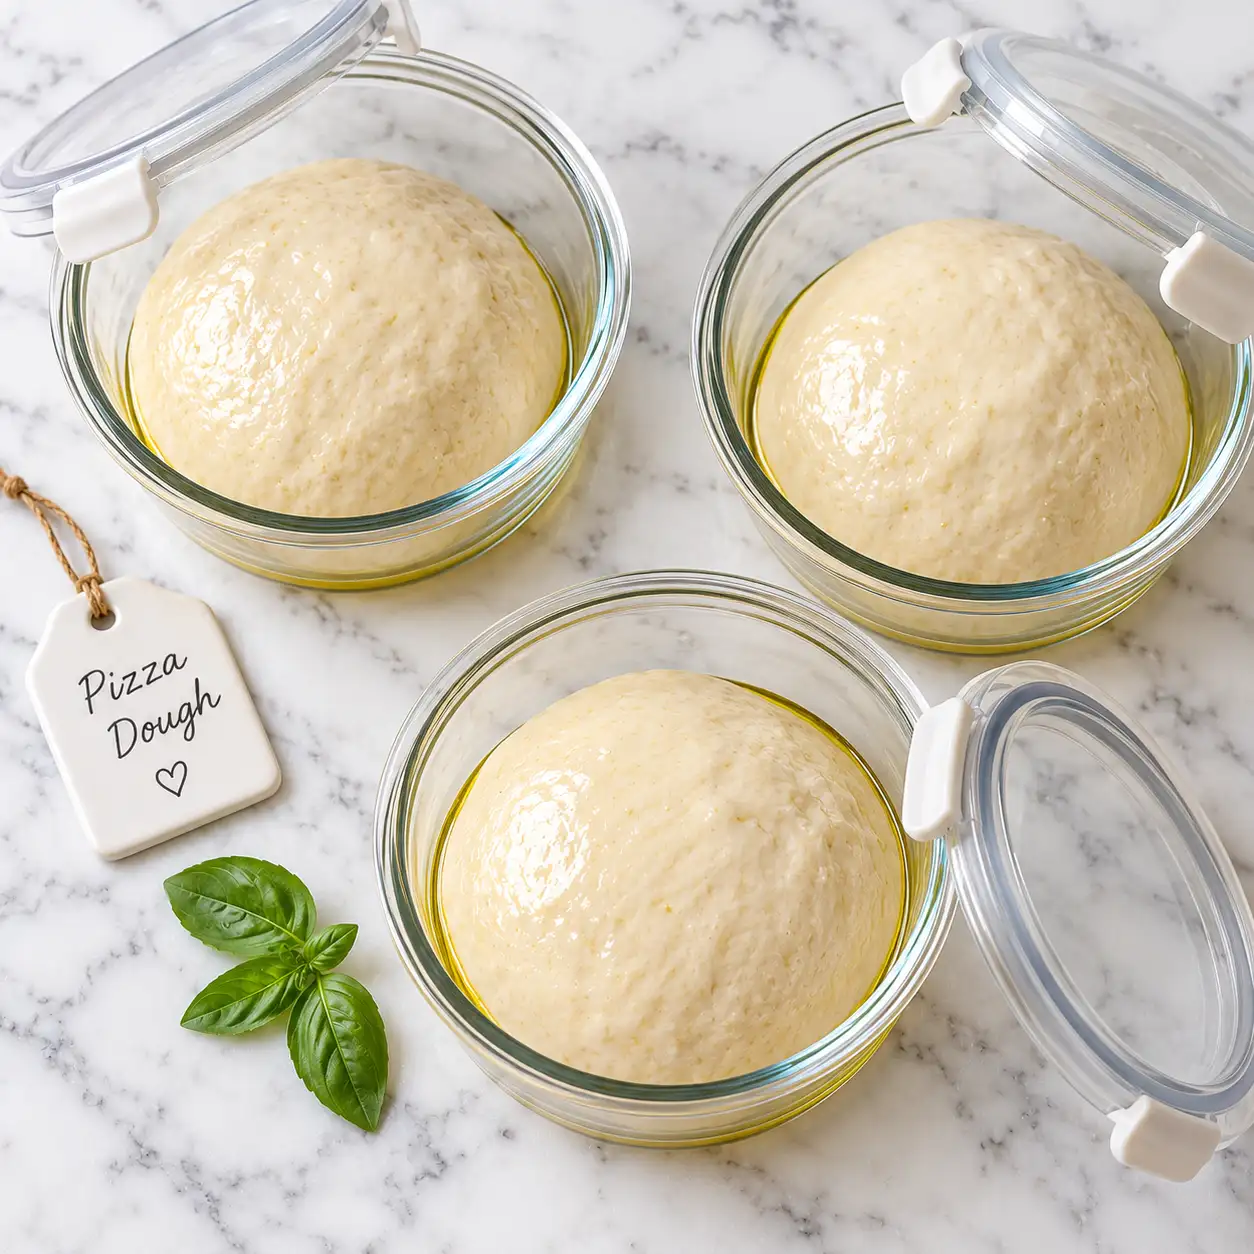
Coat each dough ball with a little olive oil and store it in an airtight container for up to 3 days. Let it sit at room temperature for 45 to 60 minutes before stretching.
Freezer
Wrap each oiled ball tightly or slip it into a freezer bag, then freeze for up to 3 months. Thaw it overnight in the fridge, then bring it to room temperature.
Reheating
Warm leftover baked slices in a skillet over medium heat for 3 to 4 minutes, or in a 375°F (190°C) oven for about 8 minutes, so the crust crisps up again.
Make Ahead
Mix and knead the dough up to 3 days before baking and let it rise slowly in the fridge. The flavor improves each day.
Personal storage tip: I label each bag with the date in marker, because frozen dough balls all look the same after a month.
Variations & Substitutions
- Whole wheat: Replace 150 g of the bread flour with whole wheat flour and add 2 tablespoons of extra water for a nuttier crust.
- Garlic and herb: Stir 1 teaspoon of garlic powder and 1 teaspoon of dried oregano into the flour for a savory base. You can also turn leftover dough into [INTERNAL LINK: garlic knots using leftover pizza dough].
- Spicy: Add 1/2 teaspoon of chili flakes to the dry ingredients for gentle heat that builds as you eat.
- Gluten free: Use a 1 to 1 gluten free pizza flour blend. The dough will feel stickier, so oil your hands and shape it on parchment.
- Thick pan crust: Press one dough ball into an oiled 9 by 13 inch pan, let it puff for 20 minutes, and bake at 450°F (230°C) for 18 to 20 minutes.
Serving Suggestions
- Pair a slice with a bowl of [INTERNAL LINK: homemade pizza sauce recipe] on the side for dipping the crust.
- Add a crisp arugula salad with lemon and olive oil to cut through the richness.
- Finish baked pizza with torn basil, a drizzle of olive oil, or a pinch of chili flakes.
- Serve with sparkling water with lemon, or a cold glass of lemonade.
- Cut the pizza into squares and set out several toppings so everyone builds their own for a [INTERNAL LINK: easy weeknight pizza night ideas].
- Pack cold leftover slices for lunch the next day.
Nutrition Information
Serving size: 1/8 of the dough (about 105 g) | Servings per recipe: 8
| Nutrient | Amount |
| Calories | 250 |
| Protein | 8 g |
| Carbohydrates | 48 g |
| Fiber | 2 g |
| Sugar | 0 g |
| Fat | 3 g |
| Saturated Fat | 0.5 g |
| Cholesterol | 0 mg |
| Sodium | 490 mg |
The dough also provides small amounts of iron and B vitamins from enriched flour. These values are estimates for the dough alone and will shift depending on your brands and how you measure. Toppings are not included.
Why This Pizza Dough Recipe Works
Bread flour has more protein than all purpose flour, and kneading turns that protein into gluten, a stretchy web that traps gas from the yeast. That web is what lets the dough rise high and bake into a chewy, open crumb instead of a dense cracker.
The 65 percent hydration (325 ml of water for 500 g of flour) keeps the dough soft and a little sticky, which creates steam in the oven and gives the rim its big bubbles. Drier dough bakes up tighter and tougher.
Heat matters as much as the dough. A stone preheated at 500°F delivers a burst of heat to the bottom, setting the crust fast before the toppings weigh it down. That quick bake is the reason the base turns crisp while the inside stays tender.
Frequently Asked Questions
Source note: Live search was not used here. These questions follow typical People Also Ask and forum patterns around pizza dough.
Can I make pizza dough ahead of time?
Yes. After mixing and kneading, skip the countertop rise and put the oiled dough in the fridge for 24 to 72 hours instead. The cold slows the yeast, which gives the crust deeper flavor and more blistering. Let the dough sit out for 45 to 60 minutes before stretching so it relaxes. You can also freeze portioned dough balls for up to 3 months, then thaw them in the fridge overnight.
Why is my pizza dough tough or dense?
Tough crust usually comes from too much flour, too little rising time, or cold water that slowed the yeast. Measure flour with a scale if you can, since a scooped cup can weigh 30 grams more than a spooned one. Let the dough double in size before shaping, and keep the final dough slightly tacky rather than dry. A soft, slightly sticky ball bakes into a lighter crust.
Can I use all purpose flour in this pizza dough recipe?
Yes. All purpose flour has less protein than bread flour, so the dough feels a little softer and the crust turns out slightly less chewy, though still good. Cut the water to 300 ml at first and add more a spoonful at a time if the dough feels dry. Expect a crust that is tender and bready rather than stretchy and crisp.
How do I know the dough has risen enough?
Look for dough that has roughly doubled and has a domed, bubbly top. Press a floured finger about 1 inch into the surface. If the dent springs back slowly and leaves a small mark, the dough is ready. If it bounces back right away, give it another 15 minutes. If the dent stays and the surface sags, it has gone too far, so shape it quickly and expect a flatter crust.
Is this pizza dough dairy free, egg free, and vegan?
Yes, the dough itself has no dairy, eggs, or animal products, so it is vegan as written. It does contain wheat and gluten. For a gluten free version, use a 1 to 1 gluten free pizza flour blend and expect a stickier, softer dough. Check labels on your flour and yeast, since cross contact can happen in processing. Toppings like cheese will change the dairy status.
Why does my dough keep shrinking back when I stretch it?
The gluten is tight and needs rest. Cover the dough and wait 10 to 15 minutes, then try again. Work from the center and let gravity help by draping the dough over your knuckles. Avoid a rolling pin, which pushes out the air bubbles you worked to build. A dough ball that rested too briefly or came straight from the fridge will fight you every time. This pizza dough recipe stretches best after a full rest.

Conclusion
The best part of a good pizza dough recipe is how little it asks from you. A few minutes of kneading, a patient rest, and a hot oven turn flour and water into something people ask you to make again.
I keep a couple of dough balls in the freezer at all times now, and they have saved more than one tired weeknight. Start with this batch, bake one pizza fresh, and see how the crust compares to what you usually order.
If you loved this recipe, save it to your homemade pizza Pinterest board so you can find it easily later!

Pizza Dough Recipe
Ingredients
Method
- Instructions:
- Combine the flour, yeast, and salt in a mixing bowl and stir until evenly blended.
- Add the warm water and tablespoon of oil, then mix until you have a rough, shaggy dough with no dry patches.
- Knead on a floured counter for 8 to 10 minutes (or 5 to 6 minutes with a dough hook) until smooth and slightly tacky.
- Place the dough in an oiled bowl, cover, and rest in a draft free spot for about 75 minutes, until doubled in size.
- Cut the dough into two equal pieces, round each into a ball, and rest them covered for 15 minutes.
- Meanwhile, heat the oven with a pizza stone inside to 500°F (260°C) for 45 minutes.
- Stretch each ball by hand to about 12 inches, leaving a thick rim, then add toppings.
- Bake each pizza on the hot stone for 8 to 10 minutes, until the rim is deeply bronzed and the cheese bubbles. Do not taste raw dough.
Notes
- Refrigerate oiled dough balls in an airtight container for up to 3 days.
- Freeze wrapped dough balls for up to 3 months and thaw overnight in the fridge.
- All purpose flour works, but start with 300 ml of water and expect a softer crust.