Red Velvet Cake: 7 Easy Secrets for a Perfect Moist Crumb

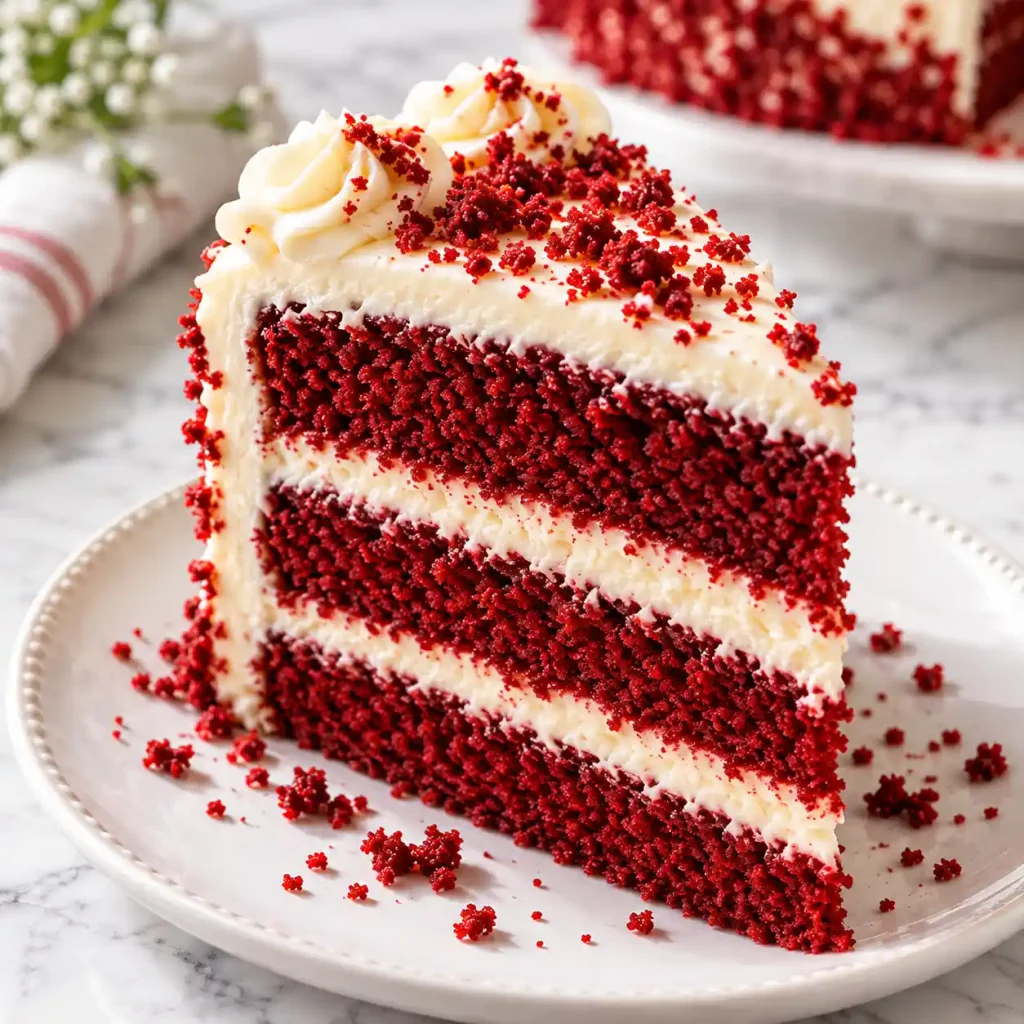
The first cut into a good red velvet cake always comes with a small surprise. The knife slides through a soft, deep crimson crumb, and a ribbon of tangy frosting clings to the blade. It looks dramatic, but the cake underneath is gentle, cocoa kissed, and just a little tart.
This red velvet cake is built for home bakers who want a bakery result without special equipment. It takes 2 hours and 25 minutes from first whisk to first slice, and most of that is cooling time. The batter needs two bowls and a whisk, the layers stay moist for days, and the cream cheese frosting is thick enough to swirl without turning sugary. I adjusted the cocoa, buttermilk, and vinegar until the crumb was tender and the color stayed bright after baking.
Why You’ll Love This Red Velvet Cake
- Soft, tender crumb: Oil and buttermilk keep every slice moist for days, even when the cake comes straight from the fridge.
- Simple mixing: Two bowls and a whisk are all the batter needs, so cleanup stays light.
- Color that holds: Gel coloring keeps its bright red through the bake, so you avoid the dull brown tint many homemade cakes get.
- Frosting with balance: Cool cream cheese and a pinch of salt cut the sweetness, so the frosting tastes tangy instead of heavy.
- Easy to plan around: The layers can be baked a day ahead, which takes the pressure off birthdays and holiday dinners.
Ingredient Selection Tips
Buy full fat cream cheese sold in foil wrapped blocks, not the whipped kind in tubs, because the tub version carries extra water and loosens the frosting. Choose a gel food coloring labeled “red” or “super red” for the strongest color with the smallest amount. Look for real buttermilk with a thick pour and a faint tang, and check the date, since older cartons lose their acidity. Fresh baking soda matters too: if the box has been open for more than six months, replace it.
Recipe Snapshot
| Servings | Difficulty | Course | Cuisine | Prep Time | Cook Time | Rest Time | Total Time | Calories |
| 12 slices | Easy | Dessert | American | 25 minutes | 30 minutes | 1 hour 30 minutes | 2 hours 25 minutes | 640 kcal per slice |
Ingredients
For the cake:
- 2 1/2 cups (300 g) all purpose flour, because its moderate protein gives a tender but sturdy crumb
- 1 1/2 cups (300 g) granulated sugar
- 1 teaspoon baking soda, which reacts with the acids to lift the layers
- 1 teaspoon fine salt
- 1 tablespoon natural unsweetened cocoa powder, enough for a faint chocolate note without hiding the tang
- 1 cup (240 ml) neutral oil such as canola or sunflower, the reason the cake stays moist for days
- 1 cup (240 ml) buttermilk, at room temperature, for tang and softness
- 2 large eggs, at room temperature, so they blend smoothly into the batter
- 1 tablespoon red gel food coloring
- 1 teaspoon white vinegar, which brightens the red and boosts the rise
- 2 teaspoons alcohol free vanilla extract or vanilla bean paste, for the same warm aroma with a cleaner finish
For the cream cheese frosting:
- 1 cup (226 g) unsalted butter, softened
- 16 ounces (450 g) full fat cream cheese, cool but soft
- 4 cups (480 g) powdered sugar, sifted
- 2 teaspoons alcohol free vanilla extract
- 1/4 teaspoon fine salt
Substitutions: No buttermilk? Stir 1 tablespoon lemon juice into 1 cup of whole milk and wait 5 minutes. No gel coloring? Use 2 tablespoons of liquid red coloring, though the color will look slightly softer.
Recipe Timing
Prep takes about 25 minutes, mostly weighing, mixing, and getting the pans ready. The layers bake for 30 minutes. Rest time adds up to 90 minutes: 60 minutes for the layers to cool and 30 minutes for the frosted cake to firm up in the fridge. That brings the total to 2 hours and 25 minutes, and only about 55 of those minutes need your hands.
[AI IMAGE PROMPT: Overhead flat lay of red velvet cake ingredients on white marble: flour, sugar, cocoa powder, buttermilk in a glass jug, eggs, red gel coloring, vinegar, vanilla, cream cheese blocks and butter in small bowls, soft natural daylight, top down angle, wooden spoon accent.] [IMAGE PLACEHOLDER — alt-text: “Flat lay of red velvet cake ingredients on white marble” | filename: “red-velvet-cake-ingredients-flat-lay.jpg” | orientation: horizontal]
Allergen & Dietary Disclosure
This red velvet cake contains gluten (wheat flour), dairy (buttermilk, butter, cream cheese), and eggs.
- Gluten: Use a 1 to 1 gluten free flour blend that includes xanthan gum.
- Dairy: Use plant based butter, plant milk soured with lemon juice, and a dairy free cream cheese alternative.
- Eggs: Replace the 2 eggs with 1/2 cup unsweetened applesauce.
These swaps change the texture slightly, and this recipe is not guaranteed safe for any specific allergy. If you cook for someone with a severe allergy, check every label and talk to their doctor first.
Equipment Needed
- Two 9 inch round cake pans: Metal pans bake more evenly than glass, and light colored ones prevent dark edges.
- Digital kitchen scale: Weighing the flour is the easiest way to avoid a dry cake.
- Hand mixer or stand mixer: Frosting beats up fluffier with a mixer, but stop as soon as it looks smooth.
- Wire rack: Air flow under the layers keeps the bottoms from turning damp.
- Offset spatula: It spreads frosting in clean, flat strokes with less pressure on the crumb.
- Serrated knife: A few gentle saw strokes trim domed tops without crushing the cake.
Preparation
Pull the buttermilk and eggs from the fridge 30 minutes before you start, since cold ingredients make the batter clump. Position a rack in the middle of the oven and heat it to 350°F (175°C). Brush the inside of each pan with oil or soft butter, press a parchment circle into the bottom, and lightly grease the paper too. Weigh every ingredient first so the batter comes together quickly once you start.
Step by Step Instructions
Step 1: Mix the Dry Ingredients
Add the flour, sugar, baking soda, salt, and cocoa powder to a bowl and whisk for about 30 seconds. The mixture should look evenly tan with no cocoa streaks.
Chef’s Note: Whisking works as a quick sift. It spreads the baking soda evenly, so you do not get bitter pockets or uneven rise.
Step 2: Blend the Wet Ingredients
In a second bowl, whisk the oil, buttermilk, eggs, food coloring, and vanilla for about 1 minute. The liquid should look uniformly deep red with no yellow streaks of egg. Wash your hands after cracking the eggs, and do not taste the raw batter.
Step 3: Combine and Add the Vinegar
Pour the wet mixture over the dry and fold with a rubber spatula until you can no longer see dry flour, usually 15 to 20 strokes. Stir in the vinegar last, with 3 or 4 quick turns.
Chef’s Note: Adding vinegar at the end preserves its reaction with the baking soda for the oven, where the rise actually happens. Overmixing builds gluten and makes the cake chewy.
Step 4: Fill the Pans
Divide the batter between the two prepared pans, about 560 g each if you want even layers. Smooth the tops, then tap each pan firmly on the counter twice to pop large air bubbles.
[AI IMAGE PROMPT: Glossy crimson batter being poured from a glass mixing bowl into a round 9 inch metal cake pan, rubber spatula in hand, flour dusted wooden counter, warm kitchen light, streaks of deep red batter on the bowl rim, 45 degree angle, white linen towel nearby.] [IMAGE PLACEHOLDER — alt-text: “Red velvet cake batter poured into a round cake pan” | filename: “red-velvet-cake-batter-pan.jpg” | orientation: horizontal]
Step 5: Bake the Layers
Slide both pans onto the middle rack and bake at 350°F (175°C) for 28 to 32 minutes. The cakes are ready when the tops spring back to a light touch and a toothpick comes out with a few moist crumbs. Resist opening the oven before minute 25.
Chef’s Note: Opening the door early drops the temperature right when the structure is setting, and the centers can sink.
Step 6: Cool the Layers
Rest the pans on a wire rack for 15 minutes, run a thin knife around the edges, and turn the layers out onto the rack. Peel off the parchment. Wait about 45 more minutes, until the bottoms feel cool when you touch them.
Step 7: Whip the Frosting
Beat the butter on medium speed for 2 minutes until pale and creamy. Add the cream cheese in chunks and beat for only 30 to 45 seconds, just until smooth. On low speed, add the powdered sugar a cup at a time, then the vanilla and salt. The frosting should hold a soft peak.
Chef’s Note: Cream cheese thins out quickly when overbeaten, so add it late and mix briefly. If the frosting turns soft, chill it for 15 minutes.
Step 8: Assemble and Chill
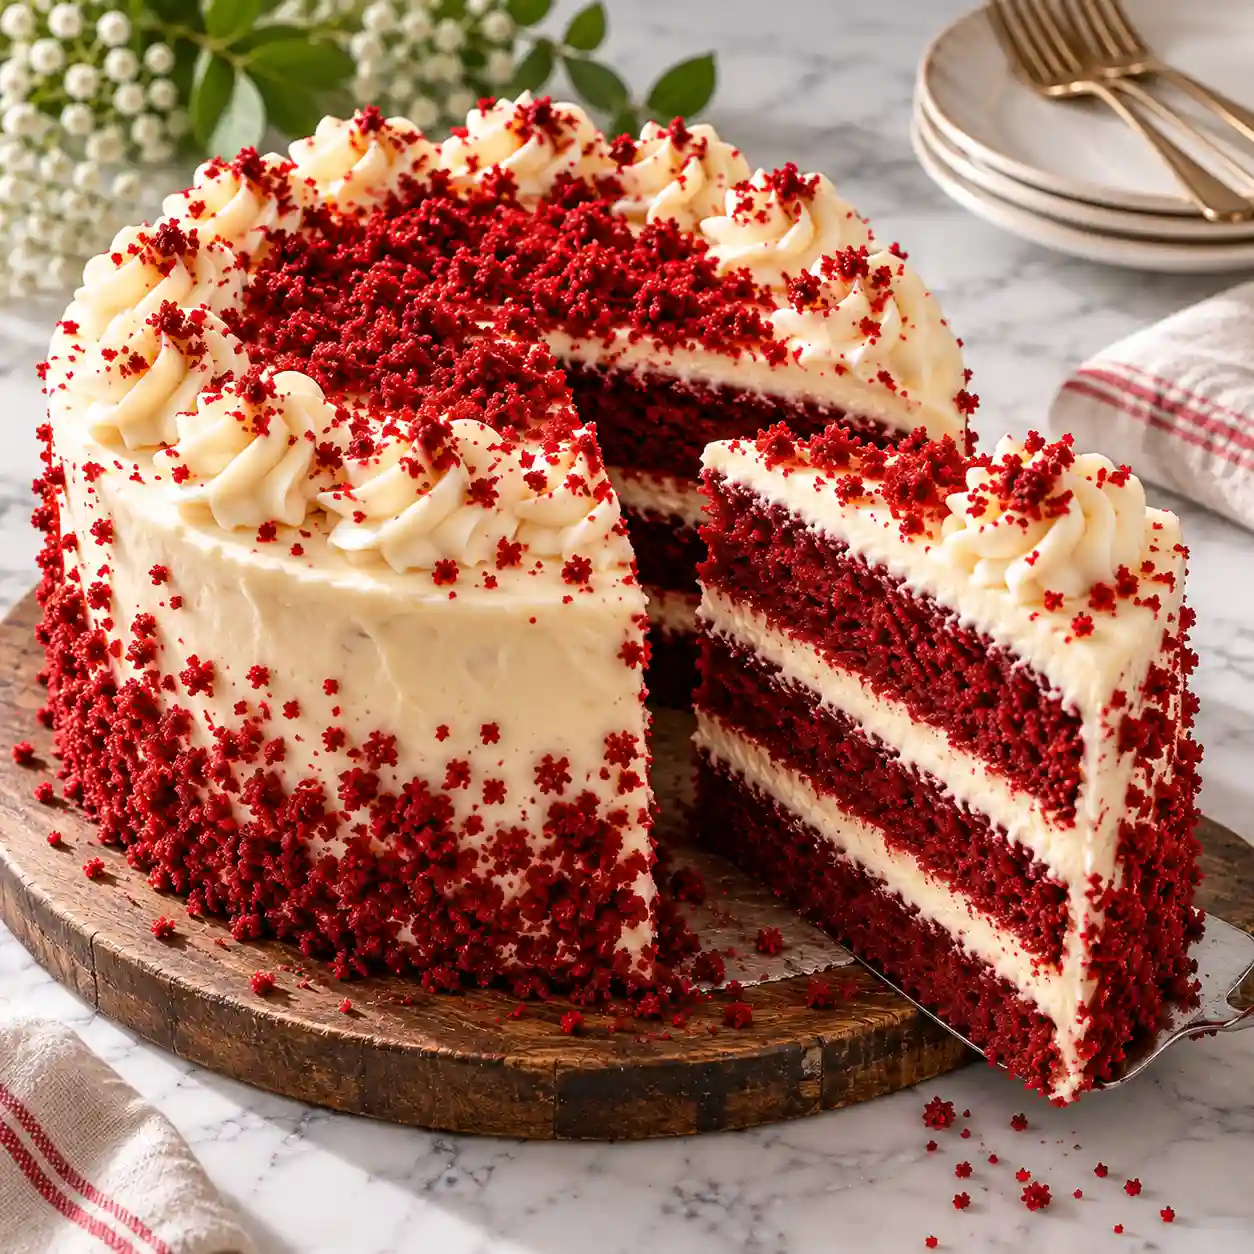
Trim any dome from the layers with a serrated knife. Place one layer on a plate, spread about 1 1/4 cups of frosting over it, and top with the second layer. Cover the top and sides with the remaining frosting, then chill the cake for 30 minutes so it slices cleanly.
[AI IMAGE PROMPT: Offset spatula spreading thick ivory cream cheese frosting over a stacked two layer red velvet cake on a white cake stand, visible crimson crumb at the edges, weathered oak table, side lit window light for texture, 45 degree angle, bowl of frosting beside it.] [IMAGE PLACEHOLDER — alt-text: “Spreading cream cheese frosting on a two layer red velvet cake” | filename: “red-velvet-cake-frosting-layers.jpg” | orientation: vertical]
Callout: Slice Cleanly. Dip a long knife in hot water, wipe it dry, and cut with one downward motion. Repeat between slices so the red crumb does not smear into the white frosting.
Expert Tips & Tricks
- Weigh your flour. One cup scooped straight from the bag can weigh 20 to 30 grams more than a spooned and leveled cup, which is the most common reason for a dry red velvet cake. Aim for 300 g.
- Use gel, not liquid, coloring. Gel is concentrated, so you add less liquid and the batter keeps its structure.
- My mistake to avoid. The first time I made this, I opened the oven at minute 15 to check the color, and the center fell into a dense dip. Wait until at least minute 25.
- Bake a day ahead. Wrap cooled layers tightly in plastic and keep them at room temperature overnight. The crumb actually slices more cleanly the next day. Pair this with [INTERNAL LINK: how to level and stack cake layers] for a smooth finish.
- Store it cold, serve it cool. The cream cheese frosting needs the fridge, but the cake tastes best after 30 minutes at room temperature, when the crumb softens.
- Weigh the batter. Splitting it by weight gives two layers that bake in the same time and stack evenly.
- Frost while the layers cool. Make the frosting during the 45 minute cooling stretch, then chill it briefly if it feels soft. That one overlap saves a quarter of an hour.
Common Mistakes & Troubleshooting
| Problem | Why It Happens | How to Fix or Prevent It |
| Cake looks brown instead of red | Too little coloring, or liquid coloring that baked out | Use 1 tablespoon of gel coloring and mix until the batter is deep red |
| Dry, crumbly slices | Too much flour or overbaking | Weigh the flour and start checking at 28 minutes |
| Sunken center | Oven opened early, or old baking soda | Keep the door closed until minute 25 and replace soda older than 6 months |
| Runny frosting | Cream cheese overbeaten or ingredients too warm | Beat briefly, use cool cream cheese, and chill 15 minutes |
| Dense, chewy crumb | Batter overmixed after adding the flour | Fold only until the dry streaks disappear |
Storage, Reheating, Freezing, Make Ahead
Refrigerator: Keep the frosted cake in a covered cake carrier or airtight container for up to 4 days.
Freezer: Wrap unfrosted layers in two layers of plastic and one layer of foil, then freeze for up to 2 months. Frosted slices freeze for up to 1 month: freeze them on a tray for 1 hour, then wrap individually.
Reheating: This cake does not need heating. Thaw frozen layers overnight in the fridge, and let slices sit at room temperature for 30 minutes before eating.
Make Ahead: Bake the layers up to 1 day early and store the frosting in a covered container in the fridge for up to 3 days. Beat it for 30 seconds before spreading.
My storage tip: Place a sheet of parchment against the cut face of the cake before you cover it. It keeps the exposed crumb from drying out.
[AI IMAGE PROMPT: Covered glass cake dome and an airtight rectangular container holding red velvet cake slices separated by parchment squares, handwritten date label, white marble counter, soft natural daylight, creamy frosting and crimson crumb visible, top down angle, folded gray napkin beside.] [IMAGE PLACEHOLDER — alt-text: “Red velvet cake slices stored in an airtight container with parchment” | filename: “red-velvet-cake-storage-container.jpg” | orientation: horizontal]
Variations & Substitutions
- Red velvet cupcakes: Fill 24 liners about two thirds full and bake at 350°F (175°C) for 18 to 20 minutes.
- Sheet cake: Pour the batter into a greased 9 by 13 inch pan and bake for 35 to 40 minutes. Frost directly in the pan for easy serving.
- Natural color: Skip the gel coloring and stir in 2 tablespoons beet powder. The cake will turn a softer ruby shade.
- Gluten free: Use a 1 to 1 gluten free flour blend with xanthan gum and let the batter rest for 10 minutes before baking.
- Extra chocolate: Raise the cocoa to 2 tablespoons and reduce the flour by 1 tablespoon for a deeper cocoa flavor.
- Whipped vanilla frosting: For a lighter finish, fold 1 cup of cold whipped cream into half of the frosting.
Serving Suggestions
- Drinks: Pour a cold glass of milk, hot coffee, or spiced tea beside each slice.
- Fruit: Add fresh raspberries or strawberries on the plate for a tart contrast.
- Garnish: Press reserved cake crumbs onto the sides or shave white chocolate over the top.
- Sauce: Drizzle a spoonful of warm berry sauce over the slice. See [INTERNAL LINK: easy berry sauce recipe].
- Dessert table: Serve alongside vanilla cupcakes and chocolate dipped strawberries for a holiday spread.
- Ice cream: A scoop of vanilla ice cream warms up beautifully next to a chilled slice. Browse more ideas in [INTERNAL LINK: cream cheese frosting desserts].
Callout: Frosting Rescue. If the frosting looks too soft, beat in 1/4 cup powdered sugar and refrigerate it for 15 minutes. If it looks stiff, add 1 teaspoon of milk and mix for 10 seconds.
Nutrition Information
Serving size: 1 slice (1/12 of the cake) | Servings per recipe: 12
| Nutrient | Amount |
| Calories | 640 kcal |
| Protein | 6 g |
| Carbohydrates | 77 g |
| Fiber | 1 g |
| Sugar | 56 g |
| Fat | 35 g |
| Saturated Fat | 12 g |
| Cholesterol | 75 mg |
| Sodium | 420 mg |
This slice also provides small amounts of calcium and iron. These numbers are estimates and will shift depending on the brands you buy and how you measure.
Why This Red Velvet Cake Works
The tang in this cake comes from acid. Buttermilk and vinegar react with baking soda to release gas, which lifts the batter and softens the crumb. The acid also gives the cake its mild tartness, and it brightens the natural pigments in cocoa, so the red looks cleaner.
Oil carries the moisture. Unlike butter, which firms up when cold, oil stays liquid at fridge temperature, so each slice stays soft even after a day or two in the refrigerator. A small amount of cocoa adds depth without turning the cake into a chocolate one.
Gentle mixing protects the texture. Folding the batter only until the flour disappears limits gluten development, and weighing the ingredients keeps the ratios consistent from one bake to the next.
Frequently Asked Questions
FAQ Source Note: These questions reflect typical question patterns seen around this topic (such as People Also Ask style questions), not live search results.
Can I make red velvet cake ahead of time?
Yes. Bake the layers one day ahead, let them cool fully, and wrap each one tightly in plastic wrap at room temperature. Store the frosting in a covered container in the refrigerator for up to 3 days, then beat it for 30 seconds before using. Assemble the red velvet cake the day you plan to serve it, or frost it the night before and chill it. Take it out 30 minutes before slicing so the crumb softens.
Why did my red velvet cake turn out dry?
Dry crumb almost always comes from too much flour or too much time in the oven. Scooping flour straight from the bag can add an extra 1/2 cup without you noticing, so spoon it into the cup and level it, or weigh 300 grams. Start testing at 28 minutes. A toothpick should come out with a few moist crumbs, not completely clean. Overbaking by even 5 minutes can dry out a red velvet cake.
Can I make red velvet cake without buttermilk?
Yes. Stir 1 tablespoon of lemon juice or white vinegar into 1 cup of whole milk, then wait 5 minutes until it looks slightly curdled. This homemade version works well in a red velvet cake because the acid still reacts with the baking soda and keeps the crumb tender. Plain yogurt thinned with a splash of milk also works. Skip skim milk, since the lower fat gives a drier, less rich cake.
How do I know when red velvet cake is done?
Bake at 350°F (175°C) for 28 to 32 minutes. The cake is done when the top springs back after a light press, the edges just begin to pull from the pan, and a toothpick pushed into the center comes out with a few moist crumbs. A wet streak means it needs 2 to 3 more minutes. Ovens run differently, so start checking at the 28 minute mark.
Is red velvet cake just chocolate cake with food coloring?
Not quite. Red velvet cake uses far less cocoa than a chocolate cake, usually just 1 tablespoon, so the chocolate note is faint. The real flavor comes from tangy buttermilk, a splash of vinegar, and vanilla, which give a mild tartness that pairs with sweet cream cheese frosting. The red color is mostly visual, though it does make the cake look festive and unmistakable.
Can I make red velvet cake without eggs or dairy?
You can adjust it, but expect small texture changes. For eggs, use 1/2 cup of unsweetened applesauce in place of the 2 eggs. For dairy, swap in plant based butter, plant milk soured with lemon juice, and a dairy free cream cheese alternative. For gluten, use a 1 to 1 gluten free flour blend. Always check labels, and talk to a doctor if you manage a severe allergy.
Conclusion
The best part of this red velvet cake is how forgiving it is once you know the few details that matter: weigh the flour, keep the oven door shut, and chill the frosting if it softens. Those three habits do more than any fancy ingredient.
I make this cake most often for family birthdays, and the plates come back clean every time, usually with someone asking for the crumbs from the bottom of the stand. Bake the layers the day before if you want a calm kitchen on the day itself.
If you loved this recipe, save it to your Dessert Recipes Pinterest board so you can find it easily later!
Red Velvet Cake with Cream Cheese Frosting
Ingredients
Method
- Instructions:
- Heat the oven to 350°F (175°C). Oil two 9 inch round pans and fit parchment circles into the bottoms.
- Whisk the flour, sugar, baking soda, salt, and cocoa in one bowl for 30 seconds.
- In another bowl, whisk the oil, buttermilk, eggs, coloring, and vanilla until the mixture is smooth and uniformly red.
- Pour the liquid into the flour mixture and fold gently until no dry flour remains, then stir in the vinegar.
- Split the batter evenly between the pans and tap each one on the counter twice.
- Bake for 28 to 32 minutes, until the tops spring back and a toothpick shows a few moist crumbs.
- Leave the layers in the pans for 15 minutes, turn them out onto a rack, and cool for about 45 minutes more.
- Beat the butter for 2 minutes, then mix in the cream cheese briefly until smooth. Add the powdered sugar, vanilla, and salt on low speed.
- Level the layers, spread frosting between and over them, and refrigerate the finished cake for 30 minutes before slicing.
Notes
- Weigh the flour for the most reliable texture.
- Store the frosted cake in the fridge for up to 4 days and serve after 30 minutes at room temperature.
- Swap buttermilk with 1 cup whole milk plus 1 tablespoon lemon juice, rested for 5 minutes.
- Unfrosted layers freeze for up to 2 months when wrapped tightly.