Easy Rice Krispie Treats: 5 Ingredients, Irresistibly Soft

The first thing you notice is the sound: a quiet crackle as warm marshmallow wraps around crisp cereal, then a slow stretch of sticky strands when you pull a square from the pan. Great rice krispie treats should bend before they break, and they should taste like toasted sugar and nutty butter, not just sweet. Most batches miss that mark. They turn hard by dinnertime or taste flat and one note.
This version takes 50 minutes from start to finish, but only about 20 of those are hands on. The rest is cooling time. A little browned butter, a pinch of salt, and a handful of marshmallows folded in at the very end give you squares that stay soft for days. You need one pot, one spatula, and five ingredients. No oven, no candy thermometer, no fancy gear. Kids can press the mixture into the pan, and adults will quietly sneak a second square.
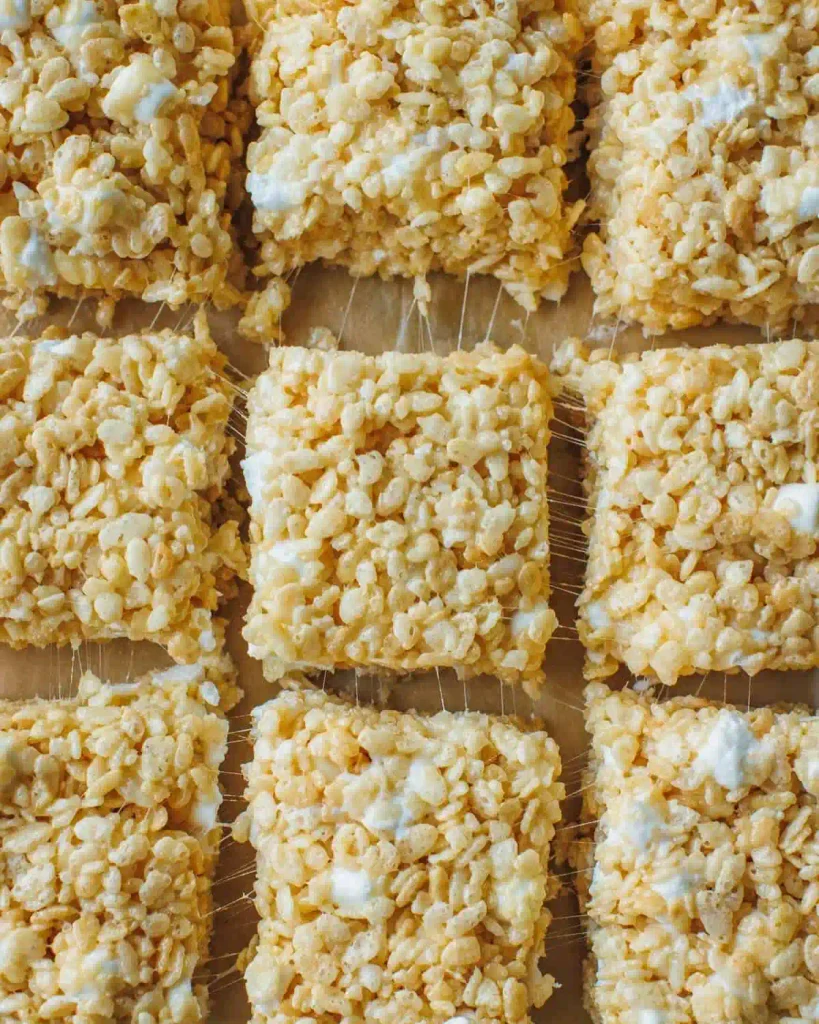
[AI IMAGE PROMPT: Stack of three thick golden rice krispie treat squares with glossy, stretchy marshmallow strands, tiny crisp cereal edges and flecks of flaky sea salt, on a white ceramic dessert plate over a white marble surface, warm kitchen light, 45 degree food photography angle, a pulled square showing sticky strings.]
[IMAGE PLACEHOLDER | alt text: “Stack of soft rice krispie treat squares with stretchy marshmallow strands on a white plate” | filename: “rice_krispie_treats_hero_stack.jpg” | orientation: horizontal]
Why You’ll Love These Rice Krispie Treats
- Five simple ingredients. Butter, marshmallows, cereal, vanilla, and salt are all it takes, and most kitchens already have them.
- Soft for days. Folding in extra marshmallows at the end leaves pockets of squishy chew that do not harden overnight.
- Real flavor. Browned butter adds a toasty, caramel like depth that plain melted butter cannot match.
- One pot cleanup. Everything melts and mixes in a single pot, so you wash one pot and one spatula.
- Kid friendly steps. The pressing and cutting parts are safe for small helpers once the mixture has rested for a minute.
Ingredient Selection Tips
Check the marshmallow bag before you buy it. The marshmallows should feel soft and pillowy through the plastic, not crusty or rock hard, because stale ones melt into a grainy, stiff mixture. Choose a freshly opened box of crisp rice cereal too. Cereal that has sat open for weeks has lost its snap, and the squares come out chewy and dull instead of light. Unsalted butter lets you control the salt, and real vanilla extract tastes noticeably rounder than imitation.
Quick Tip: Weigh the marshmallows if you own a kitchen scale. A “10 ounce bag” can be a little over or under, and the ratio of marshmallow to cereal decides whether your squares come out soft or dry.
Recipe Snapshot
| Servings | Difficulty | Course | Cuisine | Prep Time | Cook Time | Rest Time | Total Time | Calories |
| 16 squares | Easy | Dessert | American | 10 minutes | 10 minutes | 30 minutes | 50 minutes | 120 per square |
Ingredients
- 4 tablespoons (57 g) unsalted butter, plus a little extra for the pan. Browning it gives the squares a nutty, toffee like flavor.
- 10 ounces (283 g) mini marshmallows, divided: 8 ounces (227 g) for melting and 2 ounces (56 g) for folding in at the end. The late addition stays soft and gives you pockets of extra chew. Look for marshmallows made with beef or fish gelatin, or a gelatin free brand, which tends to give a slightly softer, stretchier bite.
- 6 cups (about 160 g) crisp rice cereal. Fresh cereal keeps the squares light instead of dense.
- 1 teaspoon vanilla extract. It rounds out the sugar so the squares do not taste flat.
- 1/4 teaspoon fine sea salt. A small amount sharpens the butter and balances the sweetness.
Substitution notes: Large marshmallows work if you cut them into smaller pieces first, so they melt evenly. If you use salted butter, cut the salt in half. Store brand puffed rice cereal behaves the same way.
Recipe Timing
Prep takes about 10 minutes, mostly for greasing the dish and measuring everything so the stovetop steps go smoothly. Cooking is another 10 minutes, split between browning the butter and melting the marshmallows. The squares need 30 minutes to firm up, which brings the total to 50 minutes. Only the first 20 require you to stand at the stove.
[AI IMAGE PROMPT: Overhead flatlay of rice krispie treat ingredients: a stick of pale yellow butter, a white ceramic bowl of fluffy mini marshmallows, a glass bowl of crisp rice cereal, vanilla bottle and a pinch of flaky salt, arranged on a white marble surface in soft natural daylight, top down flat lay.]
[IMAGE PLACEHOLDER | alt text: “Flatlay of butter, mini marshmallows, crisp rice cereal, vanilla and salt on white marble” | filename: “rice_krispie_treats_ingredients_flatlay.jpg” | orientation: horizontal]
Allergen & Dietary Disclosure
- Dairy: The butter contains milk. Dairy free baking sticks work, though you will lose the browned flavor.
- Gluten: Most crisp rice cereal contains barley malt. Use a certified gluten free puffed rice cereal instead.
- Soy: Some marshmallows and cereals contain soy derivatives, so read each label.
If anyone eating these has a severe allergy, check every package label yourself, because brands change their formulas and processing.
Equipment Needed
- Large heavy bottomed pot (5 quart): The thick base protects the butter from scorching, and the roomy sides give you space to fold in the cereal.
- Silicone spatula: A lightly greased one releases sticky mixture much better than a rigid spoon.
- 9 by 13 inch baking dish, glass or metal: This size gives squares about 1 inch thick.
- Parchment strip: Leave it hanging over two sides so you can lift the whole slab out for cutting.
- Wax paper square: It lets you flatten the top without the mixture gluing itself to your palms.
Preparation
Rub butter over the bottom and sides of the baking dish, then lay a strip of parchment across the bottom with the ends hanging over the sides. Measure the cereal into a large bowl or keep it next to the stove. Weigh the two marshmallow portions into separate bowls. Everything should be in reach before the heat goes on, because the stovetop steps move quickly.
Step by Step Instructions
Step 1: Prepare the pan
Grease the dish and tuck in the parchment handles as described above. Keep the extra butter wrapper handy for greasing your spatula later. Make sure the cereal and both marshmallow portions are measured before turning on the burner.
Step 2: Brown the butter
Melt the 4 tablespoons of butter in the pot over medium low heat, swirling often for 4 to 5 minutes. When the foam settles and you see amber flecks on the bottom with a toasty, nutty smell, the butter is ready.
Chef’s Note: Those flecks are toasted milk solids, and they carry most of the flavor. Pull the pot off the heat if they go from amber to dark brown.
Step 3: Melt the main marshmallows
Drop the heat to low and add the 8 ounces of marshmallows. Stir steadily for 3 to 4 minutes, until no white lumps remain and the mixture looks smooth and glossy.
Chef’s Note: Low heat matters here. Marshmallow is mostly sugar, and overheating it pushes the sugar toward a candy stage that sets hard once cooled.
[AI IMAGE PROMPT: Low side view of glossy white marshmallow melting into foamy amber butter in a stainless steel pot, steam rising, a silicone spatula dragging thick stretchy ribbons, resting on a white marble surface, warm kitchen light, 30 degree low camera angle, sprinkle of vanilla droplets on top.]
[IMAGE PLACEHOLDER | alt text: “Marshmallow melting into browned butter in a stainless steel pot with a spatula” | filename: “melting_marshmallows_browned_butter_pot.jpg” | orientation: horizontal]
Step 4: Add the flavor
Take the pot off the burner and stir in the vanilla and salt for about 10 seconds. The mixture will loosen slightly and smell like toffee. Melted marshmallow is extremely hot, so give it a minute before letting children near it.
Step 5: Fold in the cereal
Tip all 6 cups of cereal into the pot at once. Fold with a greased spatula, scraping the bottom, for about 1 minute until no dry cereal is visible and every piece has a glossy coat.
Chef’s Note: Folding instead of stirring in circles keeps the cereal from getting crushed, which is what keeps the squares light and crisp.
[AI IMAGE PROMPT: Close view of crisp rice cereal being folded into glossy marshmallow in a large stainless steel pot, strands stretching from a silicone spatula, golden toasted tones, on a white marble surface, warm kitchen light, top down angle, a few cereal pieces scattered nearby.]
[IMAGE PLACEHOLDER | alt text: “Crisp rice cereal folded into melted marshmallow in a stainless steel pot” | filename: “folding_cereal_into_marshmallow.jpg” | orientation: vertical]
Step 6: Add the last marshmallows
Scatter the remaining 2 ounces of marshmallows over the mixture. Fold just 3 or 4 times so most of them stay whole and soft rather than melting into the base.
Step 7: Press into the dish
Scrape everything into the prepared dish. Flatten the top with a square of wax paper or a greased spatula, using gentle pressure until the surface is level but still springy.
Chef’s Note: Pressing hard squeezes out the air pockets and gives you dense, tough bars. A light touch is the difference between chewy and jaw tiring.
[AI IMAGE PROMPT: Hands pressing a thick slab of rice krispie treats into a glass baking dish with a square of wax paper, glossy golden surface, soft crisp edges, white marble surface, warm kitchen light, 45 degree food photography angle, wax paper corners curling up.]
[IMAGE PLACEHOLDER | alt text: “Pressing rice krispie treat mixture into a glass baking dish with wax paper” | filename: “pressing_rice_krispie_treats_into_dish.jpg” | orientation: horizontal]
Step 8: Let it set and cut
Leave the dish on the counter for 30 minutes, until the top feels dry and a light fingertip press does not stick. Lift the slab out by the parchment handles and cut it into 16 squares with a lightly greased knife.
Expert Tips & Tricks
- My own mistake to avoid. I once melted the marshmallows over medium high heat while answering a text, and the batch cooled into a bar you could have used as a doorstop. Stay at the stove and keep the heat low.
- Make ahead trick. Press the slab into the dish the night before and leave it uncut under a loose cover. Cut it fresh in the morning so the edges stay soft.
- Storage tip. Layer squares between sheets of wax paper so the sticky sides do not weld together in the container.
- Technique tip. Grease your spatula and your cutting knife, not just the pan. It saves a surprising amount of scraping.
- Texture tip. For extra chewy squares, use 1 ounce more marshmallows in the main melt. For crisper squares, use 1 ounce less.
- Time saver. Measure all three marshmallow and cereal portions the night before and keep them in bowls. Dinner prep goes from messy to 20 minutes flat.
Quick Tip: If you want a sweet and salty finish, sprinkle a tiny pinch of flaky salt over the top right after pressing the mixture into the dish.
Common Mistakes & Troubleshooting
| Problem | Why It Happens | How to Fix or Prevent It |
| Squares are hard and dense | Marshmallows overheated, or the mixture was pressed too firmly | Keep the heat on low and press with gentle pressure only |
| Mixture is too sticky to handle | Too much marshmallow for the amount of cereal, or the cereal was stale | Measure carefully, use fresh cereal, and grease your spatula |
| Squares crumble when cut | Not enough marshmallow, or the butter was not fully mixed in | Weigh the marshmallows and fold until every piece is coated |
| Flat flavor | Salt skipped or imitation vanilla used | Add the salt and use real vanilla extract |
| Burnt smell | Butter went past amber to dark brown | Brown on medium low heat and remove the pot as soon as it smells nutty |
Storage, Reheating, Freezing, Make Ahead
Room temperature
Keep the squares in an airtight container at room temperature for up to 3 days. Layer wax paper between them.
Refrigerator
I skip the fridge, because the cold firms the squares up and makes them chewy in an unpleasant way. If your kitchen is very warm, refrigerate for no more than 1 day and bring them to room temperature before serving.
Freezer
Wrap each square in plastic wrap, then place them in a freezer bag. They keep for up to 2 months. Thaw on the counter for 20 to 30 minutes.
Reheating
If a square has firmed up, microwave it for 5 to 8 seconds to loosen the marshmallow.
Make ahead
Press the slab into the dish up to 24 hours ahead and cut it right before serving. A personal tip: label the container with the date on a piece of tape, so nobody guesses how old the squares are.
[AI IMAGE PROMPT: Neatly cut rice krispie treat squares layered between wax paper sheets in a clear glass storage container with a lid, a paper label on the lid, white marble surface, soft natural daylight, top down flat lay, soft marshmallow texture visible.]
[IMAGE PLACEHOLDER | alt text: “Rice krispie treat squares stored between wax paper in a glass container” | filename: “storing_rice_krispie_treats_glass_container.jpg” | orientation: horizontal]
Variations & Substitutions
- Chocolate drizzle. Melt 1/2 cup chocolate chips and drizzle them over the cooled slab. Check the label of the chocolate you use.
- Peanut butter swirl. Stir 1/4 cup creamy peanut butter into the melted marshmallow before adding the cereal. This adds an allergen, so label it clearly.
- Cocoa version. Swap 2 cups of the cereal for chocolate flavored crisp rice cereal.
- Sprinkle party squares. Fold 1/4 cup rainbow sprinkles in with the last marshmallows for a kid friendly birthday treat.
- Pistachio and cardamom. Add 1/2 teaspoon ground cardamom with the vanilla and press 1/4 cup chopped pistachios into the top.
Serving Suggestions
- Serve with a warm cup of [INTERNAL LINK: hot chocolate recipe] on a cold afternoon.
- Drizzle with [INTERNAL LINK: homemade caramel sauce] and a pinch of flaky salt for a dinner party plate.
- Pair with a glass of [INTERNAL LINK: fresh strawberry lemonade] for a summer picnic.
- Stack a few squares on a platter with fresh berries for a bright, simple dessert.
- Wrap single squares in wax paper and tie with twine for bake sale or lunchbox treats.
- Cut into smaller bite sized pieces for party trays and kids’ parties.
Nutrition Information
Serving size: 1 square (about 32 g) | Servings per recipe: 16
| Nutrient | Amount |
| Calories | 120 |
| Protein | 1 g |
| Carbohydrates | 23 g |
| Fiber | 0 g |
| Sugar | 11 g |
| Fat | 3.5 g |
| Saturated Fat | 2 g |
| Cholesterol | 8 mg |
| Sodium | 110 mg |
Fortified cereal contributes small amounts of iron and B vitamins. These numbers are estimates and will shift depending on the brands you buy and how you measure.
Why This Rice Krispie Treats Recipe Works
Marshmallows are mostly sugar and air, held together by gelatin or a plant based stabilizer. When you melt them gently, the sugar loosens into a smooth, stretchy syrup that coats the cereal. If the heat climbs too high, that sugar cooks toward a hard candy stage, and the bars set stiff as they cool. Low heat keeps the syrup soft.
Browning the butter toasts the milk solids and creates new flavor compounds through the Maillard reaction, which is why the squares taste nutty and rich instead of just sweet. A small amount of salt sharpens those flavors and keeps the sugar from tasting flat.
The final handful of marshmallows is added after the mixture comes off the heat, so they only soften instead of fully melting. They stay as soft pockets inside the cooled squares, which keeps the texture chewy for days.
Frequently Asked Questions About Rice Krispie Treats
FAQ source note: live search was not used here. These questions reflect typical People Also Ask and forum style question patterns for this topic.
How far ahead can I make rice krispie treats?
You can make them up to 3 days ahead and keep them in an airtight container at room temperature, with wax paper between layers. For the softest texture, press the slab into the dish the night before and cut it just before serving. Freezing also works for up to 2 months if you wrap each square individually.
Why did my rice krispie treats turn hard?
The most common cause is overheated marshmallows. When the sugar gets too hot, it sets into a firm candy once cooled. Pressing the mixture too firmly into the pan also squeezes out air and makes the squares dense. Keep the heat on low, stop stirring once the marshmallows are smooth, and press gently.
Can I use large marshmallows instead of mini?
Yes. Use about 40 large marshmallows, roughly 10 ounces, and cut them into smaller pieces with greased kitchen scissors so they melt faster and more evenly. Weigh them if you can, because the weight matters more than the count. Large ones take about a minute longer to melt, so keep stirring over low heat.
How do I know when the marshmallow is melted enough?
Look for a smooth, glossy mixture with no white lumps, which usually takes 3 to 4 minutes on low heat. When you drag the spatula through it, the marshmallow should stretch in thick ribbons. If you still see solid pieces, keep stirring for another 30 seconds rather than raising the heat.
Can I make rice krispie treats without dairy?
You can use dairy free baking sticks or coconut oil in place of the butter. You will not get the same nutty browned flavor, but the texture works well. Add a little extra salt to make up for the missing depth. For a gluten free batch, choose a certified gluten free puffed rice cereal. Always check labels if anyone has a severe allergy.
How do I cut clean squares?
Let the slab rest for the full 30 minutes, lift it out by the parchment handles, and use a lightly greased knife. Press straight down rather than sawing back and forth. Wipe the blade between cuts if it gets sticky. A bench scraper also works well for clean edges.
[AI IMAGE PROMPT: Macro close up of a single rice krispie treat square, soft glossy marshmallow stretching in thin strands, golden cereal crisp edges, on a white ceramic plate over a white marble surface, side lit soft natural daylight, straight on camera angle, flaky salt sprinkled on top.]
[IMAGE PLACEHOLDER | alt text: “Close up of a soft rice krispie treat square with stretchy marshmallow on a white plate” | filename: “rice_krispie_treats_final_plated_closeup.jpg” | orientation: vertical]
Conclusion
The trick to rice krispie treats worth making again is not a secret ingredient. It is patience at the stove: low heat, a little browned butter, and a light hand when pressing. Those three habits turn a basic snack into soft, toasty squares that people ask for by name.
In my kitchen, a full pan rarely makes it to the next day. If you have a few extra minutes, brown the butter and fold in the last marshmallows at the end, and you will taste the difference in the very first bite.
If you loved this recipe, save it to your easy dessert Pinterest board so you can find it easily later!
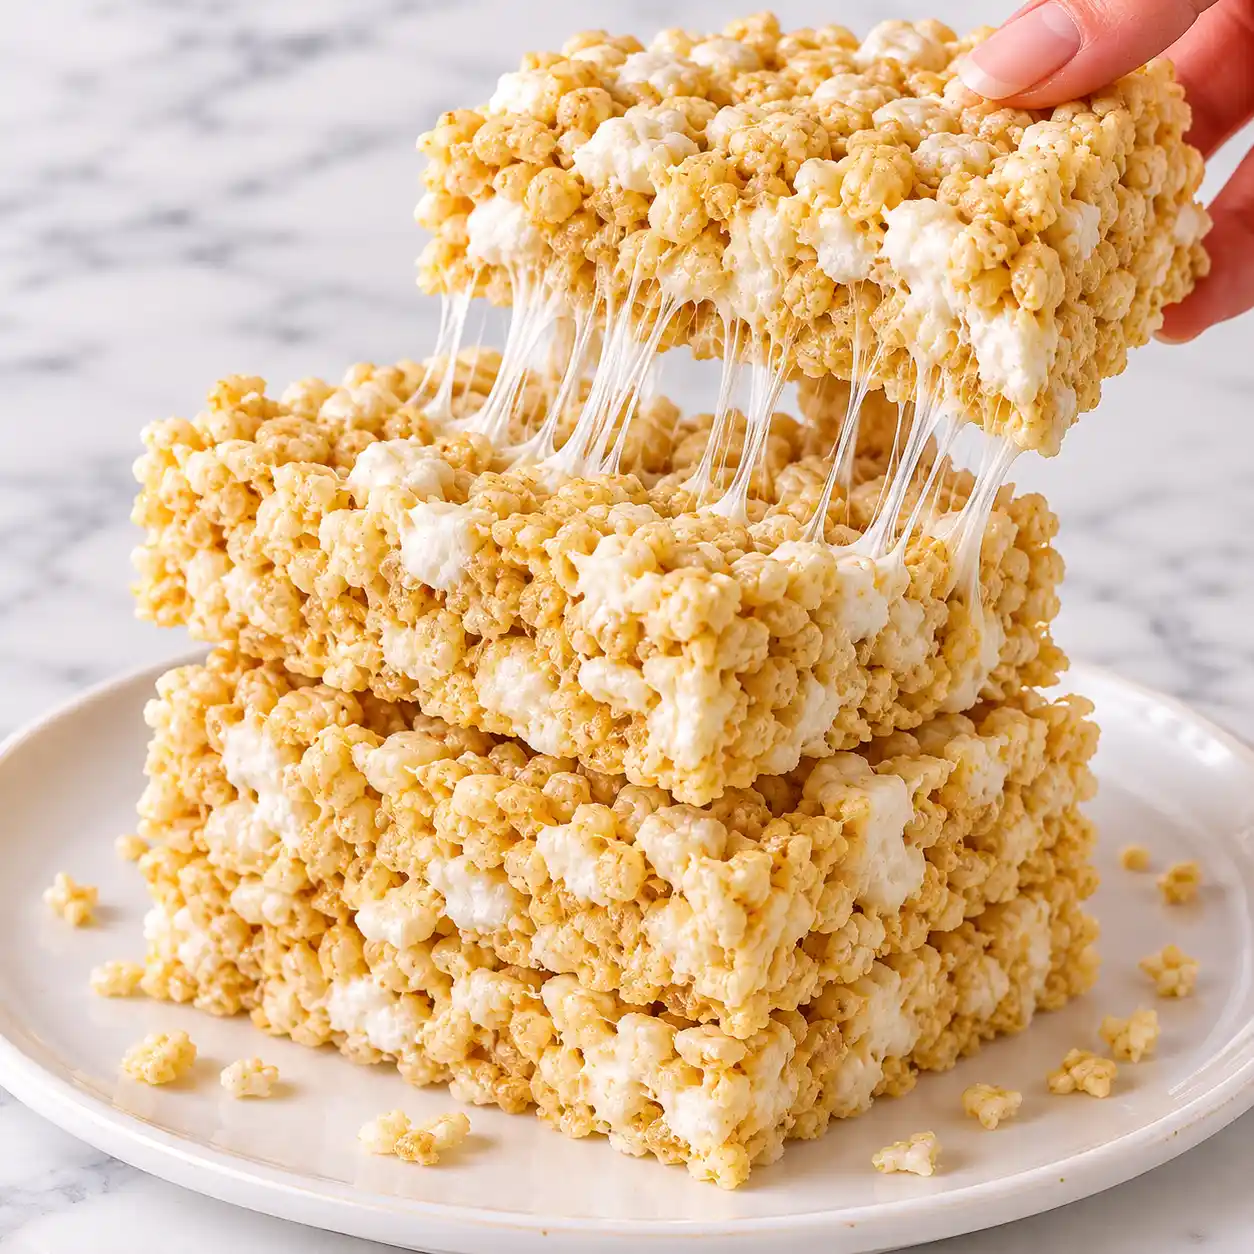
Easy Rice Krispie Treats with Browned Butter
Ingredients
Method
- Instructions:
- Butter a 9 by 13 inch dish and drape a parchment strip across the bottom, leaving the ends hanging over two sides.
- Heat the butter in a large pot over medium low heat, swirling for 4 to 5 minutes until it smells nutty and shows amber flecks.
- Reduce to low, add 227 g marshmallows, and stir for 3 to 4 minutes until the mixture is smooth, glossy, and free of lumps.
- Remove from the heat and stir in the vanilla and salt for about 10 seconds.
- Pour in all the cereal and fold with a greased spatula for about 1 minute until fully coated.
- Sprinkle in the remaining 56 g marshmallows and fold 3 or 4 times, leaving them mostly whole.
- Transfer to the dish and flatten gently with wax paper or a greased spatula until level.
- Rest for 30 minutes at room temperature, lift out with the parchment, and cut into 16 squares.
Notes
- Store in an airtight container at room temperature for up to 3 days, with wax paper between layers.
- Freeze individually wrapped squares for up to 2 months and thaw for 20 to 30 minutes.
- For gluten free squares, use certified gluten free puffed rice cereal.
- Use marshmallows made with beef or fish gelatin, or a gelatin free brand, and check every label.