Irresistible Protein Balls: 6 Ingredients, 15 Minutes Prep

Open the fridge at 4 p.m. and find a tray of cold, chewy chocolate chip bites waiting for you. That is the quiet win of a good batch of protein balls: the snack decision was made days ago, and your past self handled it. You grab two, close the door, and the afternoon slump loses its grip.
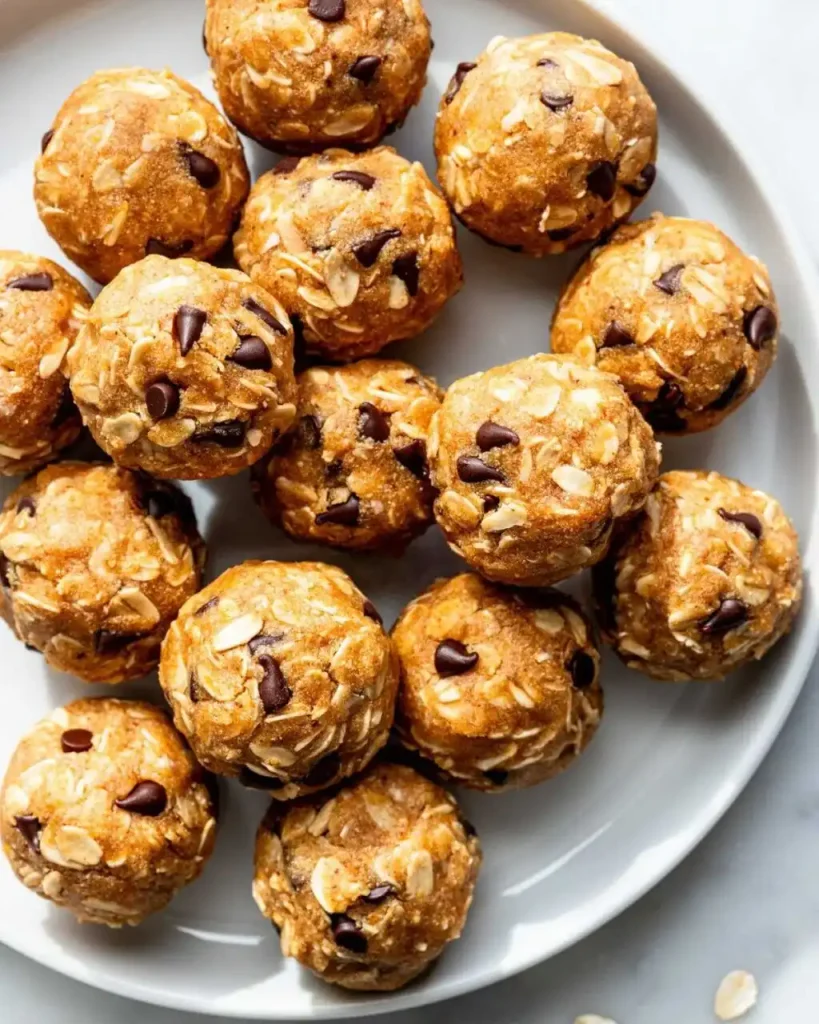
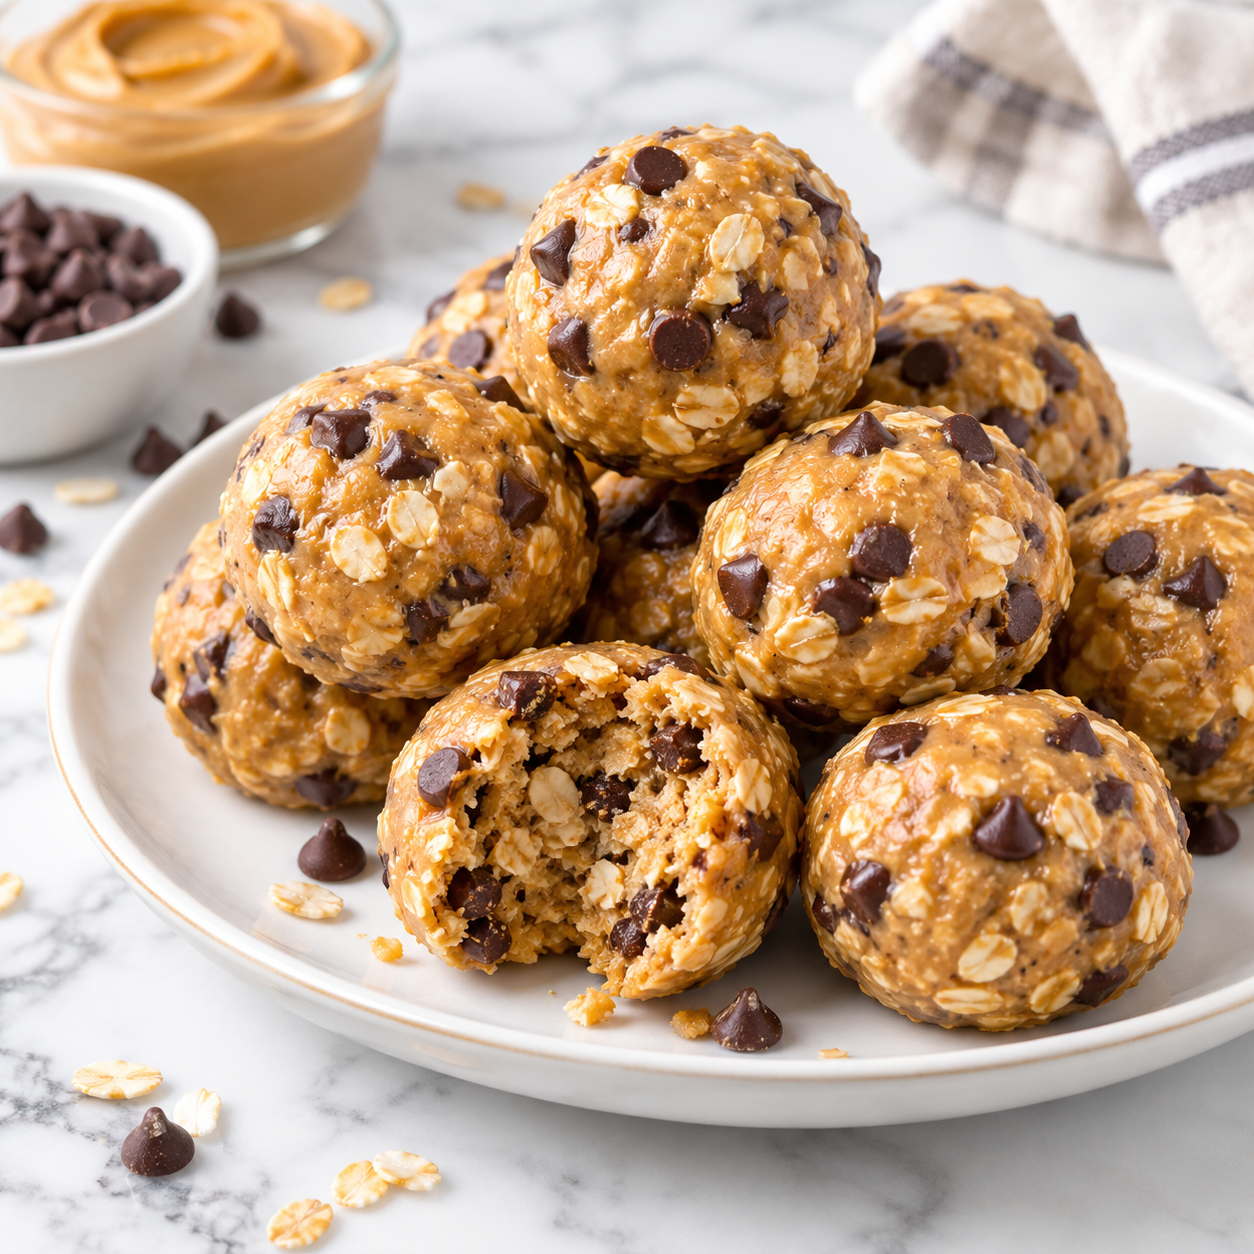
These protein balls come together in one bowl with six pantry ingredients and about 15 minutes of hands on time. There is no oven and no food processor involved. The texture lands somewhere between cookie dough and an oat bar, soft inside but firm enough to survive a lunch bag. Each ball carries about 6 grams of protein and tastes like a peanut butter cookie in a smaller, tidier form. After a short chill they hold their shape for a full week in the fridge, so one session covers your snacks from Monday to Friday.
Why You’ll Love These Protein Balls
- Six ingredients, one bowl. Everything gets stirred together in a single bowl, so cleanup is one spatula and a spoon.
- No oven, no heat. Your kitchen stays cool, which helps in summer or when the oven is already busy with dinner.
- Real protein in every bite. Peanut butter, oats, flaxseed, and protein powder add up to about 6 grams per ball.
- Easy portions. A 1.5 tablespoon scoop gives you 16 even balls, so you always know what one serving looks like.
- Lasts all week. Refrigerated balls stay soft and fresh for up to 7 days, enough to cover a full work week.
Ingredient Selection Tips
Pick a creamy peanut butter that drips slowly off a spoon. A jar with a layer of oil on top works fine once you stir it back in, but a stiff, dry jar gives crumbly balls that refuse to stick together. Reach for old fashioned rolled oats, not quick oats (they turn pasty) and not steel cut (they stay hard). Honey should be runny, and mini chocolate chips spread more evenly through the dough than full size ones.
Recipe Snapshot
| Servings | Difficulty | Course | Cuisine | Prep Time | Cook Time | Rest Time | Total Time | Calories |
| 16 balls | Easy | Snack | American | 15 minutes | 0 minutes | 30 minutes | 45 minutes | 125 per ball |
Ingredients for Protein Balls
- 1 cup (90 g) old fashioned rolled oats. They give the balls their chew and body, and they soak up just enough moisture to firm up in the fridge.
- 1/2 cup (130 g) creamy peanut butter. This is the main binder and the biggest source of protein and richness in the mix.
- 1/4 cup (85 g) honey. Its stickiness holds everything together, and it keeps the powder from drying the dough out.
- 1/2 cup (60 g) vanilla protein powder. It adds protein and a gentle sweetness, so you need no extra flavoring.
- 1/3 cup (60 g) mini chocolate chips. They add small pockets of melt and make the balls taste like a treat instead of a health snack.
- 2 tablespoons (14 g) ground flaxseed. It absorbs liquid, adds fiber, and helps the balls hold their round shape.
- Optional: 1 to 2 teaspoons of water, only if the dough looks dusty and will not press together.
Swaps that work: Maple syrup can stand in for honey and gives a slightly softer ball. Sunflower seed butter replaces peanut butter at the same amount. Chia seeds can replace flaxseed, though they add a little crunch.
Tip: Weigh the oats and protein powder if you own a kitchen scale. A scooped cup of powder can weigh noticeably more than a spooned and leveled one, and that difference is the most common reason a batch turns dry.
[AI IMAGE PROMPT: Top down flat lay of six ingredients in small white bowls: rolled oats, creamy peanut butter, golden honey, vanilla protein powder, mini chocolate chips, ground flaxseed, with a wooden spoon and honey dipper on white marble, bright soft daylight, pale cream tones, loose chocolate chips scattered around.]
[IMAGE PLACEHOLDER: alt-text: “Flat lay of oats, peanut butter, honey, protein powder, chocolate chips and flaxseed in white bowls” | filename: “protein-balls-ingredients-flat-lay.jpg” | orientation: horizontal]
Recipe Timing
You will spend about 15 minutes at the counter measuring, stirring, and rolling. The 30 minute chill afterward asks nothing of you, and it lets the oats and flaxseed drink up moisture so the balls turn firm and easy to handle. That brings the full timeline to 45 minutes. If you cannot wait, the dough is perfectly edible right after rolling, just softer.
Allergen and Dietary Disclosure
This recipe contains several common allergens. Here is where each one shows up and what you can do about it.
- Peanuts: The peanut butter is the base. Sunflower seed butter works at the same amount.
- Dairy: Whey protein powder contains milk. A plant based vanilla powder works instead, and you may need 1 to 2 extra teaspoons of water because pea and rice powders absorb more liquid. Many chocolate chips also contain milk, so look for a dairy free brand.
- Soy: Chocolate chips and some protein powders list soy lecithin. Check the labels.
- Gluten: Oats are often processed near wheat. Choose oats labeled certified gluten free if that matters in your home.
Honey should never be given to babies under 12 months. If anyone eating these has a severe allergy, read every label yourself and confirm with their doctor, since ingredient formulas change.
Equipment Needed
- Medium mixing bowl and a sturdy silicone spatula. The dough gets stiff, and a thin spoon bends under the pressure.
- 1.5 tablespoon cookie scoop. It gives you 16 balls of the same size, each around 27 g, so they chill and store evenly.
- Kitchen scale. Weighing the dry ingredients keeps every batch consistent.
- Flat tray covered with a sheet of baking paper. The balls rest here in the fridge without sticking.
- Airtight container. Pick one tall enough to stack two layers with paper between them.
- Small bowl of water. Damp fingertips stop the dough from clinging while you roll.
Preparation
Nothing here needs heat, so there is no oven to turn on. Set out all six ingredients and measure each one before you start, ideally by weight. Cover the tray with a sheet of baking paper and put the bowl of water next to it. If your peanut butter lives in the fridge, leave it on the counter for 30 minutes so it stirs smoothly.
Step by Step Instructions for Protein Balls
Step 1: Mix the dry base
Tip the oats, protein powder, and flaxseed into the mixing bowl and stir with the spatula for about 20 seconds. The mix should look evenly beige, with no white pockets of powder left.
Chef’s Note: Stirring the dry ingredients first spreads the protein powder through the oats. Skip this and you get clumps that taste chalky.
Step 2: Add the peanut butter and honey
Spoon the peanut butter and honey over the dry mix. Press and fold with the spatula for about 1 minute, until no dry streaks remain and the dough pulls away from the sides of the bowl in one shaggy mass.
Step 3: Test the texture
Pinch a small piece of dough and squeeze it. It should hold together without crumbling or sticking to your fingers. If it crumbles, stir in 1 teaspoon of water and test again, and if it feels sticky, add 1 tablespoon of oats.
Chef’s Note: Protein powders vary a lot in how thirsty they are. This quick pinch test lets you correct the dough for your brand instead of trusting a fixed measurement.
[AI IMAGE PROMPT: A glass mixing bowl of thick, shaggy peanut butter oat dough with a ribbon of honey on top, silicone spatula resting on the rim, flecks of flaxseed visible, dark wood table, warm kitchen light from above left, 45 degree food photography angle.]
[IMAGE PLACEHOLDER: alt-text: “Bowl of peanut butter oat dough for protein balls with a spatula on the rim” | filename: “protein-balls-mixing-dough.jpg” | orientation: horizontal]
Step 4: Fold in the chocolate chips
Add the chocolate chips and fold the dough over them 10 to 12 times. Stop when the chips look evenly scattered through the dough, with none piled at the bottom.
Step 5: Scoop the portions
Pack the 1.5 tablespoon scoop with dough, level it against the bowl’s rim, and release it onto the tray. Repeat until you have 16 mounds of about 27 g each, spaced a finger width apart.
Step 6: Roll into balls
Dip your fingertips in the water, shake off the excess, and roll each mound between your palms for about 5 seconds. Each ball should end up smooth and round, with no cracks on the surface.
Chef’s Note: Damp hands create a thin barrier between your skin and the honey, which is what stops the dough from sticking to you.
[AI IMAGE PROMPT: Hands rolling a chocolate chip dough mound into a smooth ball above a tray of finished rounds, chips studding the surface, tan oat color, on white baking paper, light oak table, soft side light, 45 degree angle, small bowl of water nearby.]
[IMAGE PLACEHOLDER: alt-text: “Hands rolling protein ball dough into rounds above a tray of finished balls” | filename: “protein-balls-rolling-by-hand.jpg” | orientation: horizontal]
Step 7: Chill until firm
Slide the tray into the fridge for 30 minutes. The balls are ready when they feel firm and spring back slightly under a gentle press.
Chef’s Note: Cold time gives the flaxseed and oats a chance to absorb the honey and peanut butter, which is what turns soft dough into a ball that holds together in your hand.
Expert Tips and Tricks
- A mistake worth avoiding: Skipping the pinch test in Step 3. A dough that looks fine in the bowl can crumble the moment you roll it, and fixing it after the balls are shaped means starting over.
- Measure smart: Measure the peanut butter first, then use the same cup for the honey. The leftover film of peanut butter lets the honey slide out instead of clinging.
- Texture control: For a softer, fudgier ball, add 1 extra teaspoon of honey. For a firmer one that travels well, add 1 tablespoon of oats.
- Make ahead: Mix the dough up to 3 days in advance and keep it covered in the fridge. Scoop and roll it straight from the bowl when you want fresh balls.
- Storage: Slip a small square of baking paper between layers in the container. It stops the balls from fusing into one block.
- Time saver: Scoop all 16 mounds before you roll any of them. Doing the same motion in one batch is faster than switching back and forth.
Common Mistakes and Troubleshooting
| Problem | Why It Happens | How to Fix or Prevent It |
| Dough crumbles apart | The protein powder soaked up more moisture than expected, or the peanut butter was dry | Stir in 1 teaspoon of water at a time and press the dough again until it holds |
| Dough sticks to your hands | The peanut butter was very soft or the honey measure was heavy | Add 1 tablespoon of oats and chill the bowl for 10 minutes |
| Balls go flat on the tray | The dough was too warm when scooped | Chill the dough for 10 minutes, then scoop and roll again |
| Chalky aftertaste | Too much powder, or powder that was never stirred through the oats | Weigh the powder and always mix the dry ingredients first |
| Balls feel rock hard | They sat too long in a very cold fridge or lacked moisture | Let them rest at room temperature for 10 minutes before eating |
| Chocolate smears on your palms | Warm hands melted the chips while rolling | Rinse your hands in cold water first and roll quickly |
Storage, Freezing, and Make Ahead
Refrigerator
Keep the balls in an airtight container for up to 7 days. Stack in layers with baking paper between them so they stay separate.
Freezer
Spread the balls on a tray and freeze for 1 hour, then move them to a freezer bag for up to 3 months. Thaw in the fridge for about 1 hour or on the counter for 15 minutes.
Tip: Freezing the balls on a tray before bagging them keeps them as individual rounds. Toss them straight into a bag and you will pull out a single frozen lump.
Serving Temperature
These need no reheating. They taste best when they sit at room temperature for about 10 minutes, which softens the peanut butter just enough.
Make Ahead
The unrolled dough keeps for 3 days in a covered bowl in the fridge. Stick a strip of masking tape on any container with the date you made them, so you never wonder how old they are.
[AI IMAGE PROMPT: Glass container with two layers of protein balls separated by baking paper, a second freezer bag of frozen balls beside it, handwritten date label on masking tape, white marble counter, soft natural daylight, 45 degree angle, golden tan balls with chocolate chip specks.]
[IMAGE PLACEHOLDER: alt-text: “Glass container of layered protein balls next to a freezer bag with a dated label” | filename: “protein-balls-storage-container.jpg” | orientation: horizontal]
Variations and Substitutions
- Vegan: Use maple syrup, a plant based protein powder, and dairy free chocolate chips. Add 1 to 2 teaspoons of water if the dough feels dry.
- Gluten free: Swap in certified gluten free oats and check the protein powder label.
- Nut free: Use sunflower seed butter in place of peanut butter at the same amount.
- Coconut crunch: Roll the finished balls in 1/4 cup of unsweetened shredded coconut before chilling.
- Chocolate lover: Replace 2 tablespoons of the protein powder with unsweetened cocoa powder and add 1 teaspoon of water.
- Warm spice: Stir in 1 teaspoon of cinnamon for a gentle, cookie like flavor that kids tend to enjoy. [INTERNAL LINK: more no bake snack ideas]
Serving Suggestions
- Fruit pairing: Serve two balls with banana or apple slices for a snack that mixes protein and fresh fruit.
- Cold drink: A glass of cold milk or oat milk turns two balls into a small, filling snack.
- Yogurt dip: Keep a small bowl of plain Greek yogurt nearby for dunking.
- Breakfast bowl: Crumble one ball over a bowl of oatmeal for a chocolate and peanut butter finish. [INTERNAL LINK: easy overnight oats recipe]
- Lunch box add on: Pack two balls with cheese cubes and grapes for an after school snack box.
- Gift idea: Stack six in a small paper box tied with twine for a homemade gift. [INTERNAL LINK: healthy snack box ideas]
Nutrition Information
Serving size: 1 ball (about 27 g). Servings per recipe: 16.
| Nutrient | Amount |
| Calories | 125 |
| Protein | 6 g |
| Carbohydrates | 13 g |
| Fiber | 2 g |
| Sugar | 7 g |
| Fat | 6 g |
| Saturated Fat | 2 g |
| Cholesterol | 2 mg |
| Sodium | 40 mg |
The oats and peanut butter also supply some magnesium and manganese. These numbers are estimates, and your totals will shift with the brands you buy and how you measure, so treat them as a guide.
Why This Protein Balls Recipe Works
The dough holds together because of basic food science. Rolled oats and ground flaxseed are both dry and thirsty. During the 30 minute chill they pull moisture from the honey and peanut butter, swell slightly, and firm up. That is why a soft, sticky mix becomes a ball you can pick up.
Peanut butter and honey do different jobs. The fat in the peanut butter keeps the texture rich and a little soft, while the sugar in honey acts like glue and holds moisture in the dough. With too little of either, the balls dry out, which is why accurate measuring matters.
Protein powder needs the most care. Whey and plant based powders both absorb liquid, and plant powders take in more. Stirring it through the dry ingredients first spreads it evenly, so no single bite turns dry or chalky.
Frequently Asked Questions
FAQ source note: these questions follow the typical patterns people search for around protein balls. They were written from common question types, not from a live search.
How long do protein balls last in the fridge?
Protein balls stay fresh for up to 7 days in an airtight container in the fridge. Put baking paper between layers so they do not stick together. For longer storage, freeze them on a tray for 1 hour, then move them to a freezer bag, where they keep for up to 3 months. Let frozen ones thaw on the counter for about 15 minutes before eating.
Why are my protein balls crumbly?
Crumbly protein balls usually mean the dough is too dry. Protein powder soaks up a lot of moisture, and some peanut butter jars are drier than others. Stir in water 1 teaspoon at a time, pressing the dough between your fingers after each addition, until it holds together. Measuring the powder by weight prevents this problem and keeps every batch consistent.
Can I use something other than peanut butter?
Yes. Almond butter, cashew butter, and sunflower seed butter all work at the same 1/2 cup amount. Sunflower seed butter is the right pick for nut free homes. Choose a creamy, runny style, since stiff, dry nut butters make the dough crumble. The flavor shifts a little, but the texture stays the same. Taste the dough before rolling, and add a teaspoon more honey if the new butter tastes plain.
How do I know when they are ready to eat?
Protein balls are ready after 30 minutes in the fridge, when they feel firm and spring back slightly when pressed. If your finger leaves a deep dent, give them another 10 to 15 minutes. The dough is safe to eat before chilling, so there is no harm in sneaking one early. It will just taste softer and stick more to your hands.
What is the most common mistake when making protein balls?
Adding too much protein powder. Extra powder dries the dough and leaves a chalky aftertaste, so the balls taste worse even if they carry more protein. Stick to 1/2 cup (60 g) and weigh it when you can. The second most common slip is skipping the dry mix in Step 1, which leaves pockets of powder inside the finished balls.
Can people with allergies eat these protein balls?
Not as written. They contain peanuts, and often milk and soy depending on your protein powder and chocolate chips. Sunflower seed butter and plant based powder offer workarounds. Honey makes them unsuitable for babies under 12 months, though older children can enjoy them as a snack. With severe allergies, read every label and ask a doctor first. Formulas change between brands, so check each time you buy.
[AI IMAGE PROMPT: Vertical shot of a white ceramic plate holding five chocolate chip protein balls, one bitten to show chewy oat interior, glossy chocolate chip speckles, small bowl of honey beside it, folded linen napkin, dark wood surface, warm side light for texture, 45 degree food photography angle.]
[IMAGE PLACEHOLDER: alt-text: “Plate of five chocolate chip protein balls with one bitten and a bowl of honey” | filename: “protein-balls-final-plated-shot.jpg” | orientation: vertical, 2:3 ratio, 1000x1500px for Pinterest]
Final Thoughts
The best protein balls are the ones you actually reach for, and that comes down to texture. Soft inside, a little chew from the oats, and chocolate in every second bite. Nobody needs a fancy ingredient list to make a snack that tastes this good. Get the dough to hold together at the pinch test and the rest takes care of itself.
Make a batch on Sunday, keep half in the fridge and half in the freezer, and you have snacks sorted for two weeks. Swap the peanut butter, change the mix ins, and make the recipe your own once you know how the dough should feel in your hands.
If you loved this recipe, save it to your healthy snack Pinterest board so you can find it easily later!
Chocolate Chip Protein Balls
Ingredients
Method
- Instructions
- Stir the oats, protein powder, and flaxseed together in a mixing bowl until the color looks even.
- Add the peanut butter and honey. Press and fold for about 1 minute until everything forms one shaggy mass.
- Squeeze a pinch of dough. If it falls apart, mix in 1 teaspoon of water. If it clings to your fingers, mix in 1 tablespoon of oats.
- Mix in the chocolate chips until they are spread through the dough.
- Use a 1.5 tablespoon scoop to portion 16 mounds, about 27 g each, onto a tray covered with baking paper.
- Wet your fingertips and roll each mound into a smooth, crack free ball.
- Refrigerate the tray for 30 minutes, until the balls feel firm and spring back slightly.
Notes
- Store in an airtight container in the fridge for up to 7 days, with baking paper between layers.
- Freeze on a tray for 1 hour, then bag for up to 3 months.
- Weigh the oats and protein powder for the most consistent texture.
- Plant based powders absorb more liquid, so expect to add 1 to 2 teaspoons of water.